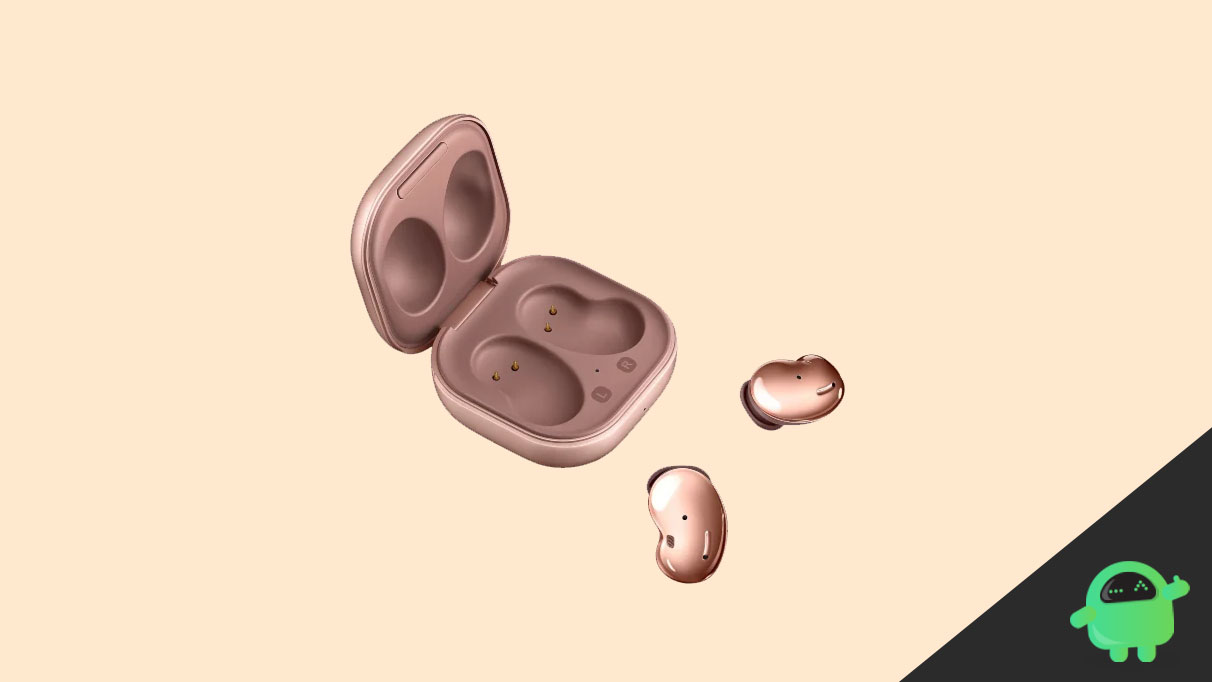
Got a new pair of Samsung Galaxy Buds Live but are disappointed by not seeing its name on the Bluetooth devices list on your Windows PC? Or, the earbuds are not showing up after installing an update on your Windows 10 or Windows 11 PC? If you are facing a similar issue with your Galaxy Buds Live earbuds, don’t panic. You are not alone here. Many users are also having a similar issue with the Galaxy Buds Live where they can’t see its name on their Windows 10 or 11 PC.
The Galaxy Buds Live are fine-tuned earbuds from the South Korea-based brand. The earbuds have an eye-catching design and offer a premium sound experience. Along with premium sound comes premium features such as ANC and smart assistant. All this sounds super amazing, but frustrating at the same if you can’t use the earbuds on your Windows PC.
Also Read
A user on the Samsung community wrote “I have been using my Galaxy Buds live with my PC but since Windows 10 installed the latest update the earbuds have now disappeared from the list of Bluetooth devices and windows can no longer discover my Galaxy Buds live. This has happened on both my laptop and my desktop pc after windows installed the latest updates“.
Further, he added that the earbuds are working fine with mobile phones, but the problem arises when using them on a Windows PC. Thankfully, there are solutions to fix the Samsung Galaxy Buds Live not showing up issue on your Windows 10 or 11 computer.
Page Contents
Here’s What to Do When Samsung Galaxy Buds Live Is Not Showing Up on Windows 10/11
Fix 1: Restart Your PC
If there’s a temporary bug or a background process that is behind the problem, a quick reboot of your PC might fix it. A reboot refreshes system processes and connected devices. It often fixes minor issues. Before restarting your PC, make sure to close all the running applications. Also, disconnect other connected devices.
To restart your computer, press the Windows button on your keyboard or click the Windows icon in the taskbar, click the power button icon, and select Restart. Wait until the PC reboots completely. Now, try connecting your Galaxy Buds Live.
Also Read
Fix 2: Pair the Galaxy Buds Live Again
This solution has worked for many people. Hopefully, it will work for you too.
Follow these steps:
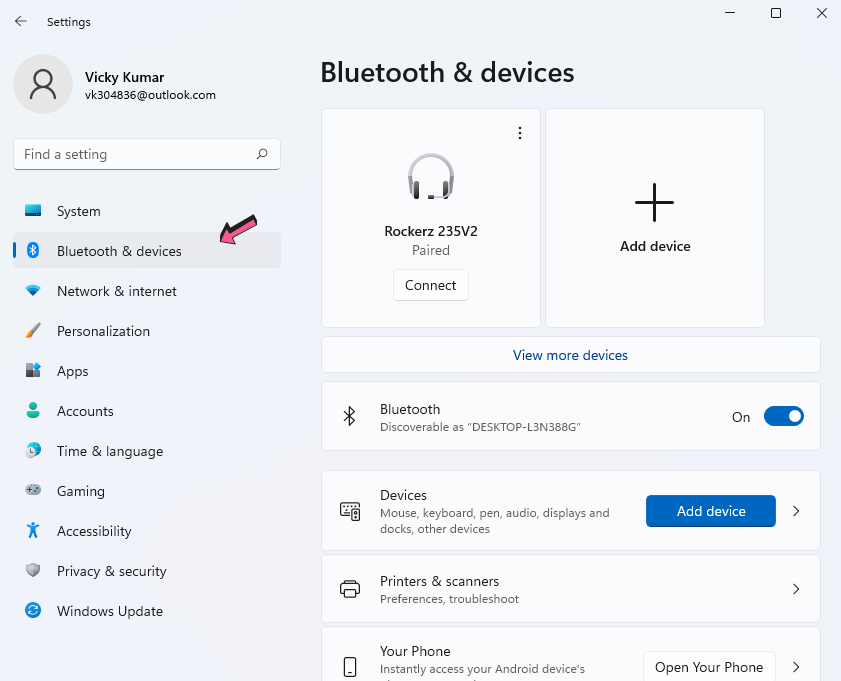
1. Open the Settings app on your PC and select Bluetooth & devices.
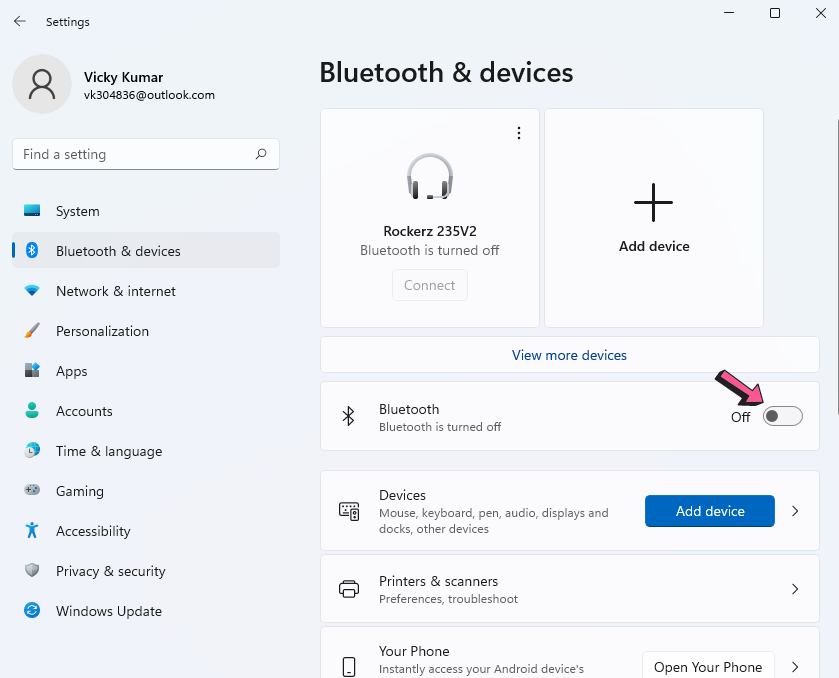
2. Turn on the Bluetooth.
3. Click on the Plus (+) icon to add a new Bluetooth device.
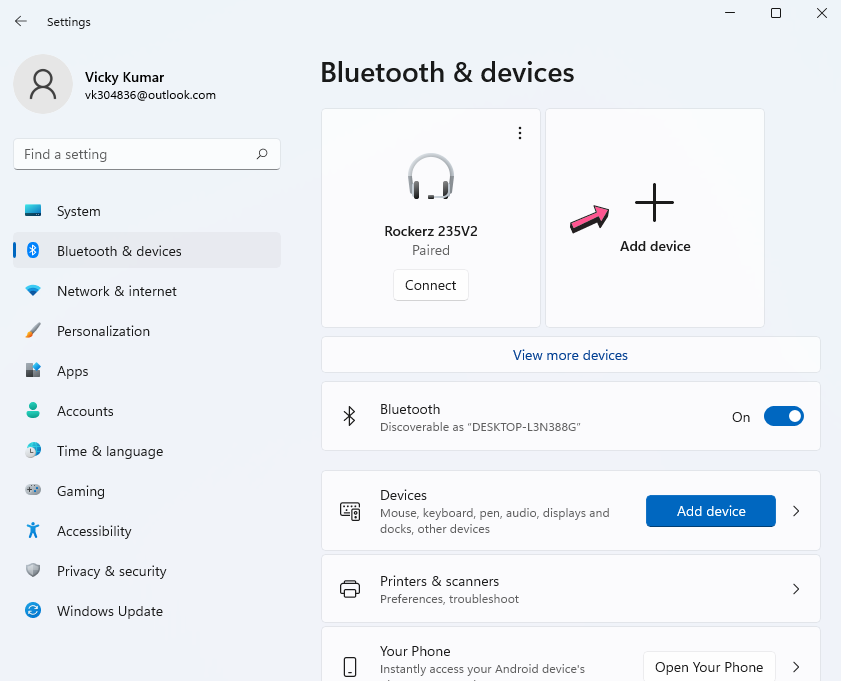
4. Select Bluetooth.
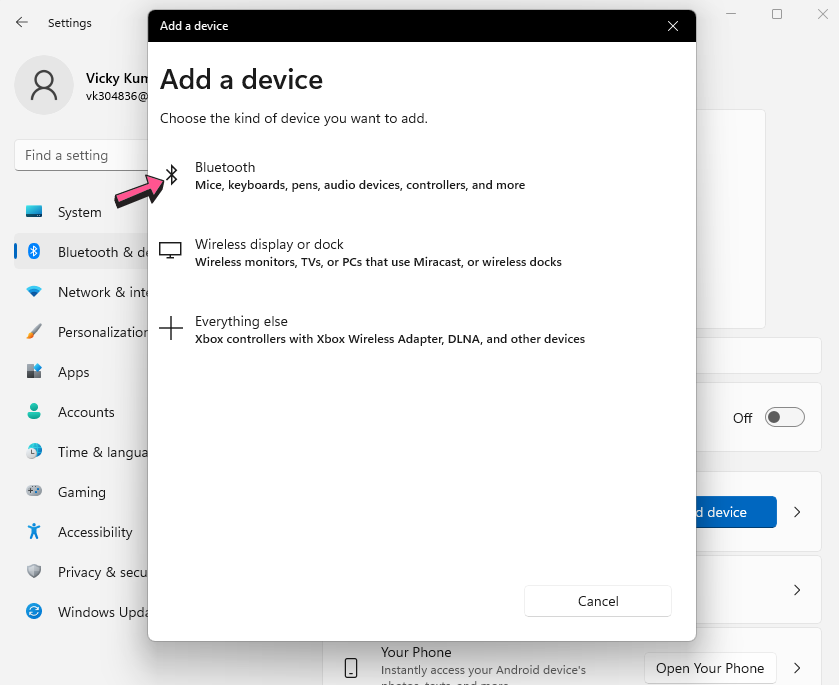
5. Place the earbuds inside the charging case.
6. Close the lid and wait for 5 seconds.
7. Open the lid and connect the earbuds to your PC.
If the earbuds are paired to another device, try these steps:
- Open the lid and take out both earbuds.
- Hold the touchpad on both earbuds for a few seconds until they enter pairing mode.
- On your PC, turn on Bluetooth and connect to the Galaxy Buds Live.
Fix 3: Update Your PC
Microsoft keeps on sending software updates to its Windows 10 and Windows 11 computers that include fixed to previously known issues, new features, and other improvements. If the issue with connecting your Galaxy Buds Live with the PC is caused by a Windows bug, a fix for this should be on the way. Hence, you should install the available updates on your Windows PC.
Here’s how you can install new updates on your PC:
- Open the Settings app on your Windows 10/11 PC.
- Select Windows Update.
- Download all available updates and install them.
- Reboot your PC.
After installing updates, check if the Galaxy earbuds are visible on the Bluetooth devices list, and connect them with your PC.
Fix 4: Set the Playback Device
The sound will not come through the earbuds if you have not set your Samsung Galaxy Buds Live as the playback device. To set your Galaxy earbuds are the playback device, go to the Settings app, Select Sound, and select your Galaxy earbuds for the audio output.
Alternatively, you can tap on the volume icon at the bottom-right side, click on the forward icon (>), and select Galaxy Buds Live as the output device. Make sure that the volume is not set to zero or muted.
Fix 5: Update or Re-install Bluetooth Driver
If your Windows 10 or Windows 11 PC is running an older version of the installed Bluetooth driver, you might face more problems in the future. It is always recommended to keep all drivers up-to-date.
Here’s how to update the Bluetooth driver on your PC:
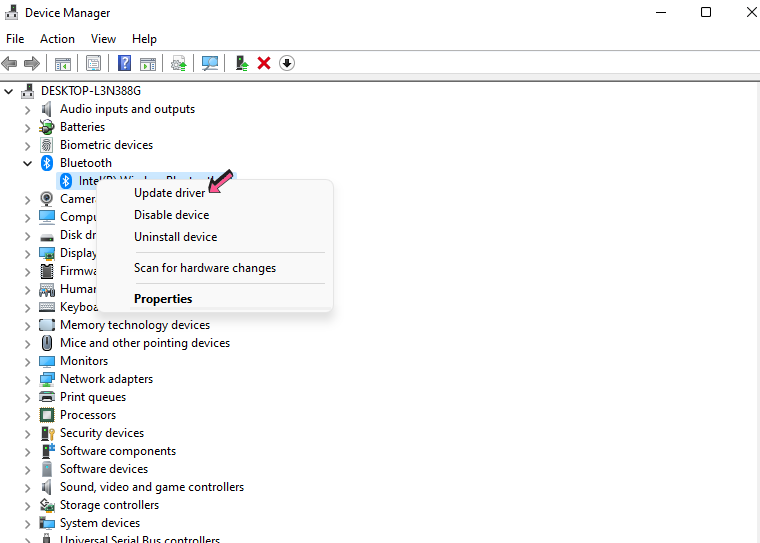
1. Click on the Search icon, type Device Manager, and hit the enter button.
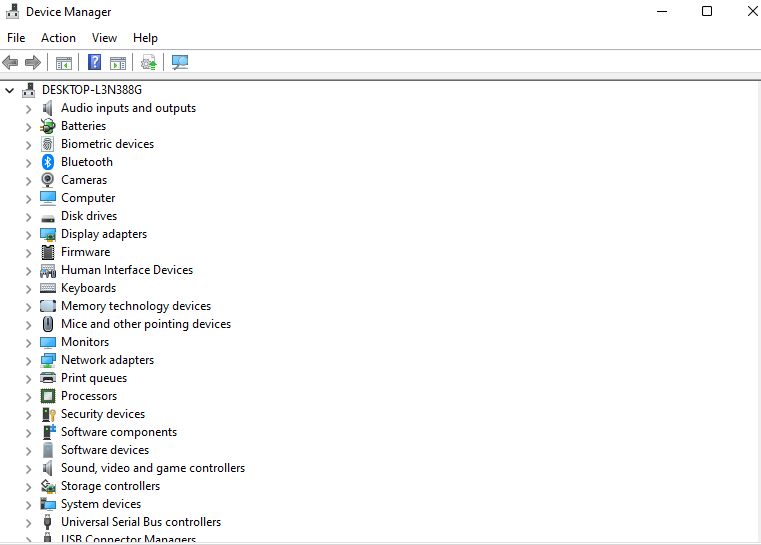
2. Expand Bluetooth options.
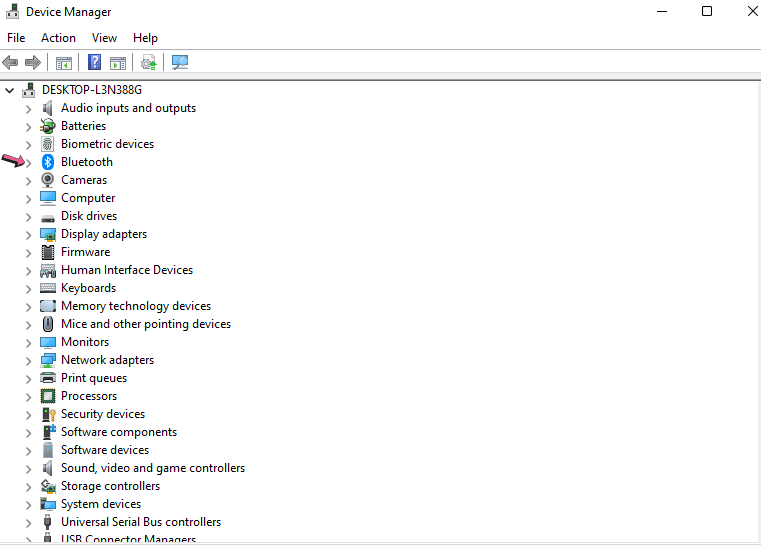
3. Right-click on the Bluetooth driver.
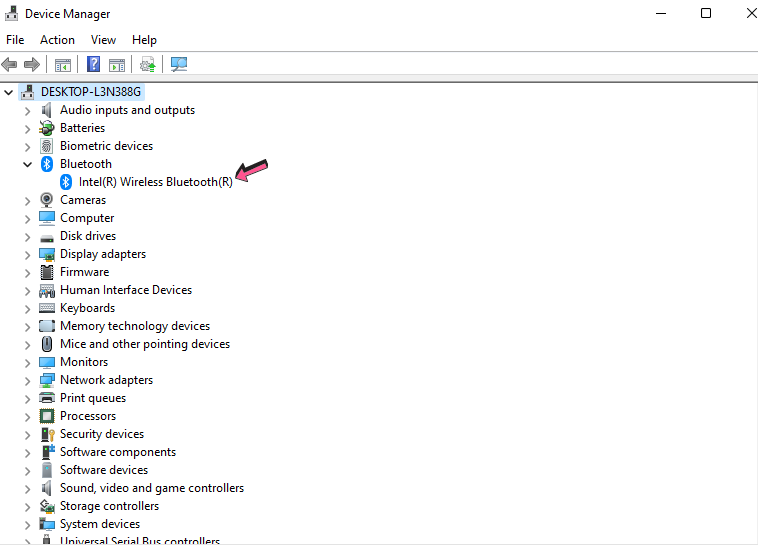
4. Select Update driver.
5. Tap on Search automatically for drivers.
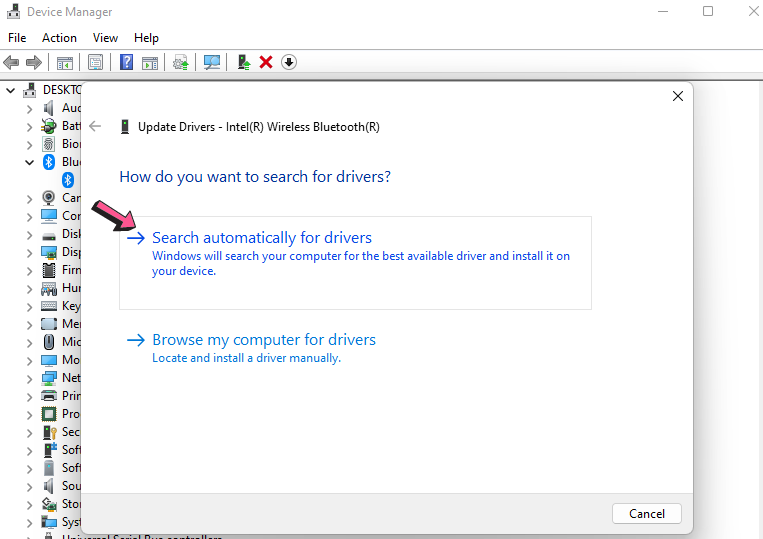
Windows will automatically look for a new version of the installed Bluetooth drivers. If found, your PC will install the latest Bluetooth driver. After the new driver is installed, check if the problem is fixed. If your answer is yes, enjoy a premium sound experience with your Galaxy earbuds. Otherwise, continue reading for the next actionable step.
If there’s a problem with the Bluetooth driver, uninstalling it might help. Don’t worry, Windows will automatically reinstall the driver.
To uninstall a driver, follow these steps:
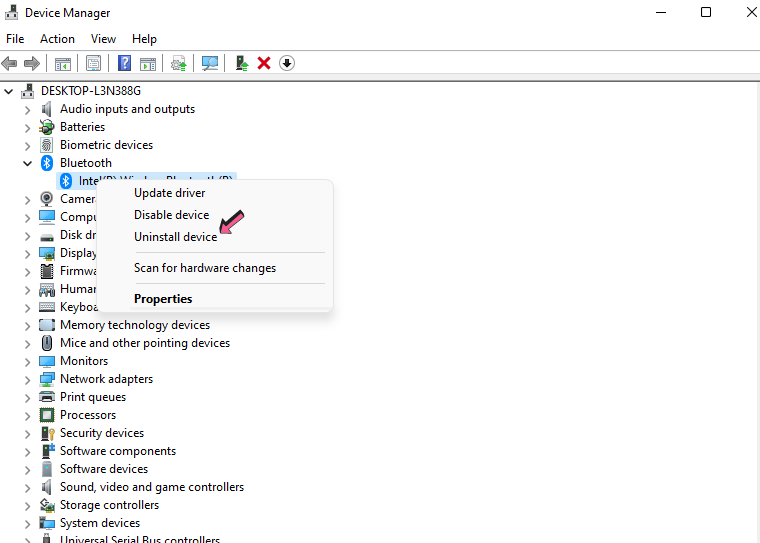
1. Open Device Manager.

2. Expand Bluetooth options.

3. Right-click on the Bluetooth driver.

4. Select Uninstall device.
5. Click Uninstall to confirm the uninstallation.
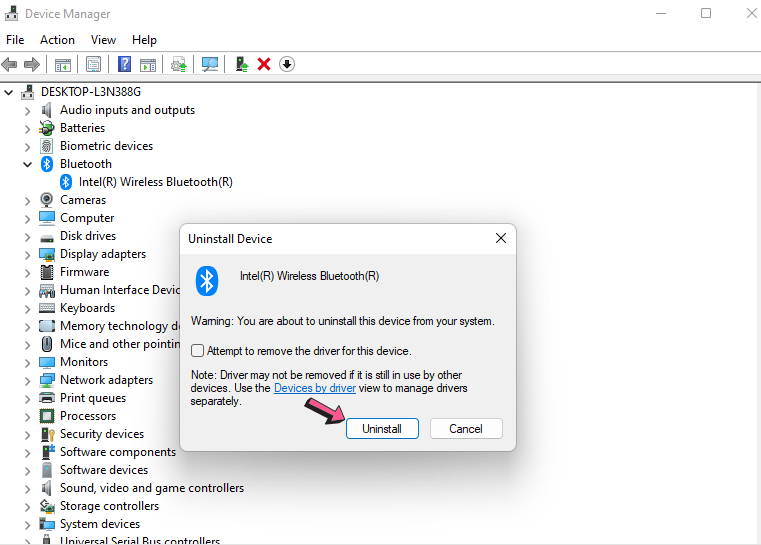
6. Reboot your PC.
Fix 6: Run Windows Troubleshooter
Windows has an inbuilt troubleshooter which is good enough to fix basic problems. It automatically checks for any issues or conflicts and resolves that.
Here’s how you can use Windows Troubleshooter to fix the Bluetooth-related issues:
1. Open the Settings app.
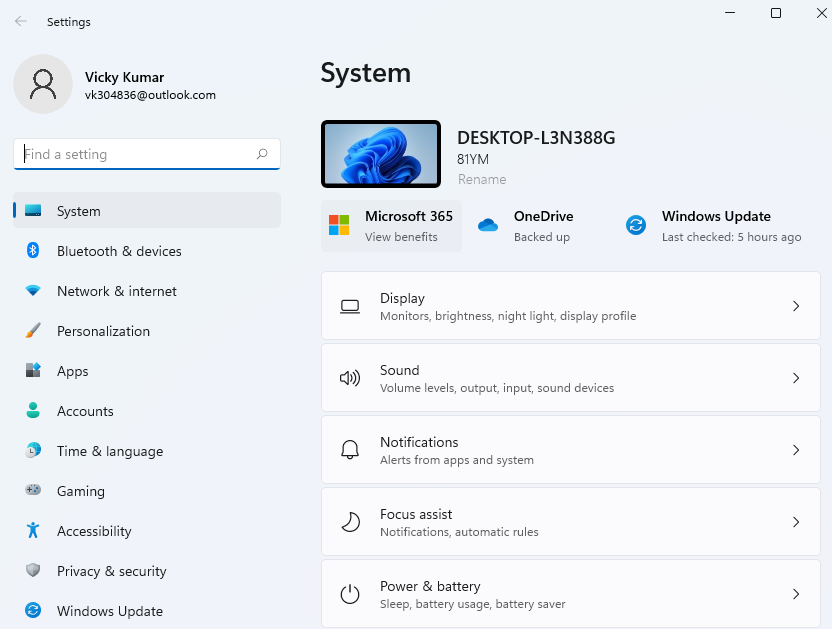
2. Scroll down and select Troubleshoot.
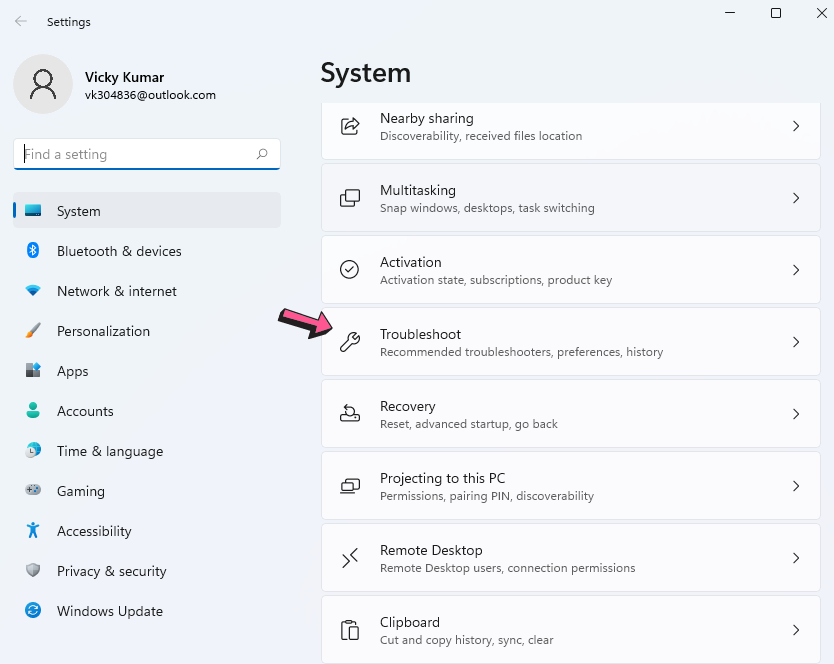
3. Click Other troubleshooters.
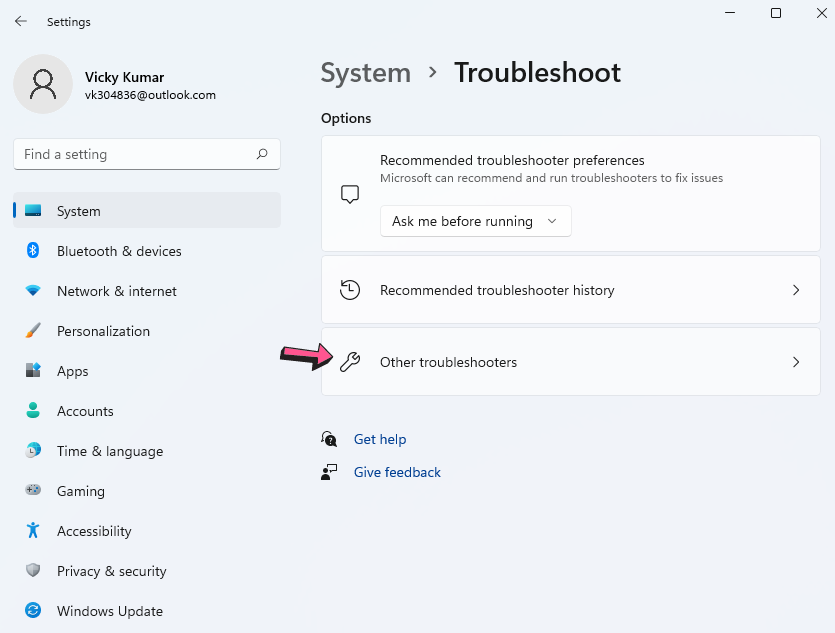
4. Tap on Run next to the Bluetooth option.
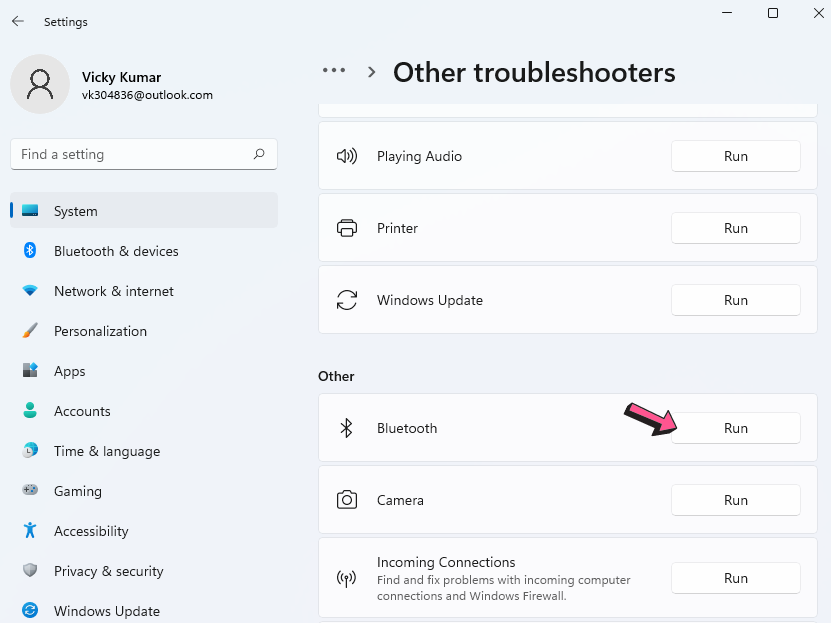
Windows will look for issues. If it finds any, it will automatically apply the best fix.
In this blog post, I’ve mentioned the actionable steps you should take when the Bluetooth device does not show up on your Windows 10 or Windows 11 PC. I hope, this guide helped you in fixing the problems. Share your thoughts or suggestions (if any) in the comments below.
