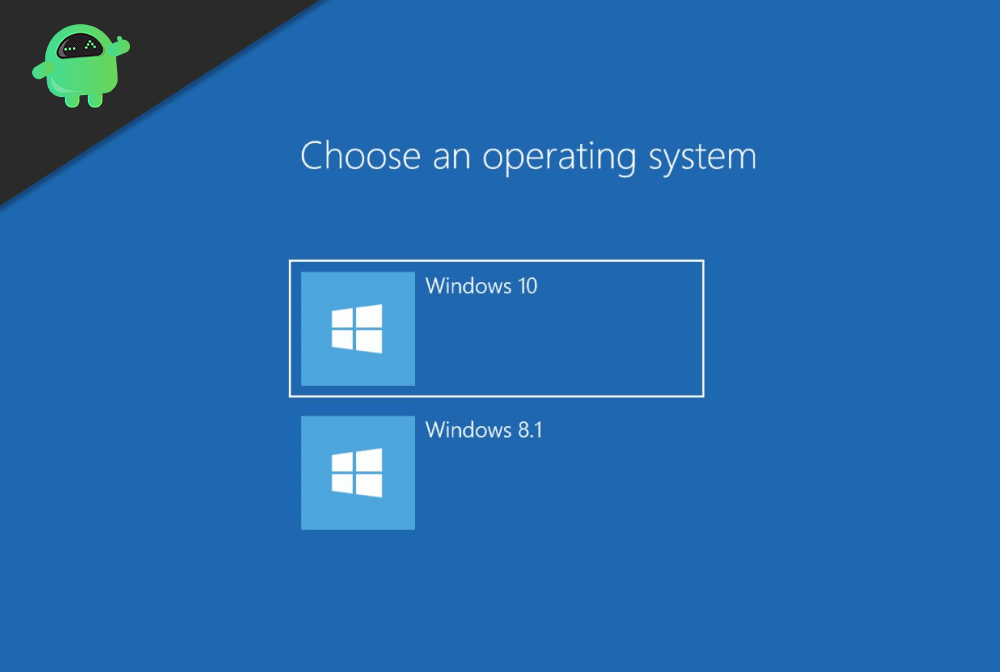
When you install fresh Windows 10 on your computer and end up with choose an operating system screen, it becomes a headache. It is There are various reasons behind this error. If you have a dual boot system before this error might occur, another reason might be that you have made a mistake during installation. You may have two operating systems installed on your computer. Maybe you didn’t format The drive, which had previous Windows in it. One more reason could be that you have installed Windows in another drive, and old drive still has Windows in it. Whatever the reason could be, We are going to talk about the solution here. There is various way to stop this from popping up every time you boot up your Computer.
Well, Old Windows used to create a simple .txt file to create these boot options, but as the Windows got upgrades, it changed. Now Windows require Modification of bootmgr.dll file to make it work. As long as there are other Windows installed, the screen will be popping up every time. If you have no data to back up and you want fresh Windows, then you can reinstall after formatting whole hard-disk or SSD whichever you are using. If you don’t want to go for all those installation processes again, there are ways to disable it. You can unlist extra OS, and thus, it won’t create choose Windows screen.
Also Read
Page Contents
How to Remove Choose an Operating System Screen in Windows 10
Solution 1: Remove extra OS from being listed.
You can remove an extra operating system if you no longer have need of it, or it is there by mistake. Here is the way to do it. We are going to do it in Windows 10, and if you have any other versions, some methods might work. Others might not.
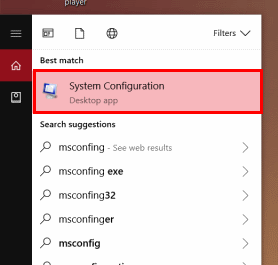
Firstly you need to search ‘ MSCONFIG ‘ in the search panel, or you can use Cortana. This will show the option of system configuration. Click on it and open it.
Now secondly, you need to go to the Boot tab in system configuration. In the boot tab, you will be able to see all or any Windows that are present in any drive of your PC. There you will see an Operating system with Current OS; Default OS tag. Now thirdly and most importantly, you need to select all Windows and delete them one by one except os with current os tag. After deleting all extra OS, click on apply.
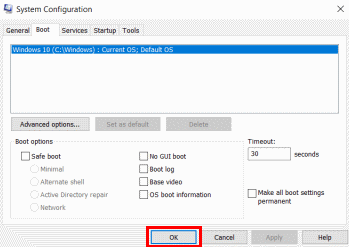
This will disable choose the Operating system screen as you have removed all extra Operating systems from your drives.
Solution 2: Choosing a default operating system
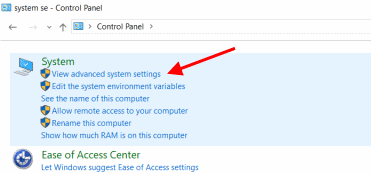
Firstly you need to go to the control panel. To open the control panel, just search it or use Cortana. Now open the Control panel. Look for system options in the control panel or just search it from the search bar. Select View advanced setting from the results you get.
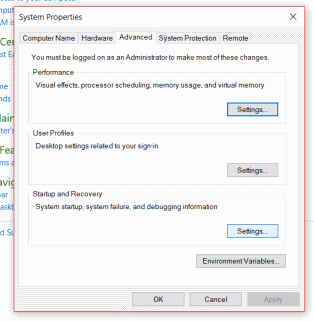
A popup named system property will appear. Now click on Advanced if it is not open by default. Secondly, you need to click on the Settings option, which will be located on the right side of Startup and Recovery.
You will see a drop-down menu on the side of the Default operating system. Now thirdly, you have to choose the Operating system you want as default. In our case, we are selecting Windows 10. There will be a checkbox labeled as Time to display the list of operating systems. You need to uncheck it if it is not unchecked by click on Ok, and you are good to go.
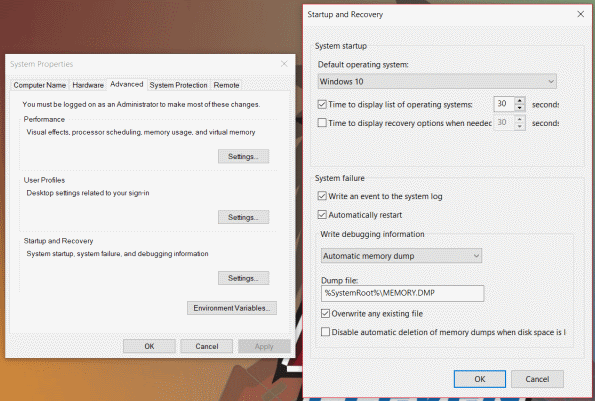
Restart your pc to check it. If you have followed the process, it will remove choose Operating system screen.
Solution 3: By Third Party BCDedit Software
This is a bit complicated process, and if you are not familiar with using command prompt, try other methods first.
You need any BCDedit software installed on your pc for this process. You can find it on Google.
Firstly you need to open CMD, aka Command prompt. Do it by searching it on the search bar or use Cortana.
Once you have opened command prompt, you need to type BCDEdit in it and press enter. It will provide a list of all the operating systems listed in bootmgr.dll. After this step, you have to Write down the alphanumeric string, which is on the right of the identifier.
Only write down those alphanumeric string which you want to delete. Now secondly, you need to type BCDedit /delete [IDENTIFIER] command in CMD. Replace the alphanumeric string, which you have noted with IDENTIFIER. Press enter, and you are good to go. You can remove all unnecessary OS listed on DLL, repeat the process and just chance the alphanumeric string. Reboot and check once you finish the process.
Note: Once you delete a boot option, it is nearly impossible to get it back. So if you need a dual boot in the future, you need to install it from the beginning. It is advisable that you should try other options first and use the last method only if other method fails.
Conclusion
This troubleshooting process is for Windows 10, but this will work with other Windows as well. I hope these methods will solve your issue, and you’ll get rid of How to Remove Choose an Operating System Screen. For more such helpful articles, follow our PC tips and tricks section to find out more.
