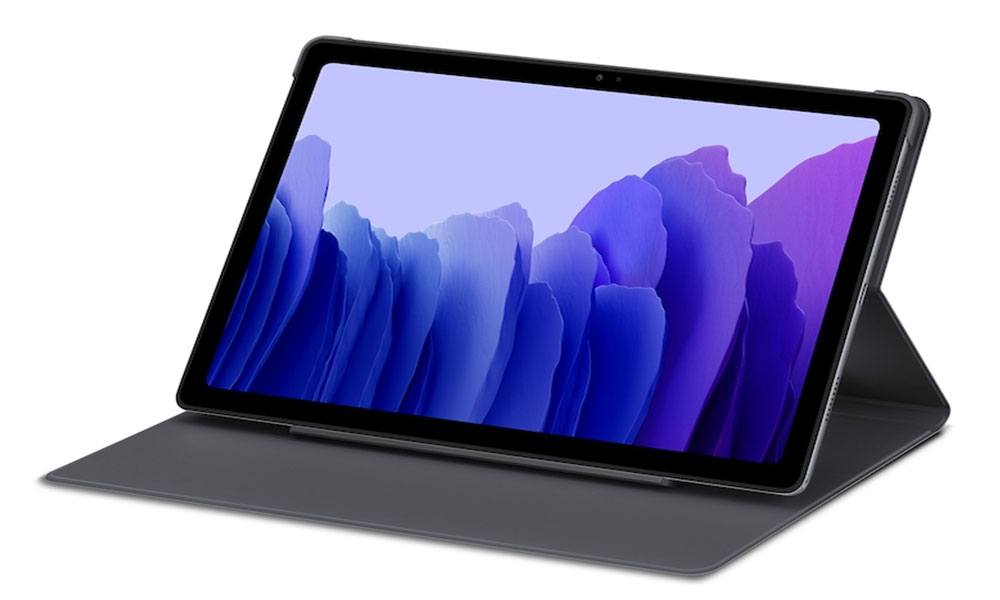
It seems that you’ve either recently purchased the Samsung Galaxy Tab A7 (SM-T500/T505) and are now interested to Unlock the Bootloader and Root using Magisk on Galaxy Tab A7. It may also be possible that you’ve waited for a while and now you want to submerge into it. Whether you’re using the Tab A7 10.4 (2020) model with a Wi-Fi variant or a 4G LTE variant, this in-depth guide will help you to go through the whole process.
It’s one of the popular tablet devices in the mobile market from Samsung when most of the OEMs are avoiding manufacturing more and more tablet devices these days. Whereas the Galaxy Tab A7 also comes with a powerful hardware specification and that’s why most Android lovers or enthusiasts are eager enough to unlock the device bootloader and root their tablet device too.
Also Read
Page Contents
- What is Bootloader?
- Benefits of Bootloader Unlock
- How to Unlock Bootloader and Root Magisk on Galaxy Tab A7 (SM-T500/T505)
- Pre-Requisites:
- Step 1: Enable Developer options
- Step 2: Enable USB Debugging and OEM Unlocking
- Step 3: Unlock Bootloader
- Step 4: Verify the Unlocked Bootloader
- Step 5: Extract the AP ROM and Move it to the Galaxy Tab A7
- Step 6: Patch the AP ROM via Magisk
- Step 7: Boot into Download Mode (EDL Mode)
- Step 8: Launch ODIN and Flash Patched AP Firmware to Root
- Step 9: Perform a Factory Reset via Stock Recovery
What is Bootloader?
A Bootloader is software that helps the device hardware to boot into the operating system or the recovery mode according to the command by a user. It’s a vendor-specific image file or program that loads up the kernel to the device and allows the hardware to run the system or recover.

It also verifies the secure boot state of the device that indicates the health of the device and allows only signed images to run which are authorized by the manufacturer. Every Android smartphone/tablet manufacturer offers a locked bootloader state to their devices by default to prevent security or privacy exploits whatsoever. Luckily, interested users can easily unlock the bootloader to start customizing their devices from the root level.
Benefits of Bootloader Unlock
- The Android device becomes eligible to fully customize.
- Flash a third-party firmware, also known as Aftermarket ROM.
- Easily install Xposed Modules or Magisk Modules.
- Gain system-level root access.
- Easily run rooted applications once rooted.
- Uninstall system apps or bloatware once rooted.
How to Unlock Bootloader and Root Magisk on Galaxy Tab A7 (SM-T500/T505)
Here we’ve provided you an easy way to unlock the bootloader on the Samsung Galaxy Tab A7 tablet as well as steps to root using Magisk. Before heading over to the methods, make sure to follow all the requirements mentioned below and the download links too.
Pre-Requisites:
You’ll need to follow all the necessary requirements that we’ve mentioned below. So, let’s get into it.
1. Charge Your Device
Make sure to charge your device before doing anything in order to avoid occasional shutdowns during the bootloader unlocking or rooting process. You should charge at least 50% or above.
2. Take Backup of your device
It’s always recommended to take a full backup of your device data before performing any of the methods because unlocking the bootloader will completely wipe out all the internal storage data.
3. Download ADB and Fastboot Binaries
ADB and Fastboot drivers or tools are really useful to run system-level commands on your connected device using the computer in a matter of seconds. Whether you want to run fastboot or adb commands on the device, or sideload OTA files, or remove programs, etc. You can grab ADB and Fastboot binaries here.
4. Download Samsung USB Drivers
USB Drivers are necessary enough to build a strong connection between the device and the computer via a USB cable for data transferring or flashing items. It ensures a smooth operation without any interruption. You can get Samsung USB Drivers here.
5. A PC, A USB Cable, and Wi-Fi Access
You’ll also require a Windows computer, a USB cable to connect the Galaxy Tab A7 10.4-inches (2020) tablet, and working Wi-Fi access on the PC as well as on the tablet.
6. Download ODIN Flash Tool and Magisk
Odin is used to flashing stock firmware files (.tar / .tar.md5) on Android OS running Samsung Galaxy devices and runs on any Windows PCs. Whereas the Magisk app is required to patch the stock boot image file for enabling root access.
7. Download Stock ROM File
Now, you should download the actual stock firmware file for your specific Samsung Galaxy model and region from reliable sources (such as SamFirm) on your computer. To do that, you can check out any of the links below:
8. Check for Software Updates
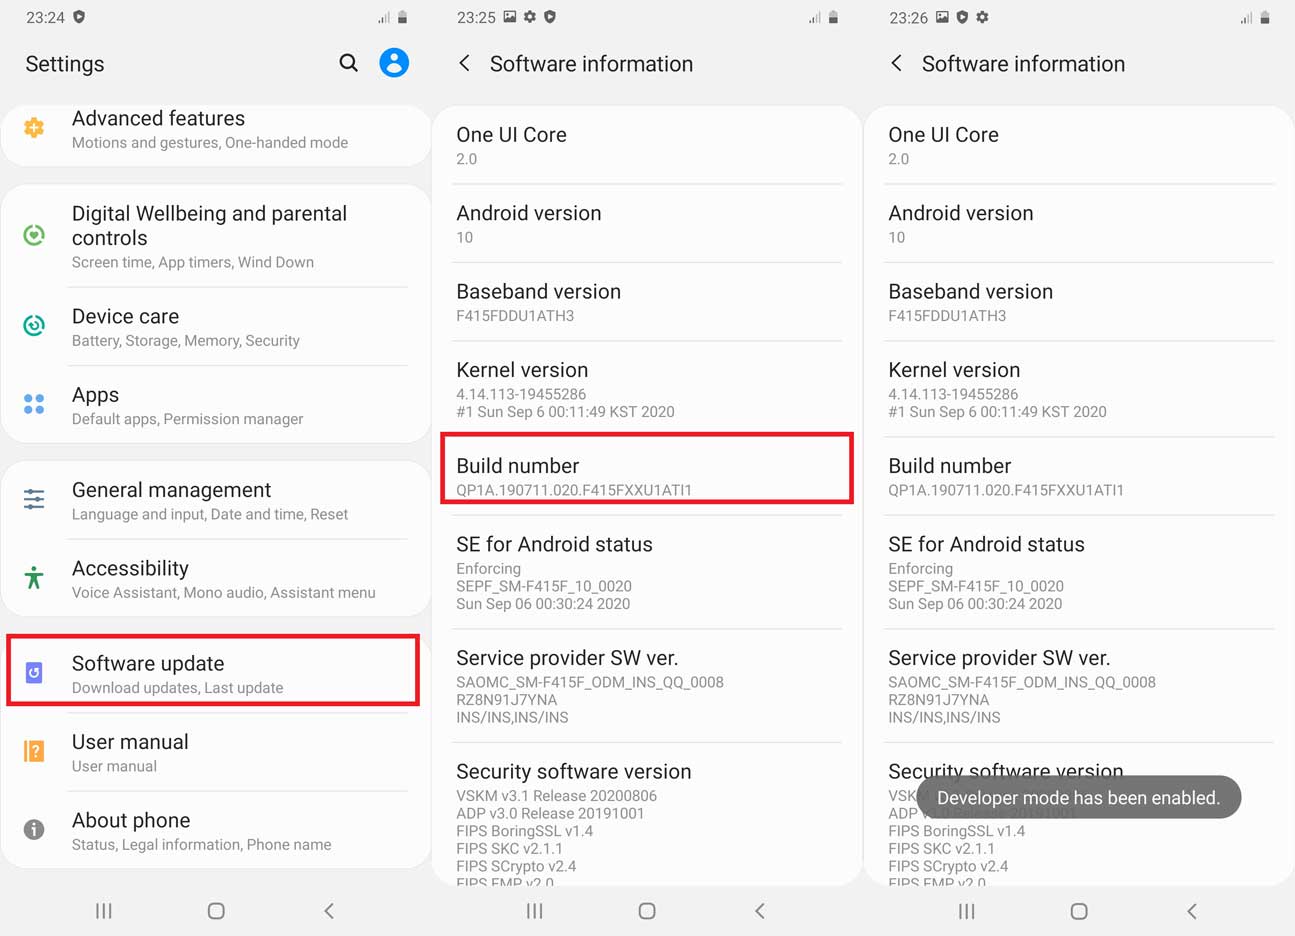
Make sure to check for software updates on your Galaxy A7 tablet. If there is an update available, try downloading and installing the update first. To do so: head over to the Settings menu > Software Update > Download and Install.
9. Verify the correct Build Number
It’s also necessary to check and verify the actual build number of the running software version on your Galaxy Tab A7 device. To do that, go to Settings > About tablet > Software information > Build number. Once done, you can now jump into the actual method below.
Warning: Make sure to create a backup of your device data (internal storage) for safety reasons because unlocking the bootloader will completely delete the internal data from the device. GetDroidTips won’t be held responsible for any kind of damage or error that may occur on your tablet while/after following this guide. You should know what you’re doing and do it at your own risk.
Step 1: Enable Developer options
- Go to Settings > About tablet > Software Information.

- Tap on the Build Number 7-8 times until you see a message “Developer option enabled.”
Step 2: Enable USB Debugging and OEM Unlocking

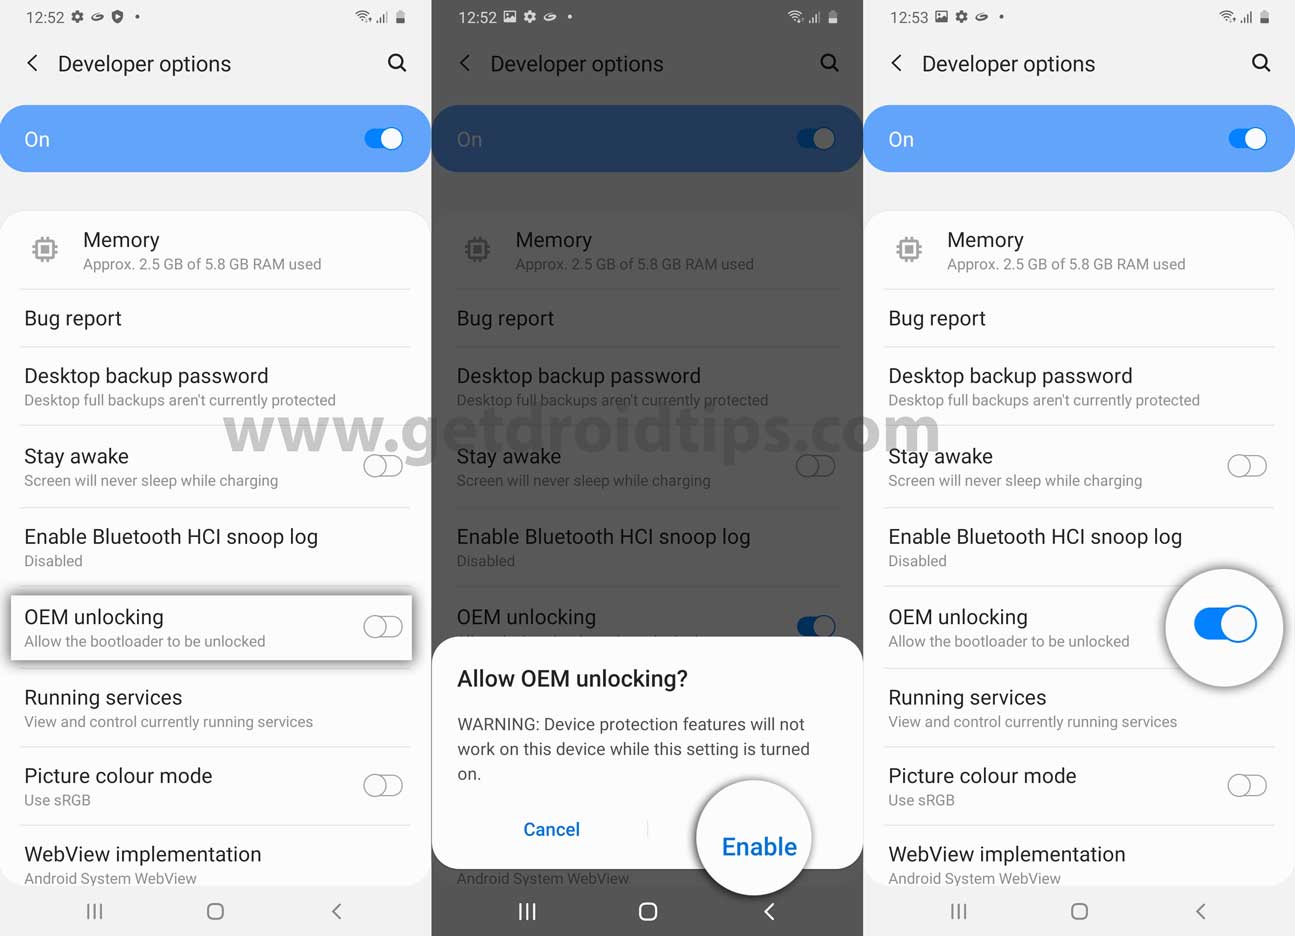
- Now, go to Settings > Developer Options > Enable USB Debugging and OEM unlocking. [If prompted, tap on Enable]
Step 3: Unlock Bootloader
- So, just power off your Galaxy Tab A7 (2020) device.
- Now, make sure to press and hold the Volume Up + Down keys simultaneously & connect it to the computer using a USB cable until you see the bootloader screen. [It’s important]
- Then press and hold the Volume Up key to enter into the ‘Device unlock mode’. If prompted, press the Volume Up key to select the action.
- Finally, your bootloader should be unlocked on your Samsung Galaxy Tab A7 10.4″ (SM-T500/T505) properly.
- Your tablet device will automatically boot into the system again. But keep in mind that it has already wiped out all the internal storage data completely.
Note: However, you’ll always see a warning message on the splash screen every time you restart or power on your device just because the bootloader is unlocked. So, don’t panic, and avoid it. The first boot time after unlocking the bootloader may take a couple of minutes. So, have some patience until it boots up.
Step 4: Verify the Unlocked Bootloader
Once your device boots up into the system, make sure to go through the initial setup process. Then head over to the Developer options menu again. If not found, then activate it again by using the above methods.
Go to the Developer options menu and there you can find out the OEM Unlocking option whether it’s greyed out or not. If it’s greyed out that means you’ve successfully unlocked the bootloader on your Galaxy Tab A7.
Step 5: Extract the AP ROM and Move it to the Galaxy Tab A7
Make sure that you’ve already downloaded the stock firmware package for your Galaxy Tab A7 in a .zip extension and unzipped it as well. Now, head over to the extracted firmware folder location on the computer and you’ll see the mentioned file formats inside the folder such as AP, BL, CP (SM-T505), CSC, and HOME_CSC.
Now, you’ll only require the AP extension-based firmware file for patching. However, do not delete the rest of the files as you will need those later.
- So, simply connect your Galaxy Tab A7 to the computer via a USB cable.
- Enable the ‘File Transfer’ mode for USB connection from the Developer options or directly from the notification panel.
- Next, make sure to copy and paste the extracted AP firmware file to the internal storage of the Galaxy Tab A7.
Step 6: Patch the AP ROM via Magisk
- Once the AP firmware is transferred to the internal storage of the Galaxy Tab A7, you can now patch the AP ROM file using Magisk.
- To do this, transfer the downloaded Magisk APK file to the internal storage of the tablet device and install the APK file as usual via a File Manager app. That’s easy.
- Now, open the Magisk app on your tablet > Tap on the ‘Install’ button.
- Tap on ‘Select and Patch a File’ from the list.
- Navigate to the AP firmware file location where you’ve recently transferred it.
- Just select the AP firmware file > Tap on ‘LET’S GO!’ to start patching the file.
- It’ll automatically download the latest version of Magisk and patch the AP firmware without any issue. [This process may take a couple of minutes. So, have some patience.]
- Once the patching is done, the patched AP firmware (TAR) file will be stored into the ‘Download’ folder [Internal Storage] of your Galaxy Tab A7.
- Keep in mind that the filename should be like “magisk_patched_xxxxx.tar”. [Here xxxxx denotes the series of letters]
- Now, you’ll have to connect your Galaxy Tab A7 to the computer and copy the patched AP firmware file to the folder where you’ve extracted the stock firmware file previously (BL, CP, CSC, etc).
Step 7: Boot into Download Mode (EDL Mode)
Now, you have to boot your Samsung Galaxy Tab A7 device into the Download Mode by following the steps below. To do this:
- Power Off the tablet first > Next, make sure to connect it to your computer via a USB cable while long-pressing the Volume Up + Volume Down keys together until you see the Bootloader screen.
- Then press the Volume Up key to enter your device into the Download Mode easily.
Please Note:
- The CP firmware is only applicable for the Galaxy Tab A7 LTE variant and not for the Wi-Fi variant.
- Select the standard CSC file for flashing while rooting. [Do not use HOME_CSC]
- Do not attempt to flash the patched AP firmware individually and always flash it along with the rest of the firmware files like BL, CP, and CSC.
Step 8: Launch ODIN and Flash Patched AP Firmware to Root
- We assume that you’ve already downloaded the Odin Flash Tool on your computer. If not then do it right now using the download link above.
- Next, extract the file and double-click on the ODIN executable (exe) file, and follow the on-screen prompts to complete the installation process. If prompted, click on ‘OK’.
- As your Galaxy Tab A7 is already connected to the computer, the ODIN tool will automatically recognize it and display the COM port number on the top-left corner.
- Now, you’ll need to load the firmware files in the Odin tool as follows:
- Click on ‘BL’ > Select the BL firmware file (BL_xxxxxxxxxxx.tar.md5)
- Then click on ‘AP’ > Select the Magisk-patched AP firmware file (magisk_patched_xxxxx.tar)
- Then click on ‘CP’ > Select the CP firmware file (CP_xxxxxxxxxxx.tar.md5)
- Next, click on ‘CSC’ > Select the CSC firmware file (CSC_xxxxxxxxxxx.tar.md5)
- Once all firmware files are loaded into the ODIN tool, click on the ‘Options’ tab.
- Make sure to uncheck the ‘Auto Reboot’ option to prevent your tablet from automatically rebooting after completing the flashing process.
- Finally, click on the ‘Start’ button to begin the flashing process.
- It may take some time so please be patient. Once it’s completed, you should see a successful message that says ‘PASS!’ on Odin’s interface.
- Now, you can close Odin and disconnect your tablet from the computer.
Step 9: Perform a Factory Reset via Stock Recovery
Now, all you need is to simply perform a factory reset of your Galaxy Tab A7 device to make a fresh start. To do so:
- Press and hold the Volume Down + Power keys together for around 7-10 seconds until your tablet exit the Download Mode. Now, once the screen turns off, immediately release the Volume Down key and quickly long-press the Volume Up key but do not release the Power key yet.
- Your tablet should now boot into the stock recovery mode. Here you’ll need to use Volume keys to navigate through the options.
- Make sure to navigate to the ‘Wipe data/factory reset’ option or highlight it.
- Then press the Power key to confirm the action. If prompted again, select and confirm ‘Factory data reset’ to initiate the process.
- Wait for the factory reset to complete and then make sure to select ‘Reboot system now’ from the stock recovery menu again.
- This will boot your device into the system and it may take some time. So, have some patience.
- Once booted, go through the initial setup process > Now, open the app drawer and launch the Magisk app.
- It should ask you to fully install the Magisk app on your Galaxy Tab A7.
- So, tap on ‘OK’ and then select ‘Install’ and wait for it to complete the installation process.
- Once done, make sure to launch the fully installed Magisk app on your tablet.
- Then it may prompt you to complete the additional setup process > Just tap on ‘OK’ and wait for it.
- Finally, your device will reboot automatically into the system again with proper root access.
- Voila! You’re ready to rock now.
As your Galaxy Tab A7 is now fully rooted after unlocking the bootloader, you can now check for the SafetyNet integration on the Magisk app easily.
Just open the Magisk app > Make sure it’s running on the latest version > Tap on ‘Check SafetyNet’. It’ll show you the ‘Success’ message.
That’s it, guys. We assume this guide was useful to you. Feel free to ask in the comment below for additional queries.
Credit: XDA
