Android is continuously developing and we can see various developers trying to mod ad bring out custom ROMs every now and then. However, the Nintendo Switch is not something that we can relate to Android nor is a device that we often talk about. But, recently XDA Developers Senior Member, langer hans and Junior Member, bylaws put in their efforts and time to let the Nintendo Switch users install and boot into the Lineage OS 15 which is based on the Android 8.1 Oreo, straight from the SD Card. Moreover, this is very exciting news for the owners of Nintendo Switch device that were sold before July 2018. So, in this post, we will guide you on how to install Android Port OS on Nintendo Switch [Lineage OS 15: 8.1 Oreo].
Moreover, we all know that the Lineage OS is one of the best and popular custom ROMs available out there for Android. And, being able to install it on the Nintendo Switch opens a whole set of new options that you can do with the Nintendo Switch. Obviously, this is an unofficial Android port for the Nintendo Switch and in this post, we bring you the step by step guide on how to install the Lineage OS on your Nintendo.
So, without any further ado, let us get straight into the article itself;
Also Read
Fix: Minecraft lags on Nintendo Switch After An Update
Fix: STAR WARS The Force Unleashed Not Loading or Crashing on Nintendo Switch
Fix: Nintendo Switch Stuck on Logo Screen
When Will Roblox Come to Nintendo Switch | Release Date
Fix: Nintendo Switch/OLED Touch Screen Not Working
Fix: Nintendo Switch Games Keep Corrupting or Damaged
How To Download Faster On Nintendo Switch in 2022
How to Fix Nintendo eShop Not Available in Your Country/Region
Pokemon Scarlet and Violet Connection Issues, Is There A Fix?
Fix: Nintendo Switch Sound But No Picture
How To Track a Lost Nintendo Switch
5 Best Nintendo Switch Emulators for PC (100% Working)
How To Check If Your Nintendo Switch Is Moddable

Page Contents
How to Install Android Port OS on Nintendo Switch [Lineage OS 15: 8.1 Oreo]
Features
This Lineage OS Android Port brings to you, the whole Android experience for the Nintendo Switch. Note that this Android port will work on any Nintendo Switch device sold before July 2018. Below is the list of features that you will get with this port on the Nintendo Switch after porting it with this Android Port;
- You get Lineage OS 15.1 based on the Android 8.1 Oreo
- This Android Port is based on the Nvidia Shield TV trees which brings a smooth and powerful Android experience for the Nintendo Switch.
- TWRP is pre-installed with this Android port
- CPU and GPU performance profiles
- Works in handheld and docked mode
- Audio is supported
- You can connect Joycons via Bluetooth, also in handheld mode
Known Bugs
There are some bugs that you need to be aware of before installing them on the Nintendo Switch. Below is the list of known bugs in this Android Port;
- Deep sleep, so battery life is not great
- Autorotation is not working
- Screen off in the dock
- It does not show that the Nintendo Switch is charging or not, but the console still charges
- Some apps don’t handle Joycon inputs correctly
- The touchscreen sometimes detects touches even when your finger is just floating over the screen
- There is a system process ANR on boot. Just click “Wait” and it will not happen again until next boot
- You cannot take screenshots
- WiFi randomly stops working. To fix this, just reboot the console
- If TV looks odd and grainy when docking then re-dock it a few times
- You cannot use any TV keyboard with a gamepad
- SELinux is disabled
- You can’t access the FAT32 partition of the SD card on macOS. However, Windows and Linux work.
Version Information
| OS Version | Android 8.x Oreo |
| ROM Kernel | Linux 4.x |
| Status | Beta |
| Current Beta Version | 1.0 |
| Beta Release Date | 27/07/2019 |
| Created On | 24/07/2019 |
| Last Update | 27/07/2019 |
| Source Code | Gitlab/switchroot |
| Contributors | langer hans, bylaws |
Download Link for Lineage OS 15.1: 8.1 Oreo for Nintendo Switch
You can download the Lineage OS Android port for the Nintendo Switch from the below links;
Steps to Install the Lineage OS 15.1: 8.1 Oreo for Nintendo Switch
- Download the image file from the above download section. The size of the image file should match to the size of the SD Card of your Nintendo Switch. You can also use an image which is smaller in size than your SD Card.
- Now, you need to write the image on the SD card using balenaEtcher. Make sure you do not extract the image file as the balenaEtcher can handle the compressed image without any issues. (Note that this will overwrite any contents on the SD card)
- You do not need to worry about the progress bar or notification on the balenaEtcher as the process of flashing will continue and once it is done, the Etcher will notify you. Moreover, the process will take about an hour depending on the size of your SD card’s speed. Also, make sure that you do not format any of the partitions when Windows prompts you to after flashing.
- Then, you need to download the GApps for the Android 8.1 Oreo. Use the ARM64 version.
- Place the Gapps on the first partition of your new SD Card.
- If you wish to make your Nintendo Switch identify as Nvidia Shield TV and install the Nvidia app, you can go ahead and download the Shield-ifier image file and place it in your SD Card.
- Now, load hekate and boot to TWRP by holding VOLUME + when you select the Android config.
- Also, make sure to mount/system first in TWRP. Flash GApps zip, and optionally flash other zips.
- Also, after installing GApps wipe cache/dalvik as offered by TWRP.
- Once the above is done, reboot to hekate and boot into Android.
- Complete the inital setup. For the Nvidia app to work make sure to update it from Google Play Store.
You can follow the video below, that shows how to access and flash zips in TWRP
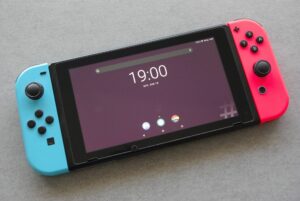
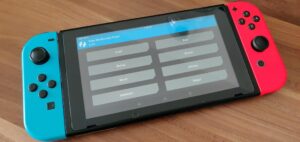
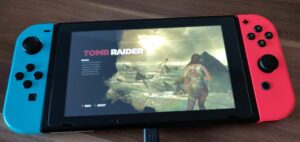
Images of Android Port Working on the Nintendo Switch
Conclusion
So, there you have it from my side in this post. Installing the Nintendo Switch can be difficult but if you follow all the instruction as mentioned above, you could do it correctly. Moreover, installing Android on the Nintendo Switch will not, in anyways, create issues with the OS installed in it. So, you do not need to worry about any issues creeping up after installing Android on your Nintendo Switch. Besides, after installing this Android port, you get all of your basic Android features, support for Google services, and even support for native Nvidia Shield applications. This further means that you can play Half-Life and Portal on the go, and even make use of GeForce. So, in other words, this Android Port enhances the features of the Nintendo Switch and with future updates, you can also expect some more add-ons to get to your Nintendo Switch.
Do let us know in the comments if you liked this post and whether you successfully installed this Android Port on your Nintendo Switch or not. Also, do let us know any issues you faced while following any of the above-mentioned steps. Until the next post…Cheers!


