If you open word files created using other word processors like Libre office or open office, you could see that there are some fonts not showing up correctly. Its because the font they used is not available in your Windows Machine. In such cases, you have to install those new fonts to Microsoft Word to view them without any issue.
Although, in some cases, you just want a cool font. So that you can make your article look better or make your font suite the theme of your content, whatever the situation is, you need the knowledge of adding font files to your PC.

Page Contents
How to Add and Install New Fonts to Microsoft Word
Here in this article, we are going to explain how to download and install new fonts so that you can add them to Microsoft Word.
Step 1: Getting font files
Font files come in packages such as True type font (.ttf) or Open type font (.otf). Firstly you have to get these files from a trusted source. Because these are the common methods of spreading malware. Some trusted sources to get fonts are:(Click to open site)
Once you download font files from these websites, you can proceed to install them. Most of the time, these fonts will be packed inside a zip file.

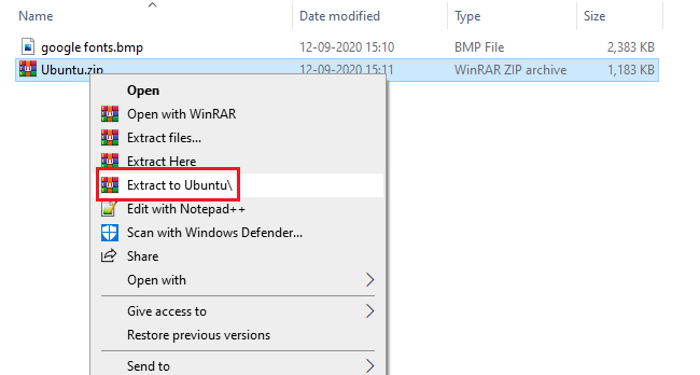
So you have to Unzip them first. You can use the built-in zip manager on windows, or you can use programs like WinRAR.
Step 2: Installing font
Once you’ve downloaded the fonts, installing them is easy. Follow these steps to install them into your PC or Mac.
For Windows
- Right-click on the font file and click on Install. (If you want to install the font for all users, you can select install for all users. Although you might need to give an admin password.)
- Wait for it to complete.
- That’s it. You’ve installed the font into your windows machine.

For Mac
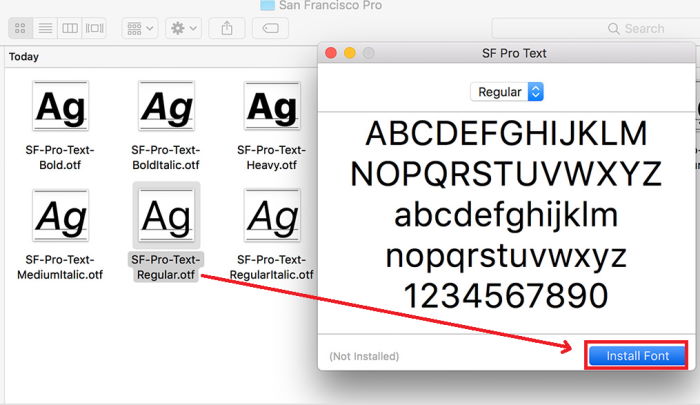
Actually, installing on a mac is pretty easy. Just follow these steps to do so:
- Double click on the font file.
- This should show you a preview of the fonts.
- Click on install and wait for it to install.

Step 3: Using the font
Once you installed the font, the font should show up in the font selector of your Word app. The font can be used everywhere in the system, including all your office apps and programs.
Open up word, select the font from the font selector. You can search for the font within the selector to find the font. Click on the font and start typing. You should see the font in action.
Note: If you’re not able to see installed fonts, then try to restart the program. If you face any issues, then you might need to restart your PC to complete the font change process.
Conclusion
As you can see, getting new fonts into your PC is not as hard as it sounds. You just have to get the font from a trusted source. After that; everything is pretty easy. Although if you are planning of sending it to other persons, they should also have the font installed on their system to view the document without any issue. But you can always export the document as pdf files to avoid this situation.
Just be careful when obtaining font files from unknown sources. They might contain harmful malware.
