Microsoft DirectX is responsible for handling tasks rated to games, video, rendering, programming, and media playback. So, in general, it is one important software/driver on your Windows 10 PC. However, if one or more components are missing, damaged, or corrupted, then you have to reinstall DirectX on your Windows 10 PC. If DirectX is not installed properly, it will throw error messages like – DSOUND.dll was not found, d3d12.dll corrupted, D3DCOMPILER_47.dll, etc. The best way to deal with such problems is to reinstall a new and latest version of DirectX from official sources.
If DirectX is not working properly, you will not be able to play games, enjoy watching movies. And it will also hinder your video editing or another graphic related workload. But DirectX is a core part of Windows now, and simply uninstalling and installing it again is not merely possible. So we have to go with a different approach and reinstall DirectX in a simple way.
Many Reddit users have reported about this issue where their current version of DirectX is not functional anymore, and they want to re-install the previous version or a fresh copy of DirectX.
Also Read
d3d12.dll corrupted. How do I reinstall DirectX12? from Windows10
So today, we will guide you through the process of re-installing DirectX on Windows 10 machine.
Page Contents
What is DirectX on Windows 10
Microsoft DirectX is a group of technologies (API’s) designed by Microsoft for Windows-based computers. These are a set of routines, protocols, and tools for building software and applications. DirectX is an ideal platform to render 3D animations and rich audios. It can run on a variety of Windows versions, and the hardware requirements are same as Windows itself.
The latest version DirectX11 gives a performance boost and security updates. It exploits the latest video and media hardware features as well as current generation machines which brings you the speed with API’s and make your experience more responsive and smooth. DirectX 11 comes pre-installed on Windows 10. And DirectX is a free tool, which means you can download it from Microsoft’s official website for free.
How to Reinstall DirectX on a Windows 10 PC
Old versions of DirectX versions can give you errors such as desetup.dll errors; these errors can be fixed by installing or reinstalling the latest updates of DirectX from Microsoft. However, it will also give you the performance in games and graphic programs. There are numerious ways to re-install DirectX on Windows system:
By DirectX Run Time Installer
These steps will guide you on how to install or reinstall DirectX on your system using the official DirectX runtime setup installer.
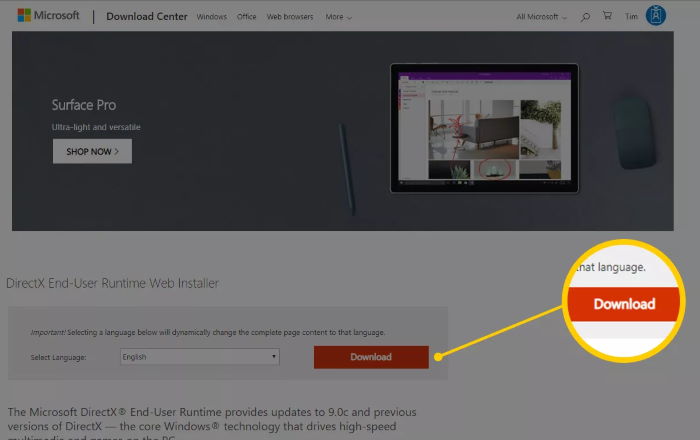
Visit Microsoft’s official site and go to the DirectX download page and click on the red Download button.
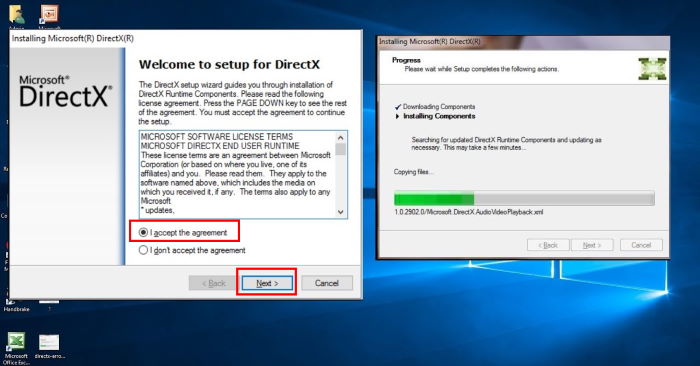
Open the downloaded file dxwebsetup.exe, accept the terms and conditions, and click on the Next button. If the version of DirectX is already installed on your system, than Reinstall option will appear. If you wanna reinstall, than select reinstall and click on the Next button. DirectX will be reinstall automatically.
Note: Sit patiently while the file downloads keep sure that your Pc is connected to the internet.
Restart your computer even you are not prompt to do so, and your DirectX will be installed or reinstalled on your system.
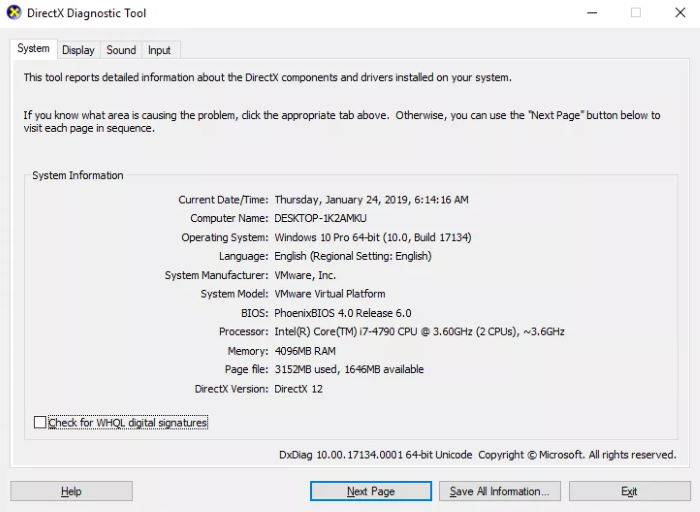
To check the version of DirectX, you can open the command prompt and type ‘dxdiag ‘ and press enter. A message may appear to rescan your hardware driver’s click yes and now go on the System tab. Look for DirectX Version.
By Roll back the version of DirectX using Registry
If the above method is not working for you, then you can try changing the registry files. In this method, we will change the version numbers of DirectX on your PC. So Windows will detect it as an old version and will automatically re-install DirectX using windows update to the latest version.
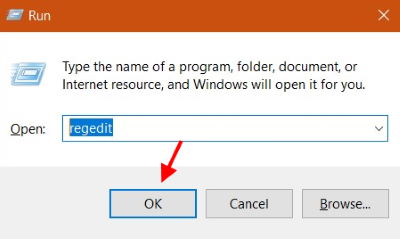
Press Windows + R and type “regedit” to open registry editor.
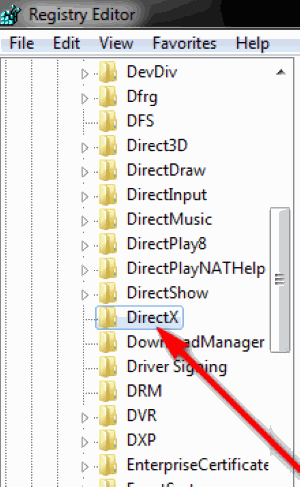
Now navigate to HKEY_LOCAL_MACHINE > SOFTWARE > Microsoft. In the left pane, choose the DirectX folder.
In the right pane, you will see a registry value “Version” Click on that.
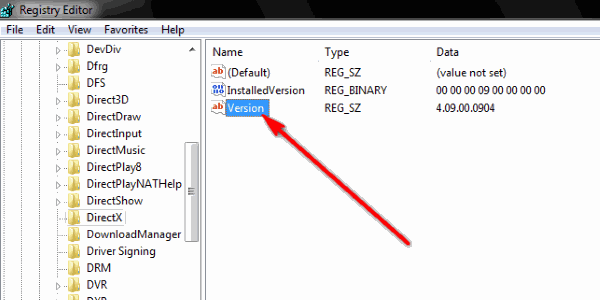
A new popup box will appear. Here you need to decrease the number. If the original value is 4.09.00.xxxx then change it to 4.08.00.xxxx version. And then reboot your PC. Windows update will automatically detect this and will re-install Direct X to the latest version.
Conclusion
DirectX is a very crucial software/driver for your windows 10 Pc. And you need to update it regularly. The above methods will help you to re-install DirectX on your Windows PC in an easy manner. In case you have problems following the tutorial, then you can comment down below. Our technical team will help you out.
