In this guide, we will show you how to control the per-app refresh rate on any OnePlus device. Refresh rate means how quickly the contents on your screen refresh each second. Nowadays, smartphones come with 60 or 90Hz refresh rates (such as the OnePlus Nord), while the flagships (like the OnePlus 8 and 8 Pro) might offer up to 120Hz refresh rates. A higher refresh rate will, in turn, give you a more fluid experience. But here is the thing. OnePlus devices dynamically switch the refresh rate as per the scenario.
For example, if you are watching movies or making a call, it may adapt to 60Hz. On the other hand, if you are playing a graphics-intensive game, it might turn to a higher refresh rate. Likewise, the device also allows you to choose from the supported refresh rates but that will get applied throughout. You don’t have any say in manually setting the refresh rate for individual apps. But with the help of the AutoHz app, you can now easily control the per-app refresh rate on any OnePlus device. Follow the below instructions to know more.
Also Read
OnePlus Display Showing Green Line After OTA Update, How to Fix?
2 Ways to Enable 5G on OnePlus Smartphones in 2023
Fix: OnePlus Smartphones Not Showing Warp Charging
How to Uninstall Facebook Services Installed As System Apps on OnePlus device

How to Control per-app Refresh Rate on OnePlus Phones
The AutoHz app allows you to choose the refresh rate for each app on your OnePlus device. Currently, this app supports all OnePlus devices that have a 60, 90, or 120Hz refresh rate, including the OnePlus Nord, OnePlus 7 Pro, OnePlus 7T, OnePlus 7T Pro, OnePlus 8, and OnePlus 8 Pro. However, AutoHz is a paid app and requires the execution of an ADB command for the initial setup. If you are willing to spend some money, here are the necessary steps to control the refresh rate of each app on your OnePlus device.

- Download and install the AutoHz app from Play Store ($1.49/ Rs 85) onto your OnePlus device.
- Then head over to the Settings menu, enable the Developer options followed by USB Debugging. You might refer to our detailed guide on: What is USB Debugging? How to Enable it on any Android device?
- Now connect your device to PC via USB cable.
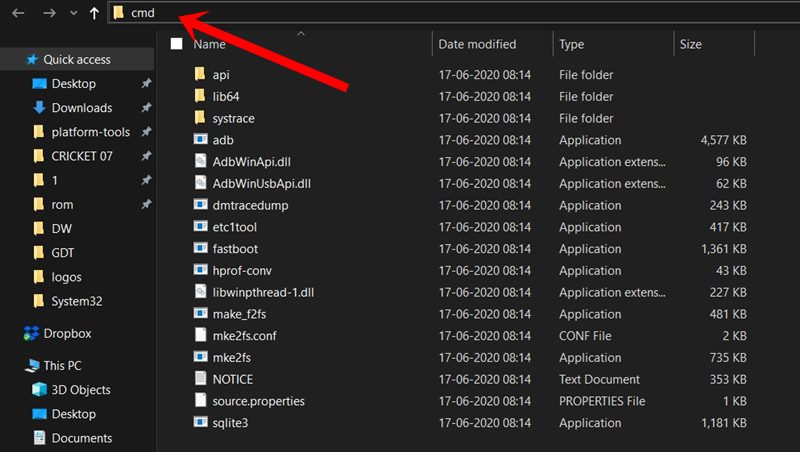
- Head over to the platform-tools folder, type in CMD in the address bar, and hit Enter. This will launch the Command Prompt window.

- Now execute the below command into the CMD window:
adb shell echo success

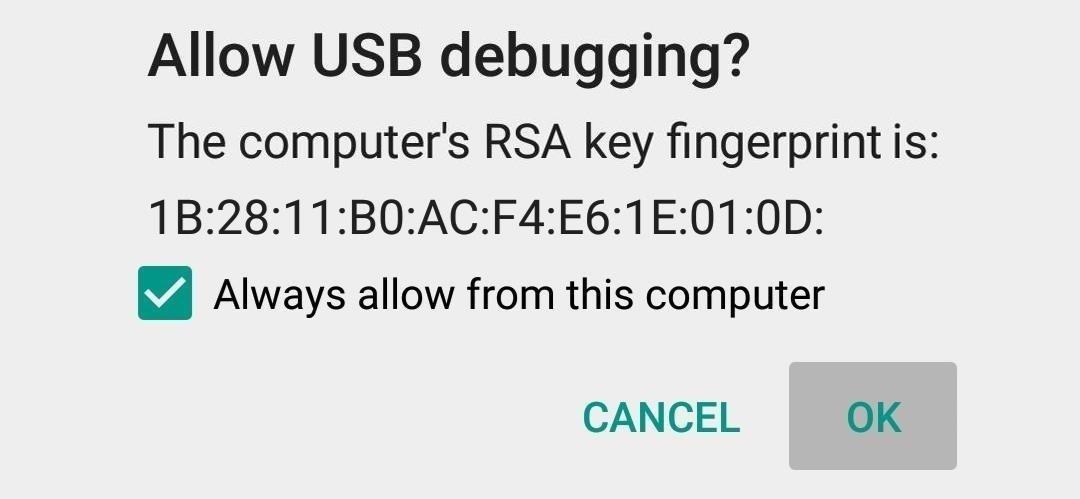
- If you get an error message, then head over to your device. There you might get an Allow USB Debugging prompt. Tap on OK. Now again execute the above command and this time, you should get the success message.

- It’s now time to grant the ‘write secure settings’ permissions and let the app control per-app refresh rate on your OnePlus device. For that, copy the below command and paste in the CMD window:
adb shell pm grant com.arter97.auto90 android.permission.WRITE_SECURE_SETTINGS

Conclusion
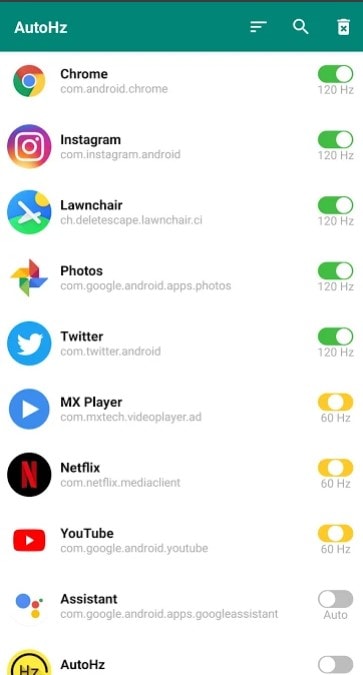
That’s it. The setup stands complete. You may now launch the app and manually set the refresh rate for each app. Furthermore, if you leave the toggle disabled for any app, then it will respect the system default refresh rate. The app also has some preset profiles that you could use directly without tweaking any settings.
On that note, we conclude the guide on controlling the per-app refresh rate on any OnePlus device. Please let us know your views in the comments section below. Rounding off, here are some iPhone Tips and Tricks, PC tips and tricks, and Android Tips and Trick that you should check out as well
