Imagine working so hard on an assignment and giving your best to get a good grade. But when you go back to send it, your work gets accidentally deleted. How infuriating is that? We all go through something like this in our life, and recovering the deleted Word file can be quite complicated.
There is no need to brood about it; instead, look for a solution that can bring back your word file. Good data recovery can help you get back your lost Word file. This article will provide you with ways to recover your Word file. Check out the article if you are seeking answers.
Also Read
Fix: MacBook Pro White Screen After Apple Logo
Fix: Macbook Pro Sound Not Working or Audio Crackling
FIX: MacBook Pro Stuck on Login Screen
Fix: macOS Ventura WiFi Not Working Issue
Fix: macOS Monterey Not Connecting to WiFi
Continuity Camera Not Working After macOS update, How to Fix?
Fix: Cannot Change Folder Background Color in Mac (macOS Ventura)
Fix: MacBook Pro / Air Won’t Turn On After Battery Died or Drained Completely
Page Contents
Part 1: How to Recover Your Deleted Word Documents on Mac?
The first thing that you should do is check your Trash Bin or Time Machine. Let’s get to know a little bit about these ways to recover your Word file.
Way 1: Trash Bin
The files that you delete are sent to the Trash Bin, so it is naturally the first place that you should check if you have accidentally deleted your Word file. The files cannot be completely removed unless you have cleared the trash bin. So you can use this method only if you haven’t cleared your trash bin. Let’s see how you can restore files from the Trash Bin:
Step 1: On the home screen of your Mac, at the bottom right corner, you will see the “Trash” icon. Proceed by clicking on it.

Step 2: Look for the targeted Word file in the Trash Bin. To ease out the finding, you can change the data arrangement by clicking on “Change the Item Arrangement.” This way, you can find the Word file much faster.
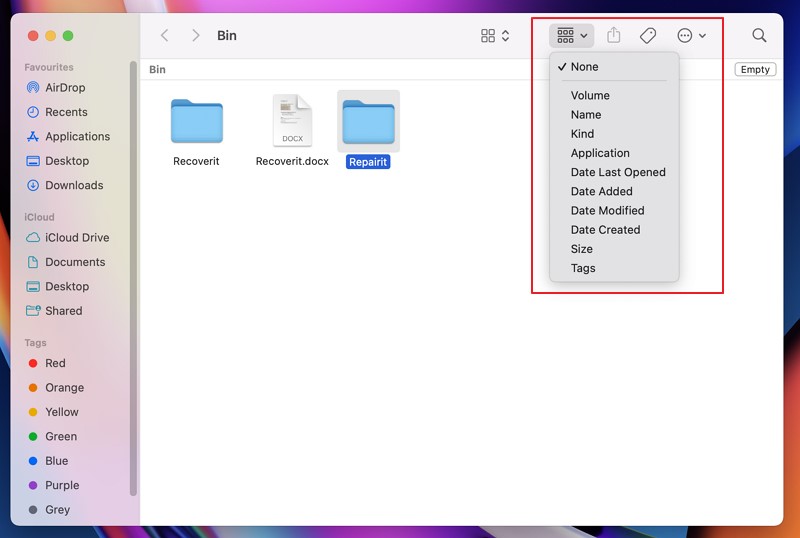
Step 3: Now that you have found your Word file, simply right-click on it and hit “Put Back.” Your file will be recovered successfully.
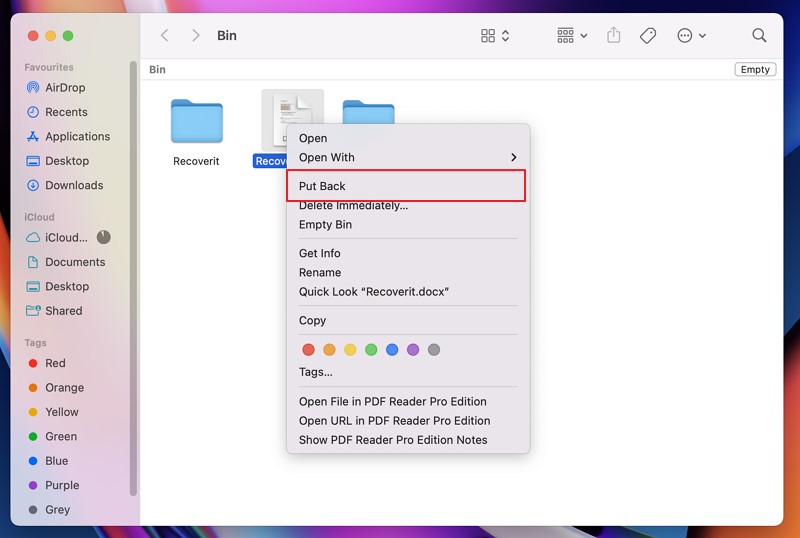
Way 2: Time Machine
Another interesting approach to recovering your data on Mac is by Time Machine backup files. Time Machine stores your files and data as a backup; in this way, you can get back your deleted Word file from the backup data. If you use Time Machine for backing up your files, then this method can certainly help you. Here’s how you can do it.
Step 1: Start by connecting your Mac with the storage that you use to do Time Machine backup. Once it is successfully connected, go to the folder where the deleted files are backed up and open it.
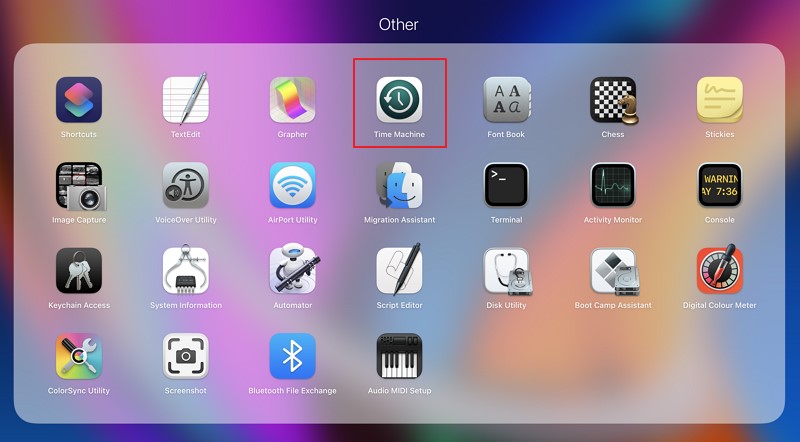
Step 2: Start up the Time Machine app by clicking on it. You can find it in the top right corner, and if you can’t see it there, then go to your launchpad, click “Other,” and then select “Time Machine.”
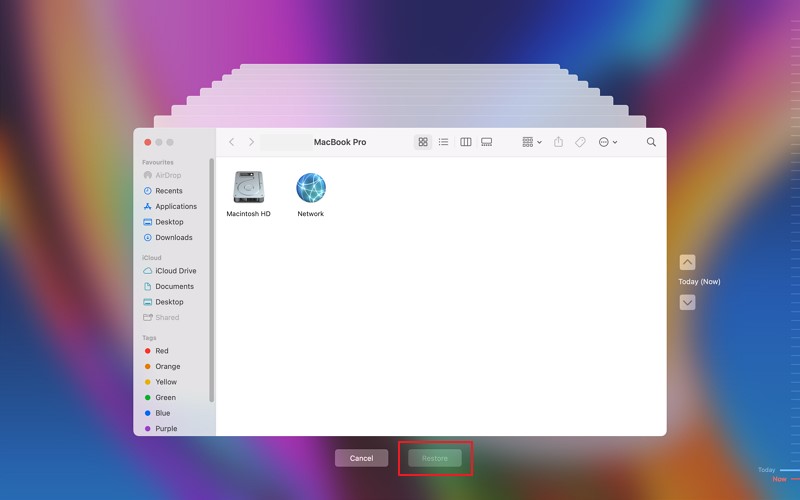
Step 3: Look for your deleted Word file with the help of a timeline and arrows. After you have found the Word file you’re looking for, choose it and click on “Restore.” Your Word file will be successfully restored to its previous location.
Let’s say you don’t have any backup stored in the Time Machine because you don’t use it, and the Trash Bin has already been cleared by you. What would you do then? You need another authentic way to recover your deleted Word file from Mac. One of the most reliable apps for recovering deleted data is Wondershare Recoverit.
It is a trusted app with many great features and an affordable subscription. You can easily recover your data no matter what format your file is in and what type of file it is; Recoverit supports all popular file formats. It deeply scans your device and can recover data from any storage device. This app is fast and reliable and offers a free 100MB data recovery on downloading.
Are you confused on how to recover data using this robust data recovery tool? Recoverit allows data recovery in a few easy steps. Follow the guide below to recover your deleted Word file:
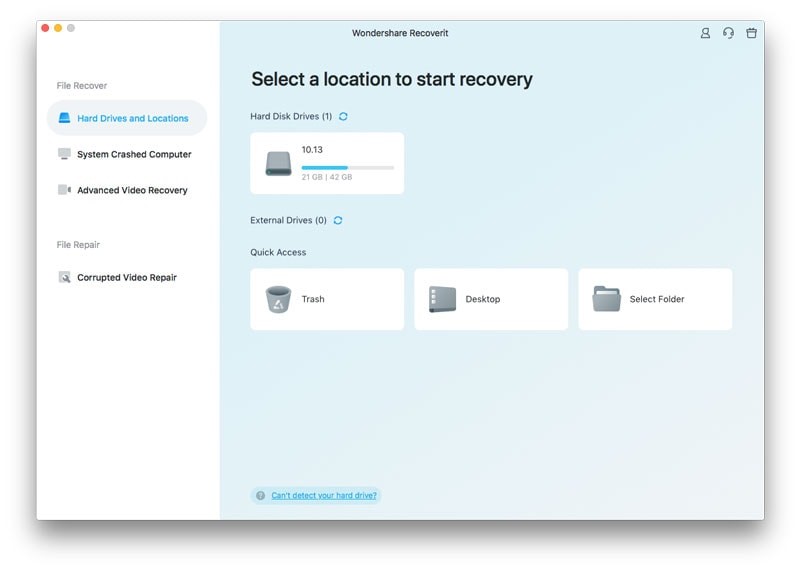
Step 1: Choose the Lost File Location
Before starting the data recovery, you need to select the location where you deleted your Word file. To do that, get the app started, and on the left side, you will see the option “Hard Drives and Locations.” After that, you need to select your hard drive under “Hard Disk Drives” and select “Desktop” under “Quick Access.” The location scanning will begin once you hit “Start.”
Step 2: Location Scanning
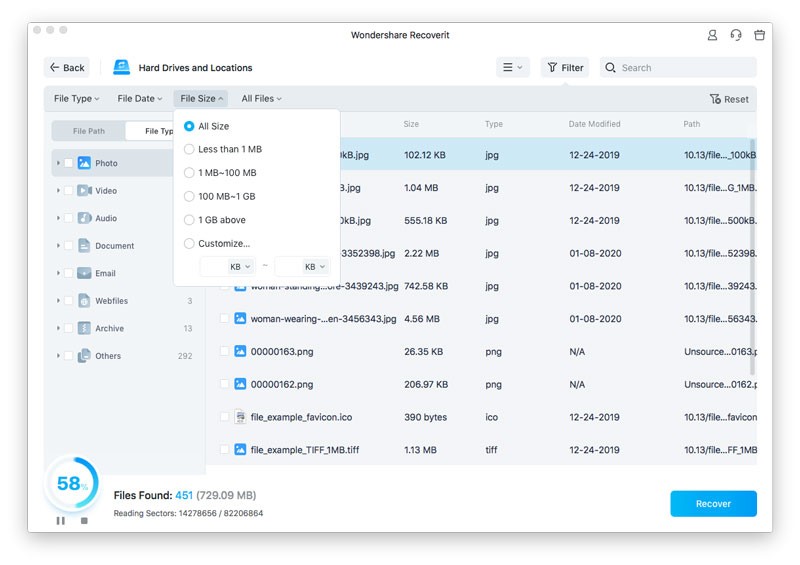
The data scan will be completed in a short time. While scanning the drive, you can narrow down the search of the required Word file by adding some search preferences, i.e., time, file type, and file size. This will speed up the process even more. You can pause or stop the scanning anytime if you have found the Word file you’re looking for. For that, click the pause or stop button from the Recoverit interface.
Step 3: Recover Word File
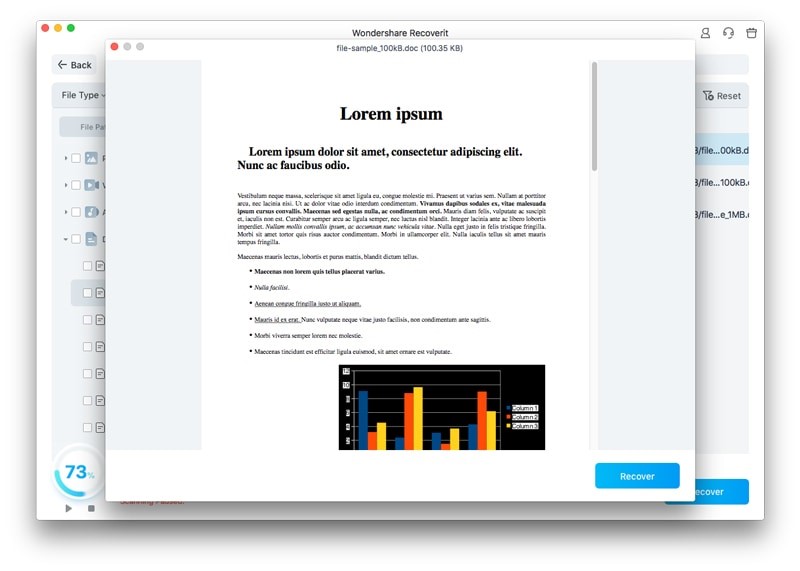
After choosing the Word file that you want to recover, you can easily get it back. A wise choice is to preview your select file before recovering it; to do that, double-click on the file. Now that you’ve previewed your Word file, it is ready to be recovered; click on “Recover” to do that and save your recovered Word file. Remember not to save your file in the same folder from where you have deleted it.
Wrapping Up
A lot of our important work is done on Word these days. From making college assignments to creating a official document at work, Word files are used everywhere to present some of our best work. Losing your Word file by accident leaves you in a worry, but what if there are some hacks and tools that can get your deleted Word file back? Sounds good, right? Read this article if you’re eager to learn more.
