Samsung finally started pushing their new major OS update; One UI 4.0 for the Samsung Galaxy A12 based on Android 12. The update is now started rolling around the globe.
Also Read
Page Contents
 Samsung Galaxy A12 Device Overview:
The Samsung Galaxy A12 comes with a 6.40 inches TFT display with an HD+ resolution, i.e., with a resolution of 720×1560 pixels. It has a pixel density of 268 Pixel Per Inch ( PPI ), a screen-to-body ratio of 81.6 percent, and an aspect ratio of 19:5:9. The rear of the smartphone is made up of plastic, and the frame is too made up of plastic. Coming to internal specs, this device comes with an Octa-core SoC that clocks at 1.8GHz. Taking about the memory options, it is available in two variants i.e. with 2 and 3GB of RAM.
While it is available only in a single internal storage variant with 32GB of eMMC 5.1 storage, further, this internal storage is expandable via a micro SD card up to 512GB, though the dedicated SIM card slot. This device is a dual-SIM smartphone that accepts Nano-SIM and Nano-SIM cards. This is a really nice touch from the brands that everyone wants in a budget smartphone.
One UI 4.0 Upgrade and Features
Of course, the Samsung Galaxy A12 came out of the box with Android 10 and later received the Android 11 update. According to Samsung’s recent policy change, their device will get three years of major OS support and four years of a security patch update. As promised, finally Samsung started rolling their One UI 4.0 update to their most flagship and feature-rich smartphone.
One UI 4.0, which is based on Android 12 brings an entirely new UI design with a simplified color palette feature and the game-changer Android 12’s material YOU design that lets users significantly personalize the look and feel of the UI. The dark mode is now been expanded to all app icons and the camera UI adds ease to use and is better than the last version.
Download Android 12 | One UI 4.0 Update:
| Build Number: A125MUBS4CXB1 Security Patch: February 2024 Model: SM-A125F |
Download Link |
| Build Number: A125FXXS4CWK3 Security Patch: December 2023 Model: SM-A125F |
Download Link |
| Build Number: A125MUBU4CWH2 Security Patch: August 2023 Model: SM-A125M |
Download Link |
| Build Number: A125U1UEU6CWEB Security Patch: July 2023 Model: SM-A125U Country: USA |
Download Link |
| Build Number: A125U1UEU6CWEB Security Patch: June 2023 Model: SM-A125F Country: USA |
Download Link |
| Build Number: A125FXXS2CVH2 Security Patch: September 2022 Model: SM-A125F Country: Europe |
Download Link |
| Build Number: A125WVLS4BVJ1 Security Patch: September 2022 Model: SM-A125W Country: Canada |
Download Link |
| Build Number: A125USQS4CVJ1 Security Patch: July 2022 Model: SM-A125U1 Country: USA |
Download Link |
| Build Number: A125USQS4CVJ1 Security Patch: September 2022 Model: SM-A125U Country: USA |
Download Link |
Steps to Install Android 12 on Samsung Galaxy A12
Before we get straight to the steps to flash the One UI 4.0 update based on Android 12 on your Samsung Galaxy A12, let us take a look at the pre-requisites first.
Pre-Requirements:
- Download and Install Samsung Kies Software on your computer.
- You have to download the latest Samsung USB Drivers and install them on your PC.
- Make sure that you have ODIN Software installed on your PC.
- You will require a Windows PC/Laptop and a USB cable as well.
- Keep your Samsung Galaxy A12 battery charged at least up to 60% for a smoother process.
- Take a backup of your device (No Root) before doing anything.
Now, let’s look at the Steps to flash Android 12 on Samsung Galaxy A12.
Disclaimer:
Installation Instructions:
We have provided a full detailed installation guide to flash the Android 12 update using Odin Tool on your Samsung Galaxy A12. In order to flash Android 12 (One UI 4.0) on Samsung Galaxy A12, you need to follow the below guide carefully:
- Download the appropriate Android 12 firmware file for your Samsung Galaxy A12.
- Extract the contents of the firmware zip file.
- Notice that the extracted files will be in “.tar” or “.tar.md5” format.
- Now download and extract the Odin tool on your PC.
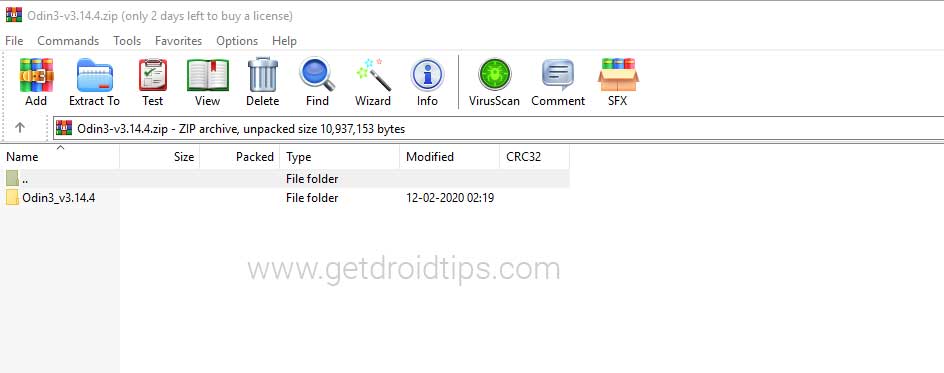
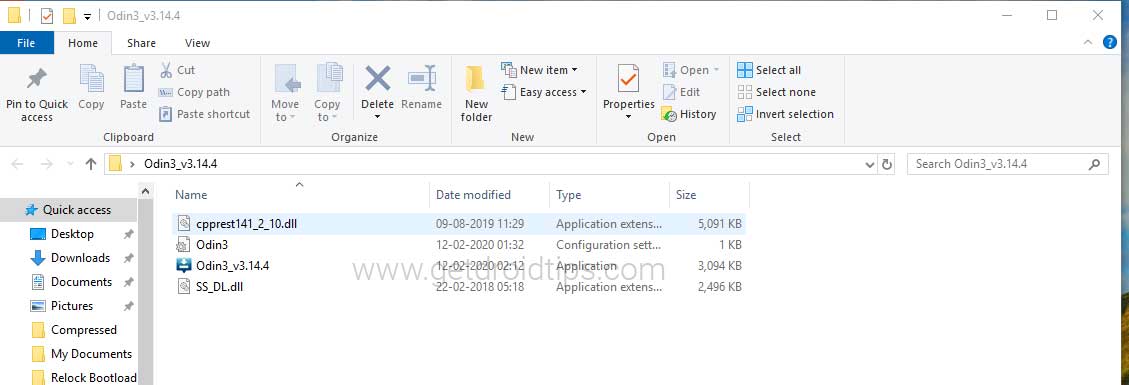
- Open the extracted folder and click on the Odin.exe file.
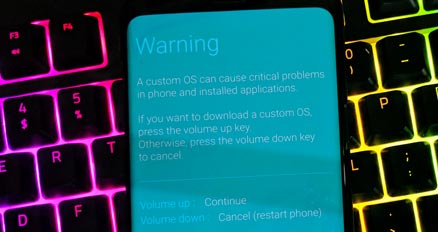
- You need to connect your Samsung Galaxy A12 to the PC while it is in Download Mode.
- Notice that the CO port will light up on Odin once you connect your phone.
- Click the AP button and select the firmware.
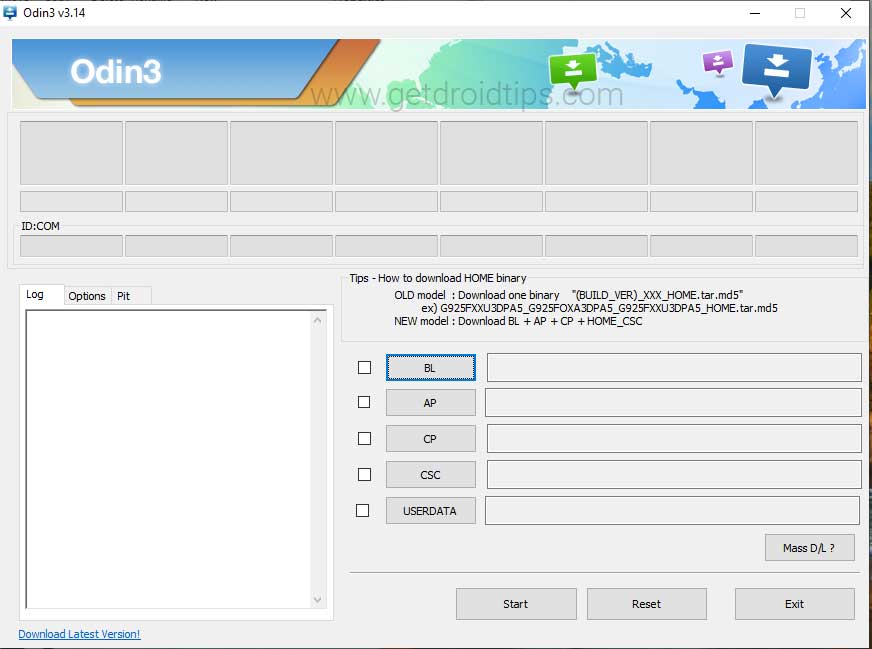
- Do the same for BL, CP, and CSC.
- Keep in mind that the regular CSC file will erase the entire data. In order to save the data, select the ‘HOME_CSC‘ file.
- Don’t forget to select Auto Reboot and F.Reset Time in the Options tab.
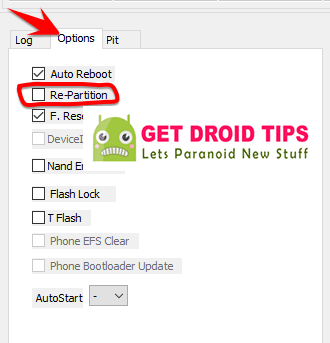
- Click the Start button to install the firmware on your Samsung Galaxy A12.
- That’s it! You will see a PASS message once the installation is complete.

Check out our full-depth video guide as well.
We hope that this guide will be helpful to you. If in case, you’re facing any issues, feel free to ask in the comments below.

Is Samsung A12 gonna have One UI or One Ui core
One ui core
It is mid September 2022 and my Galaxy A12 has not received the Android 12 update.