New Updated on March 13, 2020: Today Vivo started rolling the latest security patch version for the Vivo V7 which carries build number PD1718F_EX_A_3.13.2. We have shared the download link to firmware along with the installation guide.
If you own a Vivo V7 (PD1718F) smartphone, then here I will guide you on how to install official stock ROM on a Vivo V7 smartphone. This guide is simple and easy to follow. We have listed the Official Stock ROM for Vivo V7 below. Download the required file to either upgrade or downgrade your Vivo V7. Learn How To Install Stock ROM On Vivo V7 pushing the below Guide and use the QFIL Software to flash any official Stock Firmware on Vivo V7. Today I will guide you on How to Install Stock Firmware on Vivo V7. Below is the given list of Stock ROM for Vivo V7. Now you can Install the Stock Firmware for Vivo V7 using the QFIL.
Download the ROM which we have listed in this table below. You can also update your Vivo V7 smartphone anytime, also you can install the Stock Firmware build to revert back to the old version also. In case if you have bricked your device, then you can bring back the phone (Unbrick) using the stock firmware anytime. Also if you feel your Vivo V7 lag or have any issue, then flash the stock firmware from the list below and save from the situation. Stock Firmware doesn’t void a warranty on your Vivo V7.

To install the Stock Firmware on Vivo V7, Please follow the guide and download the ROM and QFIL on your computer. This guide is for How to Install Stock ROM on Vivo V7 smartphone.
The Advantage Of Stock Firmware:
- Flash Stock To Unbrick your Vivo V7
- Flash Stock ROM to Fix the Bootloop problem
- Upgrade and Downgrade Vivo V7
- Unroot or Fix Bugs on your phone
- To fix the lag or stutter on Vivo V7
- By flashing Stock ROM, you can solve software problems.
- Revert back to stock to gain your warranty.
Steps to Install Stock firmware on Vivo X20 Plus:
Before installing, make sure to follow the pre-requisite and install the necessary drivers and tools on your PC.
Pre-requisites
- Supported device: Vivo X20 Plus
- Charge your phone: You need at least a 50% charge on Vivo X20 Plus
- Laptop or PC: To carry out this installation, you need a PC or Laptop.
- Take Device Backup: The very first thing to pay attention to is taking the device backup. You might not be able to take the backup of phone data, however, if you have inserted a memory card in your device, remove it at least to save it.
- Download AF Tool, QFil Flash Tool, or QPST Flash tool and install it on your PC.
- Install the Latest Vivo USB Drivers | Qualcomm drivers
Disclaimer:
Download Flash Files
- PD1718F_EX_A_3.13.2: Download
- PD1718F_EX_A_3.12.0: Download
- PD1718F EX A 3.7.8: Download
- Vivo_V7_PD1718F_EX_A_1.8.6_MSM8953_QFIL: Download
Method 1: Instructions to Install via Recovery:
First, you can try the official method to install the OTA stock ROM update via Vivo device recovery. Follow the guide link given below to install the OTA update on the Vivo device.
Guide to Install Vivo Firmware on any Vivo smartphone
Method 2: Instructions to Install via QFIL Tool:
Download the Qualcomm Flash image loader tool and USB Drivers on your PC. Follow the link to install the firmware using QFIL tool
Method 3: Instructions to Install via MSM Download tool:
- Download the MSM Download tool, firmware, and drivers on your PC.
- Now install the USB drivers
- Place the MSM download tool and firmware in the same folder
- Open the MSM download tool and connect your device to PC/Laptop
- Once you connect, it will automatically load the firmware, if not select it manually.
- Click on the start button and wait patiently to complete the installation process.
- Once it is done! remove your device from your PC. That’s it!
Method 4: Instructions to Install via QPST Tool:
Here are the instructions you need to follow in order to install Stock ROM on the Vivo X20 Plus:
- First of all, do all the PREREQUISITE STEPS and Now Open the Extracted QPST Folder
- You will find two files with the name: Qualcomm_USB_Drivers_For_Windows.rar and QPST.WIN.2.7 Installer-00429.zip

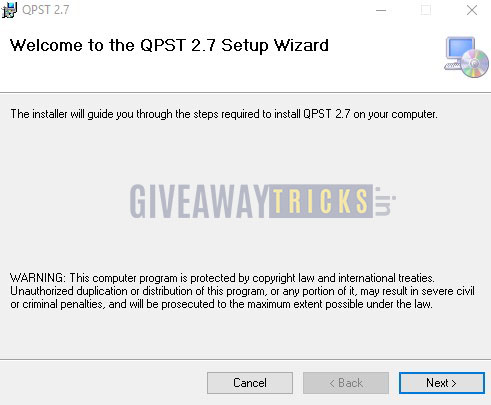
- Open the QPST Win folder and Install the QPST.exe file on your PC/Laptop

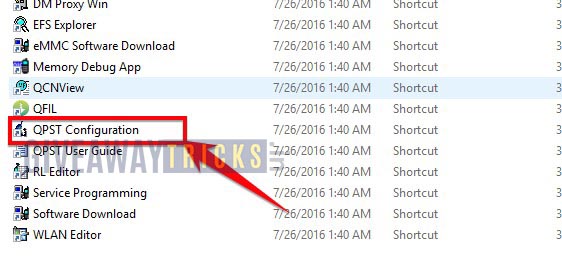
- After Installation, Go to the Installed Location in the C Drive
- Open the QPST Configuration

- Now in the QPST Configuration, Click on Add new port -> Select the com port of your device -> and close it

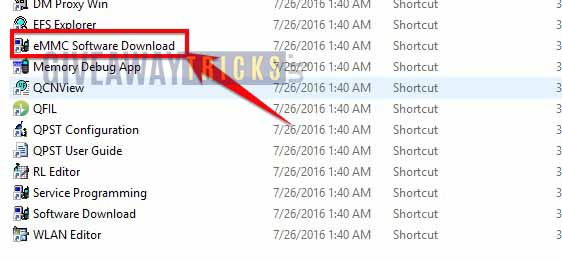
- Now Open the EMMC Software Downloader in the same folder located all the QPST Files

- In EMMC Software Downloader, Check program boot loaders -> Browse for the device com port

- Now Click Load XML Def and browse for rawprogram0.xml in folder ROM in EMMC Software Downloader (If you didn’t extract please extract the ROM and then browse the file rawprogram0.xml)

- Now tap on Load Patch def and browse for patch0.xml in folder ROM

- Check the search path 2 and browse for the folder ROM

- Now click download, wait for the download to finish (it never finish but it also detects for a new driver, and that’s important) and it will search for the new hardware found, install the driver
- That’s it! Once your installation is done! Reboot the phone! Congrats, you successfully installed Stock ROM on Vivo X20 Plus.
We assume you’ve installed the Stock ROM on Vivo X20 Plus successfully, Now, please rate this website with your comment. We always welcome feedback and improvements.
