iTunes is Apple’s mainstream music streaming services specially designed for the iPhone and iPad. Where it also used in macOS, but later Apple removed the macOS support in the latest version because apple divides iTunes into three different Music, Apple Podcasts and Apple TV, to manage another type of media. Therefore, they introduced Finder for Backup, Updating, Restoring, and Syncing to iOS devices similar to iTunes experience.
You can Still access your iPhone or iPad through the Finder’s Sidebar alongside with other connected devices. Moreover, you can sync Media With your iOS device using Finger with the help of Data Cable and Wi-Fi Network. It is a most straightforward way to sync in the new Entertainment apps, movies, TV Shows, and other videos through the New TV App. Likely, This because
Also Read
FIX: Crunchyroll Black Screen When Streaming
Fix: macOS Ventura WiFi Not Working Issue
Fix: macOS Monterey Not Connecting to WiFi
Fix: iPadOS 16 Not Charging My iPad
Continuity Camera Not Working After macOS update, How to Fix?
Fix: Cannot Change Folder Background Color in Mac (macOS Ventura)
Fix: SanDisk Extreme Pro SSD Not Recognized or Detected on macOS
Fix: iPhone Won’t Update Payment Method
What Does ‘No Location Found’ Mean on iPhone?
How to Fix If iPhone Stuck on Apple Logo Storage Full
Page Contents
What Can you can use With the Finder
- Photos and Videos.
- Contact and Calendar.
- Albums, songs, playlists, movies, TV shows, podcasts, books, and audiobooks.
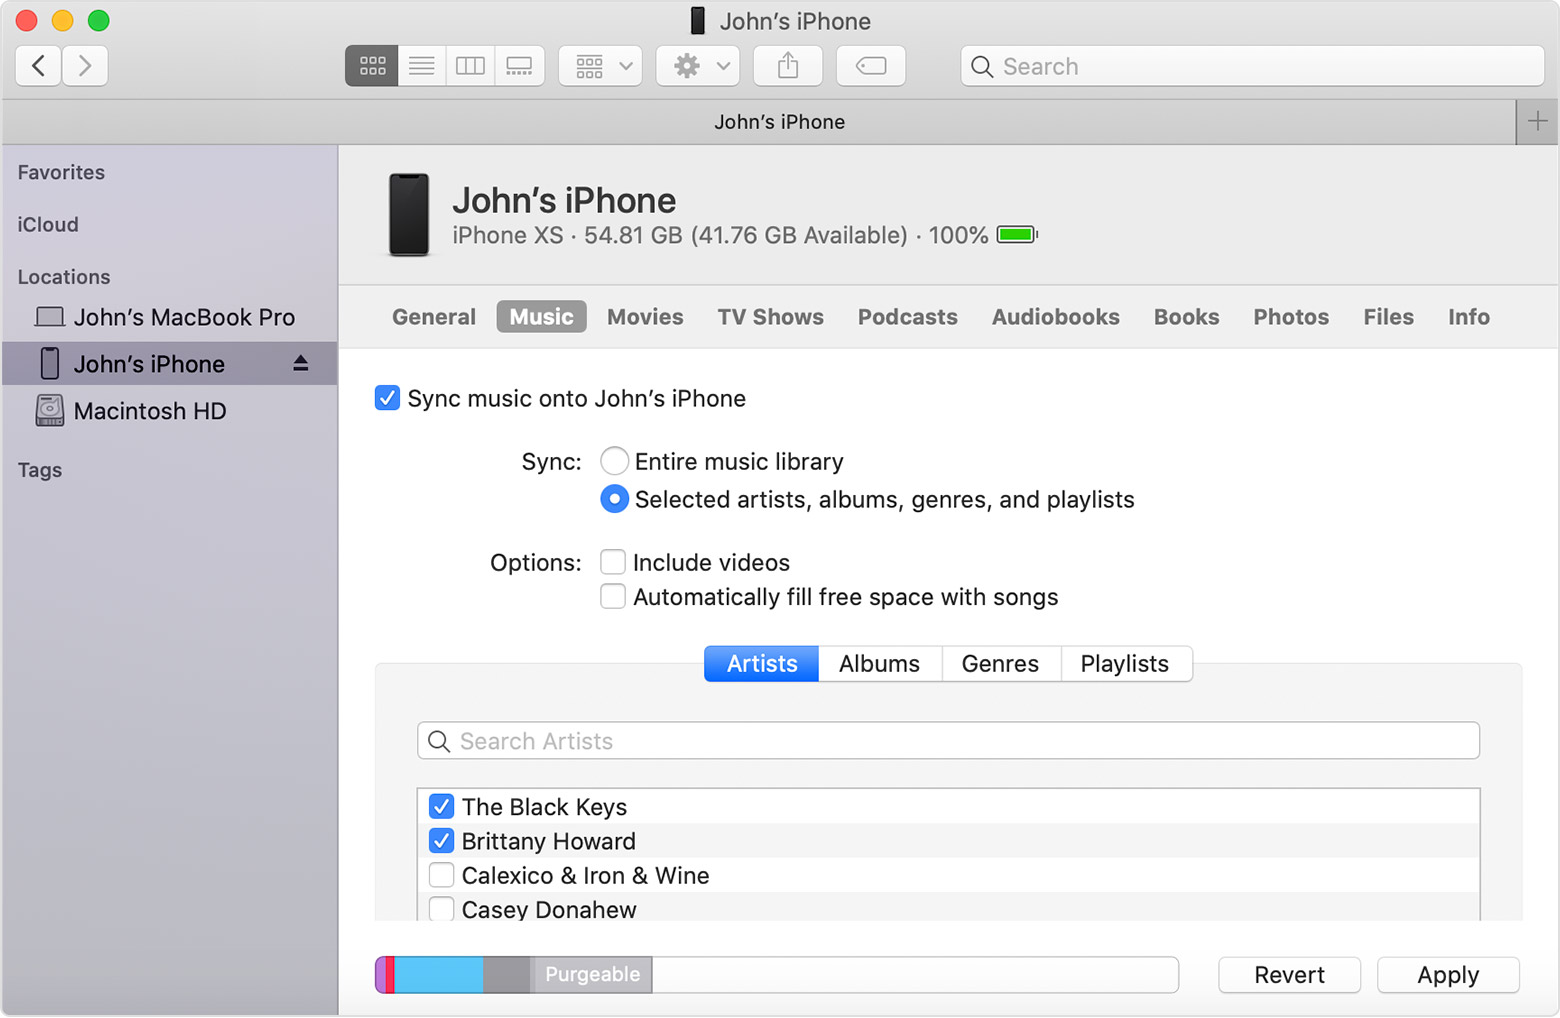
Today we are going to teach you how you can Sync music from Mac to your iPhone or iPad. Apple introduced its finder app to sync your Albums, Songs, playlist, movies, TV Shows, Podcasts, Books, Audiobook, Photos, Video, Contact, and Calendar.
How to Sync Music From iPhone to Mac.

Note: If you are using iCloud for Syncing feature, thought the Finder might be turned off.
- First, you need to connect With USB Cable your iPhone or iPad to your Desktop.
(Make Sure you are using a Compatible capable.) - Launch the “Finder” app on your Mac and your iPhone or iPad.
(You will find iPhone in the sidebar under the “Location” section. Click on the “Sync” button to sync your iPhone.) - If Promoted, Trust your device.
- Select the type of Content that you want to Sync or Remove
- Turn Syncing on for a Content-Type, select the checkbox next to Sync.
(It will Create a Backup, Updating your iPhone, Encrypting backup among more.) - Click the Apply Button, Click on “Syncing.”
(First time, it doesn’t sync automatically.) - Note: You can Create a Specific tab based on Category.
(If you want to individually sync certain items such as Music, Media, Books, Files, and other files.)
Note: You don’t have to click on the “sync” button every single time if you have done once it automatically starts syncing.
How to Sync your Content using Wi-Fi
Before we continue, Make sure you have done with Syncing Finder with your device using Wi-Fi instead of USB.
- Connect your iDevice with Mac using UBS Cable.
- Then, Open a Finder window and Select your Device.
- Choose “Show the [Device name] When on Wi-Fi.”
- Click Apply.
Note: When the computer and the device are on the same Wi-Fi network, it appears in the Finder.
Don’t Disconnect your iPhone or iPad while using Finder, Because if you disconnect, it stops sync. You can Ditch your device after it finishes Synced music to the iPhone from the Mac. Not to mention, if you are using Mac OS older version than you can continue to use iTunes. We like to know your thoughts in the comment section down below.
