• Skip to primary navigation
  • Skip to main content
  • Skip to primary sidebar
  • Skip to footer
Get Droid Tips

Get Droid Tips

Custom ROM | CyanogenMod | Android Apps | Firmware Update | MiUi | All Stock ROM | Lineage OS |

  • Android
  • Games
  • iPhones/iPad
  • Social Media
  • Windows
  • LineageOS 17.1
  • Android 10
  • iOS 14
  • Free Among Us for PC
  • Write for US
  • Watch IPL 2020 For Free
Home Social Media

How to Share your Phone or Desktop Screen on Zoom

Updated on April 18, 2020 by Swayam Prakash

Advertisements

Zoom has become one of the most popular apps in recent days. The world is restricted to their homes due to COVID-19. However, people still need to work, do meetings and attend conferences, etc. Of course, they cannot go out of their houses for safety reasons. To meet all those needs we have the online meeting and conferencing apps such as Zoom. This app has a lot of great features that make it the most sought after solution for official meetings. In this guide, we will discuss the Zoom screen share feature. This means users can share their device screens on the app.

Now, everyone is not using the same operating systems. Some use Windows and some others prefer macOS or Android. So, to deal with that I have put up the guide that demonstrates the zoom screen share feature various OS platform. Depending on what you use, follow the respective guide. So, let’s begin.

Zoom Screen Share

Related | List of Zoom keyboard Shortcuts for Various OS Platforms

Advertisements

Table of Contents

  • 1 How to Use Zoom Screen Share on Various Devices
    • 1.1 Android OS
    • 1.2 Windows/Linux and macOS
    • 1.3 Zoom Screen Share on iPad and iOS

How to Use Zoom Screen Share on Various Devices

Let’s begin with the guide.

Android OS

  • Start a new meeting by tapping on New Meeting
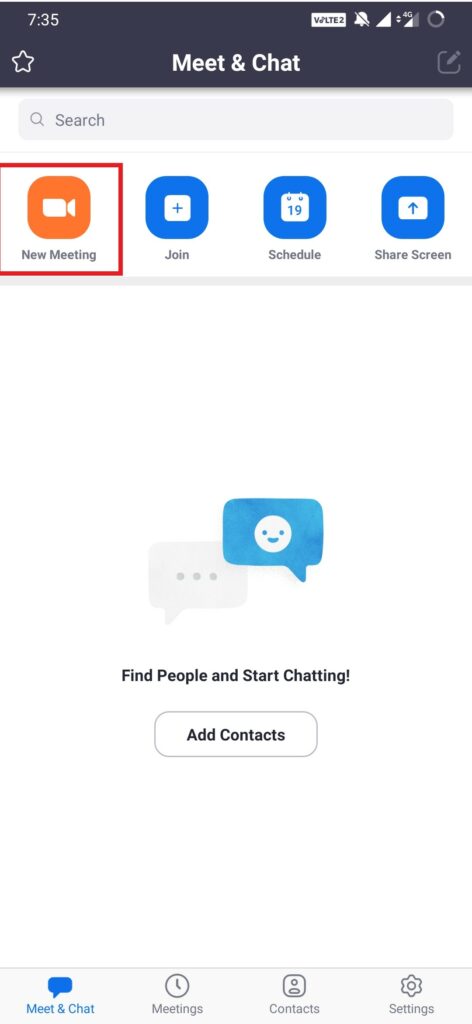
    Start A New Meeting
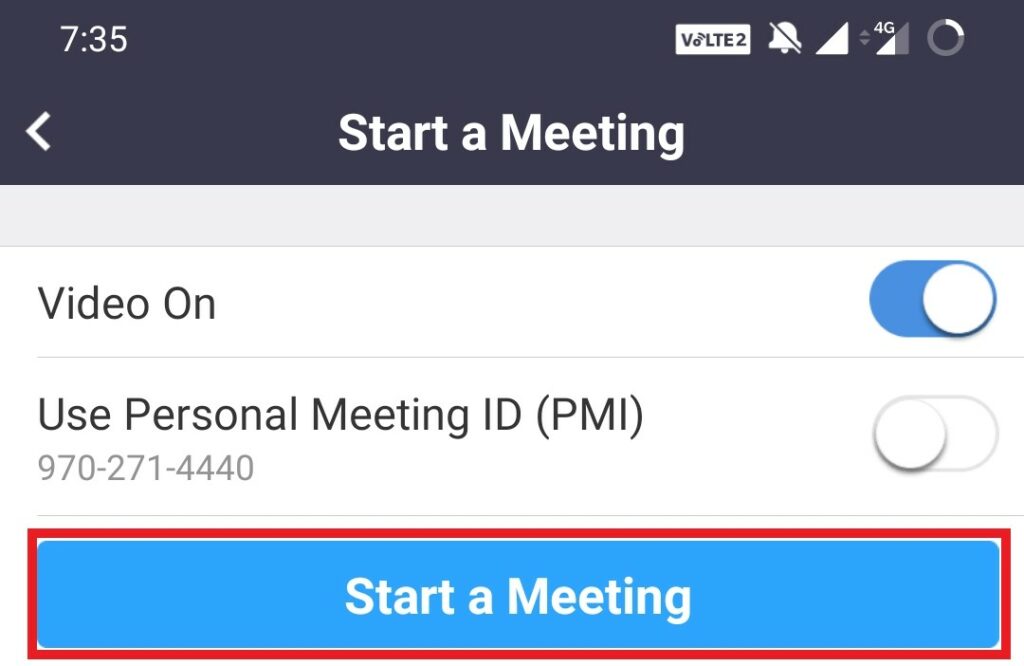
  • Then tap on Start A Meeting
    Start Meeting
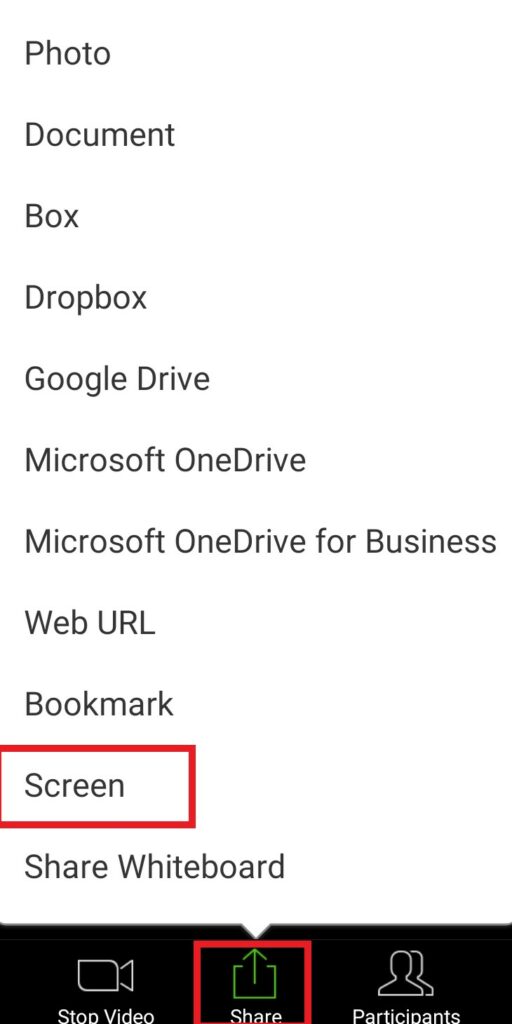
  • There should be a Share option
  • In the pop-up menu tap on Screen

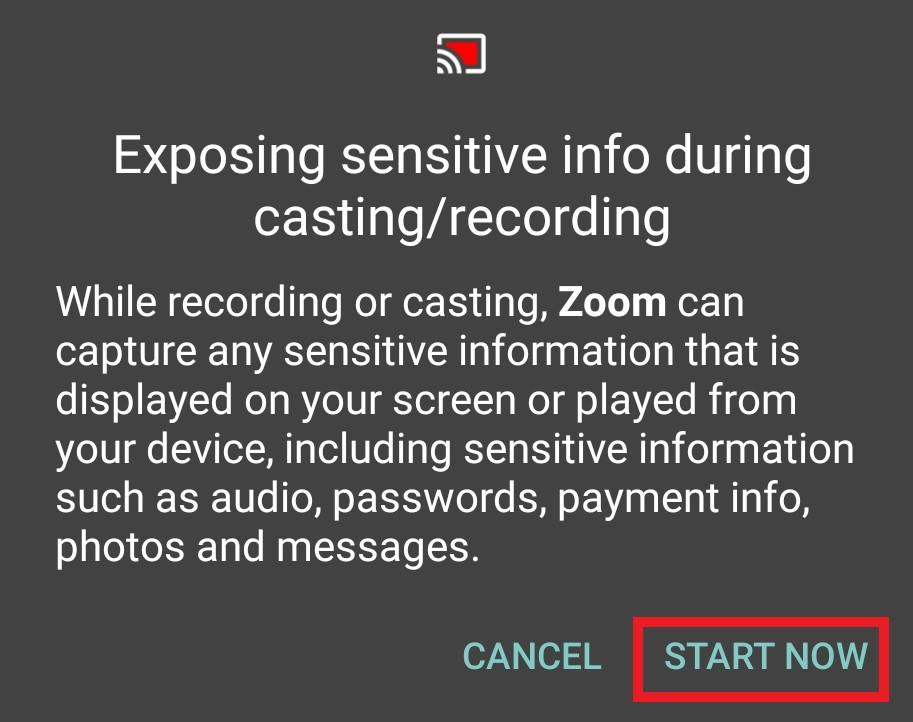
  • A prompt will show up that will ask your confirmation to start recording the screen
  • Tap on Start Now
    Start Zoom Screen Share on Android OS
  • Now the screen will be recorded
  • There will be a small toolbar that you can use to control the recording.

Read Now | How to Use Whiteboard in Zoom Meetings Application

Windows/Linux and macOS

The process of Zoom Screen Share is the same for all three PC platforms.

  • Start the meeting
  • Like in Android, there will be an option Share Screen at the bottom
  • Click on it or you can also use Alt + S shortcut to start/stop screen sharing
  • You have to select if you wish to share the whole of the screen or a portion of it.
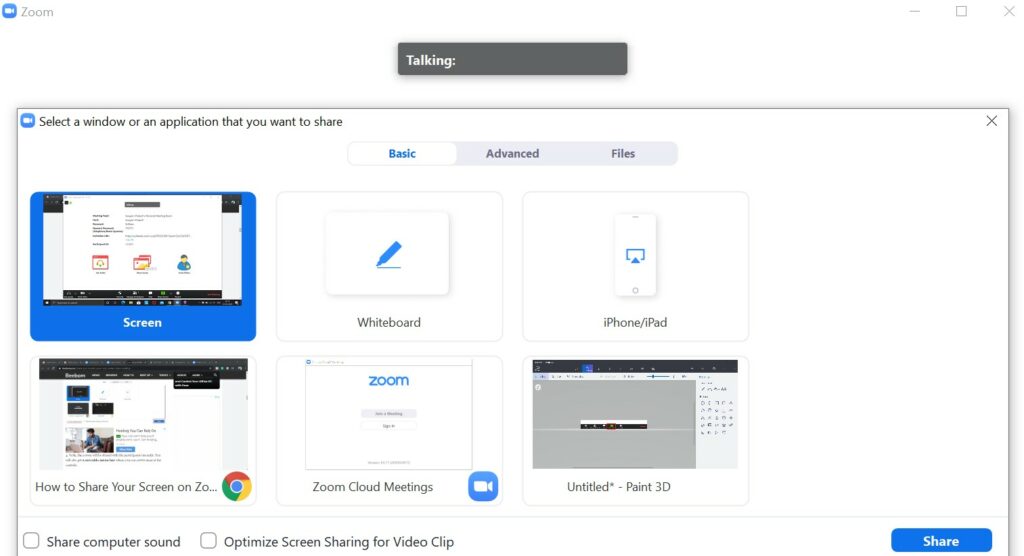
    Zoom Screen Share options
  • Click on Advanced if you wish to select a portion of the screen

Note

If you use macOS Catalina, then go to Security & Privacy under System Preferences. Go to the Screen Recordings tab and select the checkbox to allow Zoom to record the screen.

Zoom Screen Share on iPad and iOS

Keep in mind that you need to run iOS 11 or higher to make use of the zoom screen share feature. First, you need to add the screen recording feature to the control center. Under Settings > go to Control Center > tap on + button to integrate screen recording.

Advertisements
  • Start a new meeting
  • At the bottom, there is an option, Share Content. Tap on it
  • Then from the pop-up menu tap on Screen.
  • Go to the Control Center by swiping action.
  • You should see a record button. Press and hold it.
  • Then you should see Zoom show up with a button Start Broadcast

While the recording will be in progress you can see the status bar at the top turning to red color. If you wish to stop your broadcast, tap on the red section. Then tap on Stop.

So, that’s how how you can use the Zoom Screen share feature on any OS platform you use. We hope that you found this guide informative.

Do Check Out,

  • Set up 2-Factor Authentication on Zoom Meeting App
  • How to Use Skype Meet Now

Tagged With: Zoom

Primary Sidebar

Buying Guide

Top 6 Smartphones on Black Friday DealsĀ 

Best Motherboards for the AMD Ryzen 9 5900X

Best Power Supply Unit (PSU) For Nvidia RTX 3090, 3080, And 3070 GPU

Best 3D Mu6 Dummy Head Recording Earphone

Best Hidden Cams To Buy in 2020

60Hz vs 144Hz vs 240Hz Monitors – Differences and Purchase Guide

How To Use PayPal On Amazon To Shop Safely?

RTX 3070 vs 3080 vs 3090: Differences, Performance, Design, Price, and More

Geforce RTX 3080 and RTX 3090 Pre-Order Guide: Where To Buy in India

How Much Will it Cost in India for Nvidia GeForce RTX 3070 / 3080 / 3090?

Advertisements
Advertisements

Footer

Signal Private Messenger Alternatives for Android and iPhone

How to Change Android DNS Settings

Download Google Camera for Samsung Galaxy M12 [GCam APK]

How to Change Google Drive Backup and Sync Folder Location

How to Stop Signal From Telling You When Your Contacts Join

Download Google Camera for Oukitel C22 [GCam APK]

Download Latest Disney+ APK v1.11.3+ | Added All Language List

Fix: Cannot Delete Key: Error While Deleting Key on Windows 10

How to Fix Your Slow SSD on Windows 10

How to Recover PowerPoint Password on Windows 10

How to Switch Windows Hello Login method from PIN to Password?

Best CSV File Viewer Software for Windows 10

How to Disable Adobe Acrotray.exe from Startup

How to Use Microsoft’s PowerToys on Windows 10?

What is Doordash Error Code 400 and How to Fix It?

Why Does Zoom Error Code 3113 Appears and How to Fix?

Zoom Error 2011 | What This Error Code Mean and How To Fix it?

How to Find If Someone Deleted your Conversation on Snapchat

How to Activate Discovery Plus on TV

How to Cancel Fabletics VIP Membership

How to Get Discovery Plus for Free

© 2021 · Get Droid Tips

  • About Us
  • Contact Us
  • Privacy Policy
  • Disclaimer
  • Editorial Policy
  • Terms of Use
  • Write for Us