Well, If you are here, then you may probably want to install the Custom ROM on OnePlus Nord 2 5G. As you read our title, yes we can guide you on installing the latest custom ROM on OnePlus Nord 2 5G based on GSI build.
OnePlus launched their new device called OnePlus Nord 2 5G which is powered by a MediaTek Dimensity 1200-AI SoC. The device features a triple rear camera setup at the back with a 50-MP (f/1.88, 1.0-micron) + 8-MP (f/2.25) + 2-MP (f/2.5).
When you buy a new phone, it comes with so-called stock ROM or stock firmware which basically means a pre-installed operating system. This ROM usually comes with some limited functionality defined by the OEM (phone manufacturer). Whereas a custom ROM is developed by using AOSP also known as Android Open Source Project. Yes, we all know that Android is open-source and therefore any developer can edit the code, or recompile it according to his or her need. You can read our complete article to understand the difference between Custom ROM and Stock ROM.
Also Read
![How to Install Custom ROM on OnePlus Nord 2 5G [GSI build]](https://www.getdroidtips.com/wp-content/uploads/2021/07/OnePlus-Nord-2-5G.jpg)
Flashing the ROM in OnePlus Nord 2 5G is easy! All you need to do is follow the instructions carefully. If you are a newbie, then you need to understand that before flashing, you must unlock the bootloader on your OnePlus Nord 2 5G. To unlock the bootloader, follow our guide on how to unlock the bootloader via fastboot mode on any Android device.
If you already unlocked the bootloader, then you can simply follow our guide to install the custom ROM on OnePlus Nord 2 5G. Before that, let’s understand What is a GSI build.
What is GSI Stands for?
GSI stands for Generic system image which is an Android System image that can be used to replace the current installed Android version with a new one. It is a pure Android with an unmodified Android Open Source Project (AOSP) code. With Android 8.1, Google introduced the project treble support for many devices and now with Android 9.0 Pie, Google finally added the API level 28 to support Generic System Images to all app developers to install and run the latest Android GSIs on a variety of existing Android devices. To know more: Read here
OnePlus Nord 2 5G Device Overview:
The Oneplus Nord 2 features a 6.43-inch Fluid AMOLED panel with a resolution of 1080 x 2400 pixels and an aspect ratio of 20:9. It is a high refresh rate panel with a 90Hz refresh rate, and it supports HDR10+ content. The display is protected by Corning Gorilla Glass 5.
Under the hood, we get the MediaTek Dimensity 1200 5G built on a 6nm manufacturing process. This is a flagship-level octa-core processor which consists of one Cortex-A78 core clocked at 3.0 GHz, three Cortex-A78 cores clocked at 2.6 GHz, and four Cortex-A55 cores clocked at 2.0 GHz. For handling the graphics-intensive tasks, we have the Mali-G77 MC9.
In terms of optics, we get a triple camera setup at the rear and a single camera at the front. The triple camera setup at the rear consists of a 50MP primary sensor paired with an f/1.9 lens, an 8MP ultrawide sensor paired with an f/2.3 lens, and a 2MP monochrome sensor paired with an f/2.4 lens. At the front, we get a 32MP selfie camera paired with an f/2.5 lens. The rear camera can capture 4K videos at 30 fps, while the front is limited to 1080p video recording.
The smartphone comes with Android 11 out of the box with OxygenOS 11 running on top. It is available in two storage options: 128GB internal storage + 8GB RAM and 256GB internal storage + 12GB RAM.
In terms of communications, we get Wi-Fi 802.11 a/b/g/n/ac, Bluetooth 5.2, GPS, NFC, and USB Type-C 2.0. And for sensors, we get an under-display optical fingerprint sensor, accelerometer, gyro, proximity, and compass. Powering it all is a 4,500 mAh battery that supports 65W fast charging.
How to Install Custom ROM on OnePlus Nord 2 5G
To install, as we said, you need to unlock the bootloader and must have a TWRP (to install via a device) or a PC (to install via Fastboot). Yes, there are two methods to install the custom ROM GSI on OnePlus Nord 2 5G.
Disclaimer
AOSP GSIs which is still marked as a pre-release. Even on a device that runs Pie GSIs nicely, it’s still possible to get broken media, camera, RIL, or even flat-out no-boot. You are strongly advised to try PHH’s original and then identify/report issues there, before moving onto other GSIs that are based on his work. Please report bugs on the same thread related to the ROM.
We’re at GetDroidTips won’t be responsible for any kind of damage or error that occurs to your handset while or after following this guide. This is a Custom ROM and may contain some of the bugs or stability issues. We can’t recommend you to use this firmware as your daily driver. Proceed at your own risk.
Pre-Requirements:
- This guide is for OnePlus Nord 2 5G.
- You will require to unlock the device bootloader at first
- ARM, ARM64, or x86: Check your Android Phone’s Processor
- Treble Support: Check If Your Smartphone Supports Project Treble
- Download the required file and Supported the GApps file from below.
- Keep your device battery charged up to 60% at least for a smoother process.
- Take a complete backup of your device data without Root. In case anything goes wrong, you can easily restore all the data.
- Download and install OnePlus USB Drivers
- For adb method: Download ADB and Fastboot tool
- For TWRP Method: Download and Install TWRP Recovery on OnePlus Nord 2 5G
Note:
A only arm32 – arm avN
A only arm64 – arm64 avN
A/B arm64 – arm64 bvN
A/B arm32 – arm bvN
Download Links:
- AOSP Quack Phh-Treble: Download
- LineageOS 18.1 Download – If broken link, check official forum
Install via TWRP Recovery:
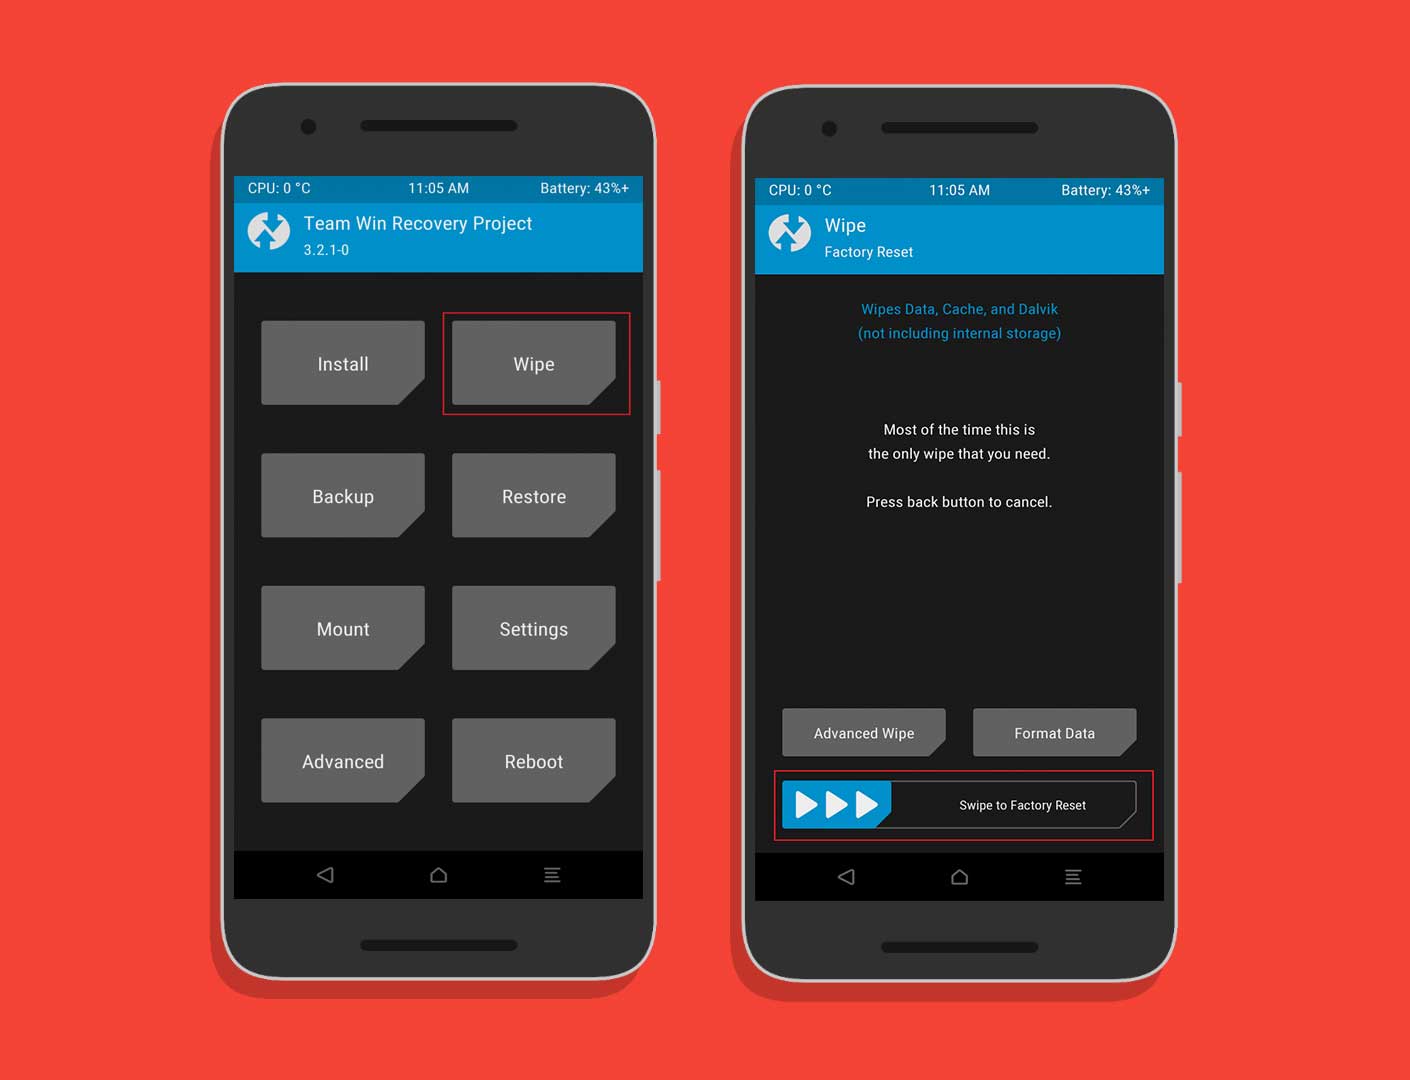
- To install via TWRP, you need to factory reset your device using TWRP
- Go into the Wipe option and Swipe to Factory Reset.
- Transfer the GSI build to your OnePlus Nord 2 5G using a USB Cable.
- Once you have moved, you can remove your USB cable.
- In your TWRP, tap on the install button –> Change type to Install Image and find the GSI you have moved in the 3rd step.
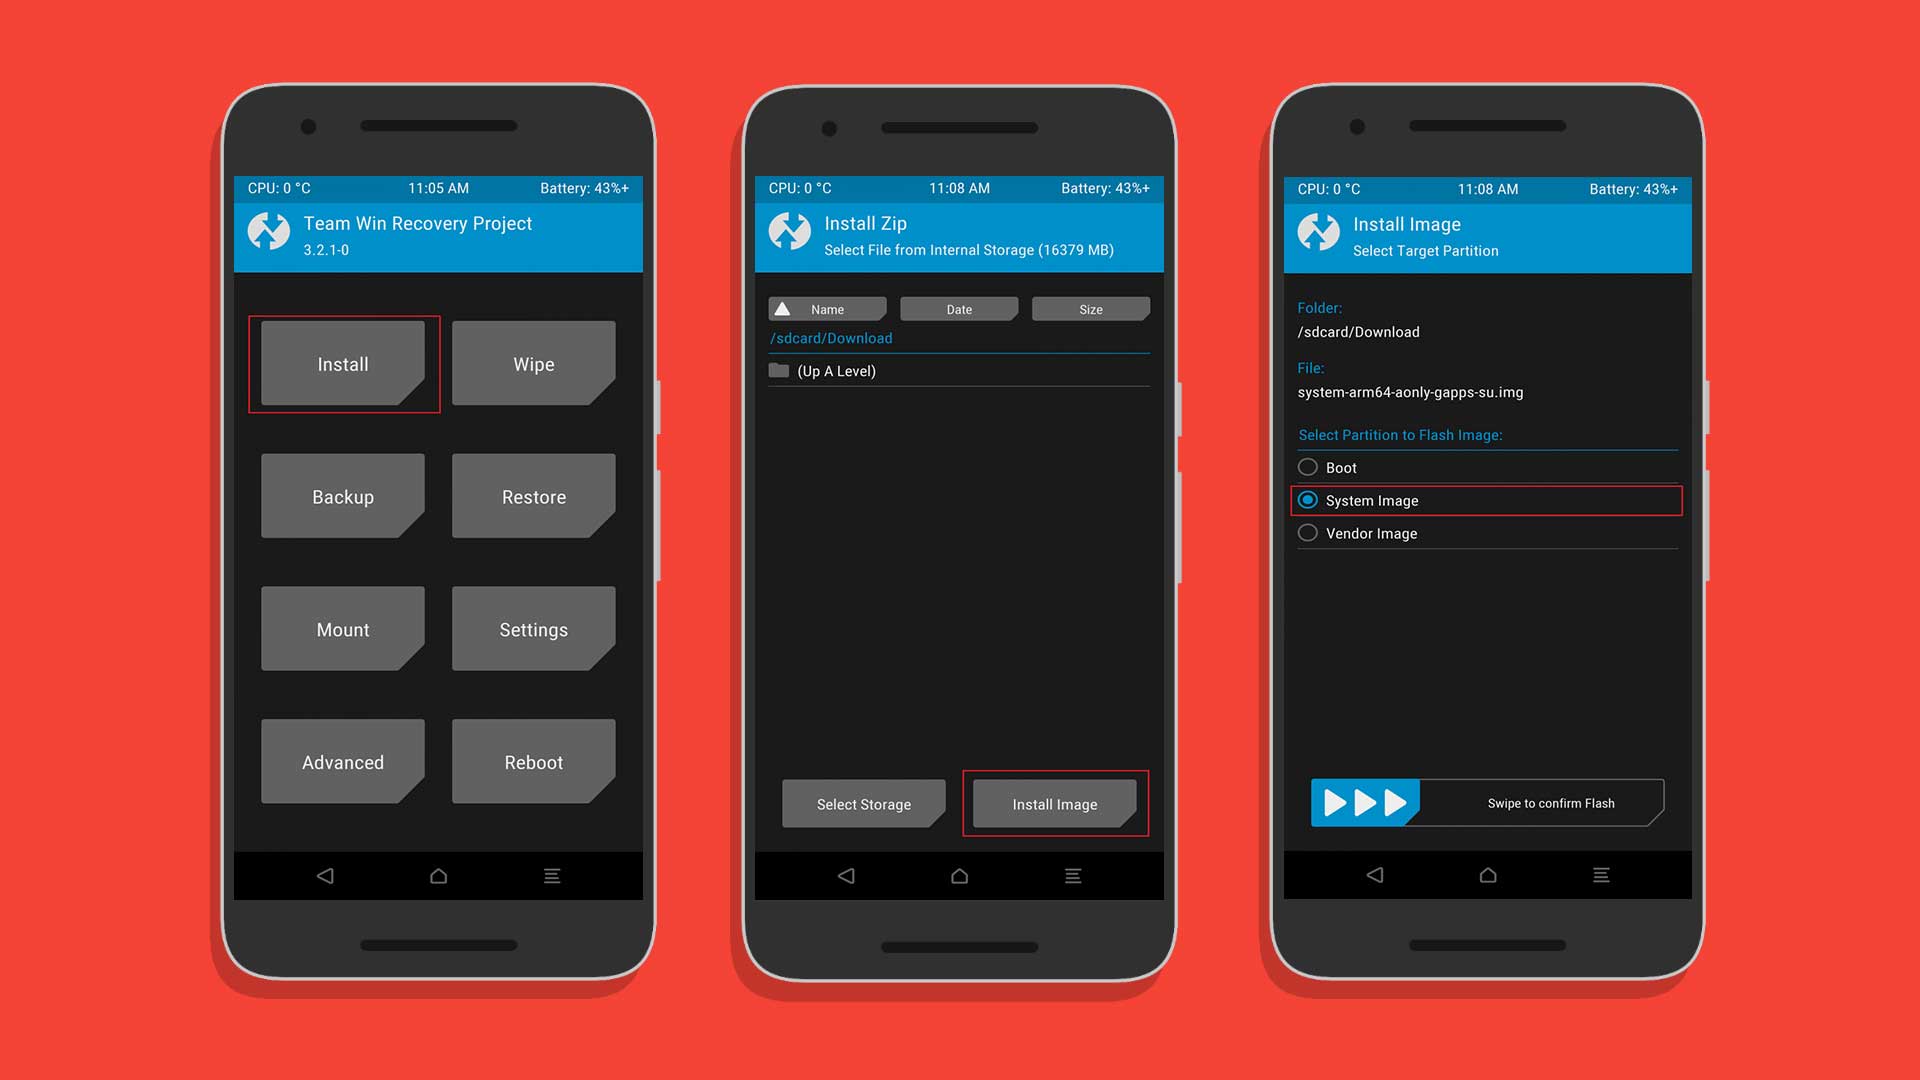
- Confirm the flash by choosing the system partition
- Once it is done, you can reboot your device and wait for a few minutes to boot up.
Flash via Fastboot
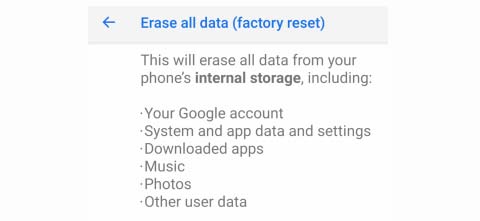
- First, do the factory reset on OnePlus Nord 2 5G. There are two methods to do it, follow anyone.
- Factory Reset When Powered On: To install without TWRP, you have to factory reset using your Umdigi A7 Pro factory reset option.
- Factory Reset via Stock Recovery: Reboot your OnePlus Nord 2 5G into stock recovery using a button combination or ADB command.
adb reboot recovery
- In your Stock Recovery, navigate using the Volume UP and DOWN button.
- Factory Reset When Powered On: To install without TWRP, you have to factory reset using your Umdigi A7 Pro factory reset option.
- Make sure to extract the downloaded GSI build.
- After resetting the factory ROM, you can now boot your device into bootloader mode using adb command
adb reboot bootloader.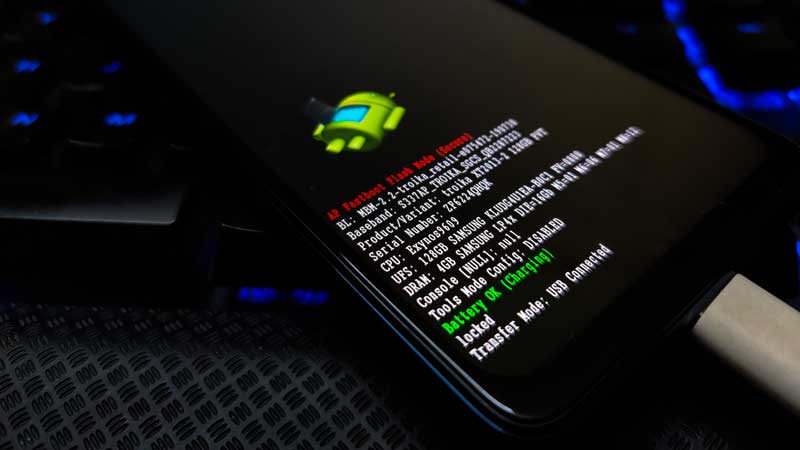
- Now open the extracted folder of GSI build, there, now open the command prompt window by holding the SHIFT KEY and Right Mouse click.
- In your command window, enter the command
fastboot erase system - To flash the system image, enter a command in the following format:
fastboot -u flash system name_of_system.fastboot rebootand wait for a few minutes to boot up.
We hope that this guide is helpful to you and you have successfully installed the Custom ROM on your OnePlus Nord 2 5G handset easily. If in case anything goes wrong or if you have any queries, feel free to ask in the comments below.
Credits to all the developer from XDA forum and 4PDA forum
Did you know?