In this guide, we will show you the steps to downgrade Google Pixel from Android 12 to Android 11 R. Google started rolling their second beta of Android 12 to the public after rolling their first one at Google I/O that brings a new revamped UI, new notification style, privacy dashboard, and many more to the table.
At the time of writing the Android 12 beta 2 is already made its way for the Pixel series of devices. Pixel 3 and onwards could now welcome tons of new and noteworthy features onto their devices. These include the likes of wallpaper-based theming styles, new screenshot edit options, Material YOU design, and plenty of others. However, as of now, they are in the beta phase.
Related Articles
For the unaware, these are intended for developers who could get acquainted with under the hood changes and codebases. These builds are among the most unstable ones and are usually accompanied by a few bugs as well. With that said, tech enthusiasts are always ready to test out cutting-edge features. If you are one of them and have installed the Android 12 but now are willing to revert your decision, then this guide shall help you out. Given here are the detailed instructions to downgrade to Android 11 R From Android 12 beta.

Page Contents
How to Downgrade Google Pixel From Android 12 to Android 11
Before we list out the instructions, there are a couple of requirements that you need to check-mark. Make sure that you meet all these prerequisites and then only proceed with the downgrade steps.
Prerequisites
- To begin with, take a complete device backup. This is because the below process will wipe off all the data on your device.
- Next up, enable USB Debugging and OEM Unlocking on your device. Head over to Settings > About Phone > Tap on Build Number 7 times > Go back to Settings > System > Advanced > Developer Options > Enable USB Debugging and OEM Unlocking.
- You will also have to unlock the bootloader on your device. If you haven’t done so yet, then refer to our guide on How to Unlock Bootloader via Fastboot Method on Android
- Likewise, install the Android SDK Platform Tools on your PC.
- Finally, download the stable Android 11 stable build for your device: Android 11 Factory Images
That’s it. These were all the requirements. You may now proceed ahead with the steps to downgrade to Android 11 R From Android 12 beta.
Instruction Steps
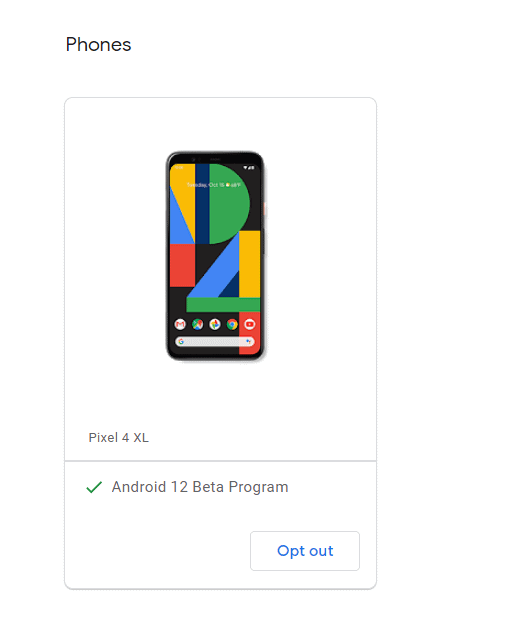
Before following the below method, you can try to opt out of the Android 12 beta permission from Google’s developer site.

Once you are done that, you will now get the official rollback OTA update which will allow you to downgrade from Android 12 to Android 11 without a computer. If in case, if you are not able to downgrade, you can follow our below method.
- To begin with, extract the downloaded Android 11 ROM from the platform-tools folder on your PC.
- Now connect your device to the PC via USB cable. Make sure USB Debugging is enabled.
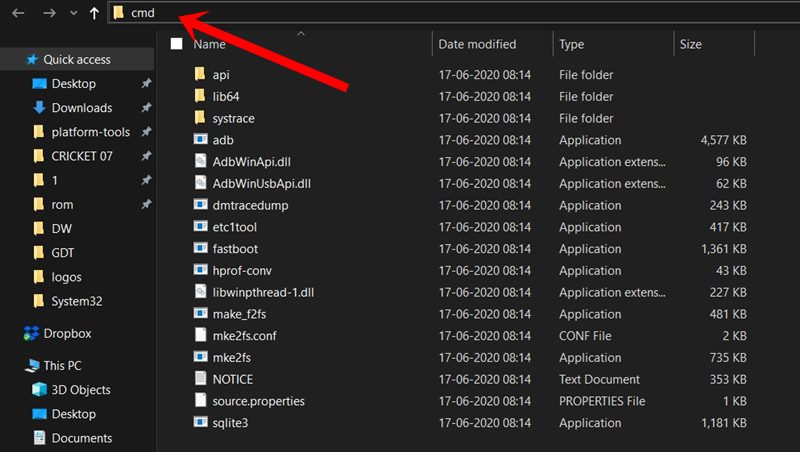
- Then head over to the platform tools folder, type in CMD in the address bar, and hit Enter. This will launch the Command Prompt.

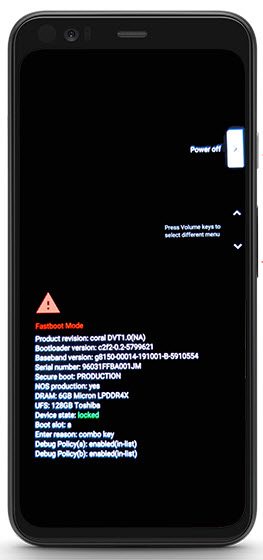
- Type in the following command in the CMD window to boot your device to Fastboot Mode
adb reboot bootloader

- Now use the below command to flash the Android 11 stable build:
flash-all
- This might take a few minutes. Once done, you may reboot your device to the OS via the following command:
fastboot reboot
That’s it. These were the steps to downgrade to Android 11 R From Android 12 beta. If you have any queries concerning the aforementioned instructions, let us know in the comments. Rounding off, here are some iPhone Tips and Tricks, PC tips and tricks, and Android Tips and Tricks that you should check out as well.
