In this tutorial, we will show you the steps to insert Google Drawings into Google Docs and Sheets. Both of these Office Suite software programs from the Silicon Valley giants have completely streamlined the workflow. To begin with, it negates the need to download any additional stand-alone software. Then the fact that all your files are automatically saved over to the clouds further adds to the ease of usability.
Along the same lines, its handy collaborative and link-sharing features deserve a few praises as well. Likewise, both these apps also allow you to add images and drawings. In this regard, you might use any software to draw and then add that diagram to the document as an image. However, there is now a much easier and shorter way of doing so. You could directly embed Google Drawings into Google Docs or Sheets right from the app itself. Let’s check out how this could be achieved.
Also Read

Page Contents
How to Insert Google Drawing into Docs and Sheets
Inserting drawings into Doc could take two different approaches. You could either create a new diagram right from the Google Drawing option baked into Docs and then insert it. Or if you already have a saved illustration in Google Drawing, then you could directly import it over to the Docs file. As far as Spreadsheets is concerned, it only has the option to insert a new drawing from the app, there isn’t any option as such to import drawings. The below instruction should make everything clear.
Embed Google Drawings inside Docs
- Head over to the Google Docs site and open the desired file (or create a new one).
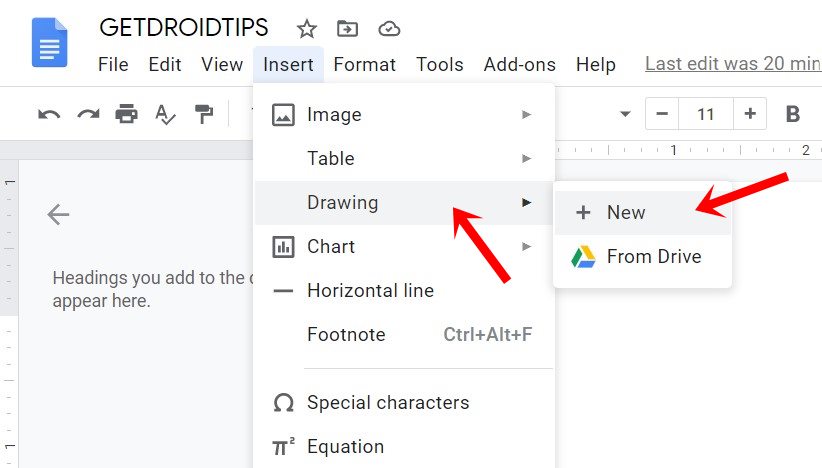
- Then go to the Insert menu situated at the top. Select Drawing > New.
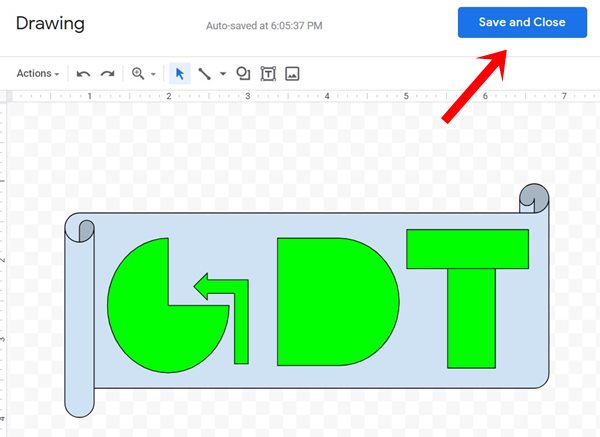
- This will open the drawing canvas. Create your illustrations using tons of provided options like Arrows, Shapes, connectors, Text insertion, Colors, etc.
- Once done, hit the Save and Close button situated at the top right. Your drawing will now be added to the Docs.
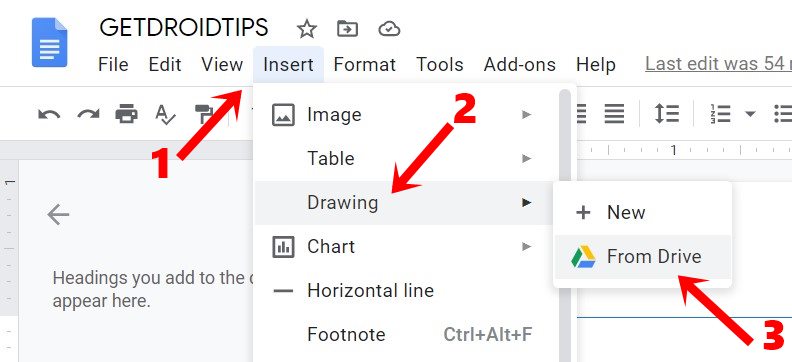
- On the other hand, if you already have a saved drawing, then head over to Insert and select the From Drive option. Then chose the drawing of your choice and hit the Select button.
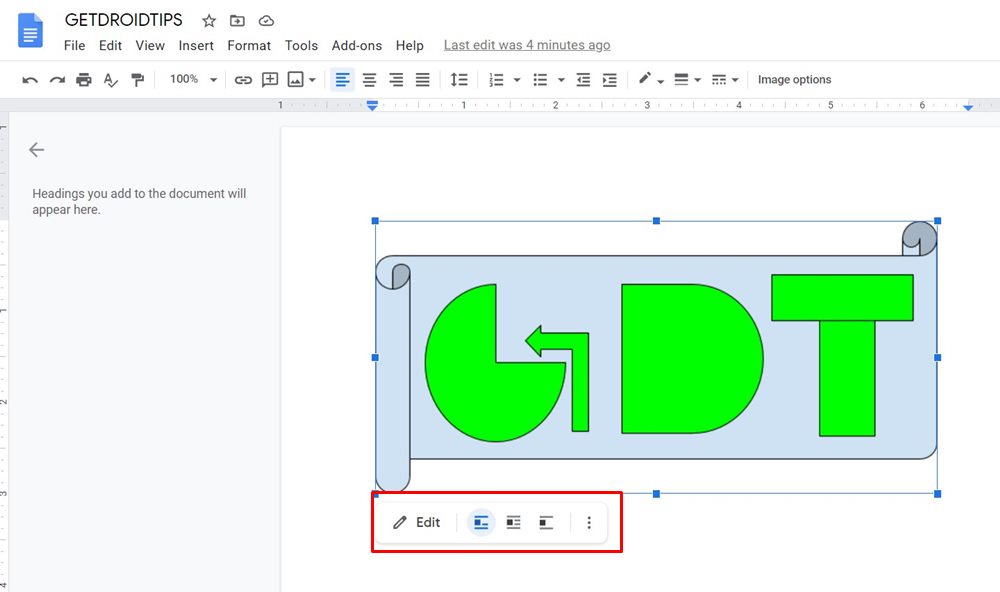
- Coming back to the embedded drawing, it also allows you to carry out further customizations like increasing or decreasing its size, changing its alignment, etc. Likewise, to make changes to the drawing itself, you could use the Edit option.
So these were the steps to embed Google Drawings into Docs, let’s now turn our attention towards Sheets.
In Spreadsheets
- Visit the Google Sheets site and load the desired file or create a new one.
- Head over to the Insert option and select Drawing from the drop-down menu.
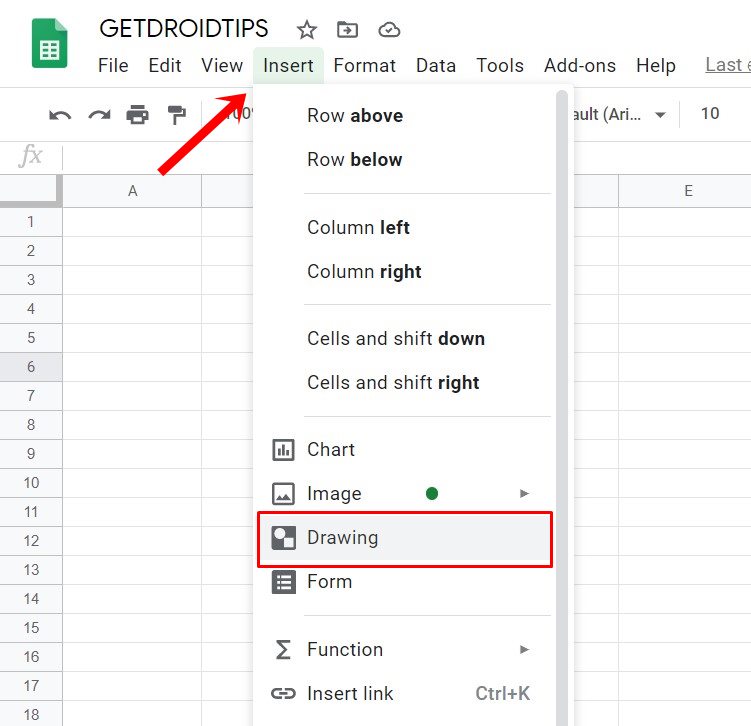
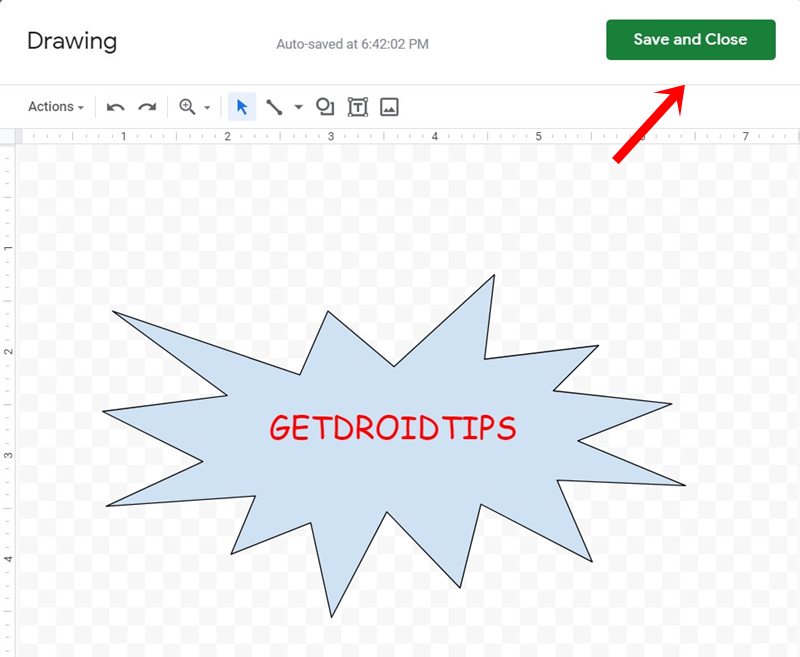
- Carry out the artwork using the plethora of provided options. Once done, click on the Save and Close button. The drawing will now be added to the sheet.
- To carry out further modifications, select the drawing and click on the overflow icon situated at the top right.
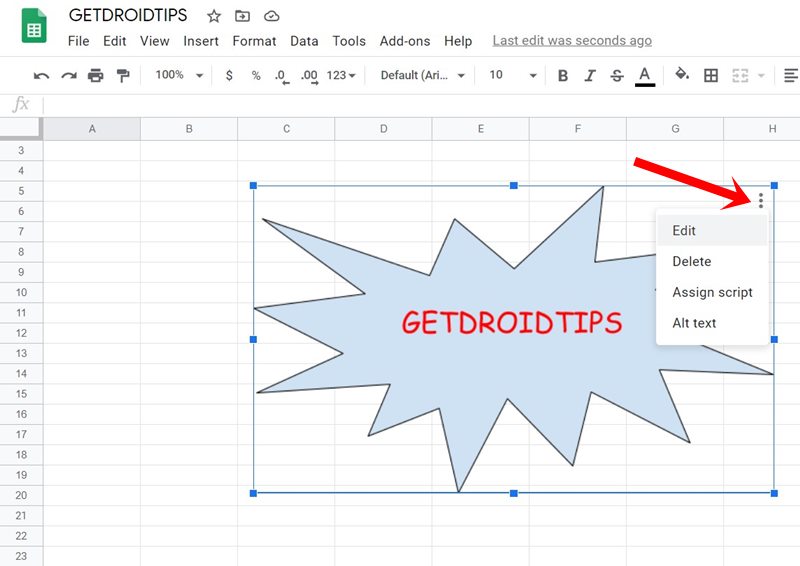
- There you could make use of the Edit functionality, add an Alternate text, assign a script or delete the drawing from the sheet.
That’s it. these were the steps to insert Google Drawings into Docs and Sheet. If you have any queries, do let us know in the comments section below. Rounding off, here are some iPhone Tips and Tricks, PC tips and tricks, and Android Tips and Trick that you would find useful as well.
