To help the specially-abled people operate their iPhones and iPad easily Apple provides the Assistive Touch feature. Using this feature, users can create virtual buttons on the screen of their Apple devices. Instead of having to use the physical buttons, they can use the on-screen buttons to execute various functions. This includes adjusting the volume, using a lock screen, using multi-finger gestures, and for restarting the device.
In this guide, I will show you how to enable the Assistive Touch feature on an iPhone or iPad. Also, I have put up in detail about how actually to put this feature to use. Apart from folks with special needs, normal users can also use the Assistive Touch feature. It comes in handy when the physical home button is not working. In fact, taking a screenshot is very easy with the virtual button. Double tapping(customizable) the virtual button can grab a screenshot. Let’s begin with the guide and check how to enable this helpful feature.
Also Read
iPhone Battery Draining Overnight, How to Fix?
How to Fix if YouTube Music Crashing on iPhone or After iOS Update
Fix: Apple Wallet Not Showing Add Card Option
5 Easy Ways to Turn Off iPhone without Power Button
How to Fix If iOS 16.4 Update Won’t install on iPhone
Fix: Google Chat Notifications Not Working on Android and iPhone
How to increase Cellular Data/ Mobile Data Speed on iPhone
Apple M3 Chipset: Everything You Need to Know

Page Contents
How to Activate Assistive Touch on iPhone or iPad
The steps I have mentioned below are based on the latest iOS 14.
- Launch the Settings app
- Scroll down to Accessibility > navigate to the tab Physical and Motor
- Under that tap on the first option Touch
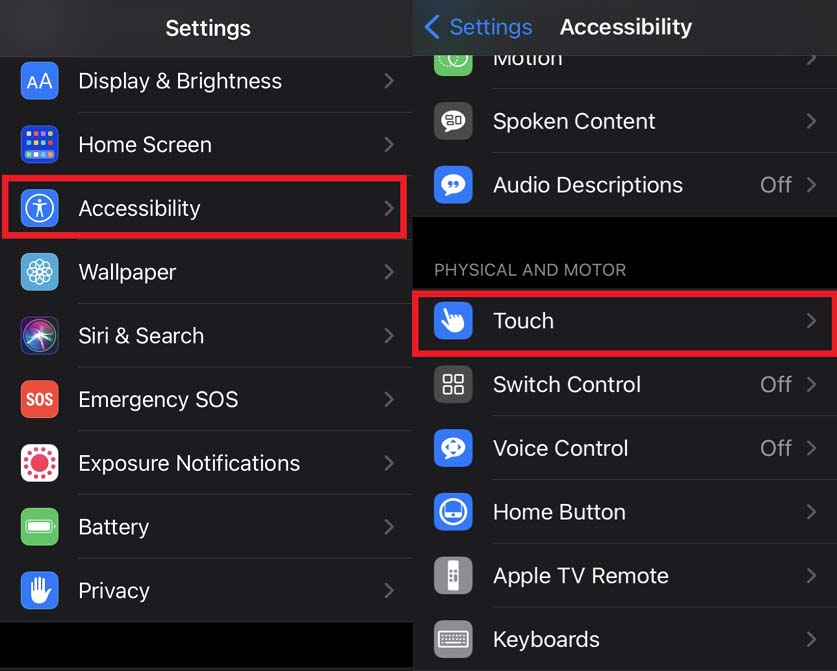
- Then you will see the AssistiveTouch feature which is by default set to Off.
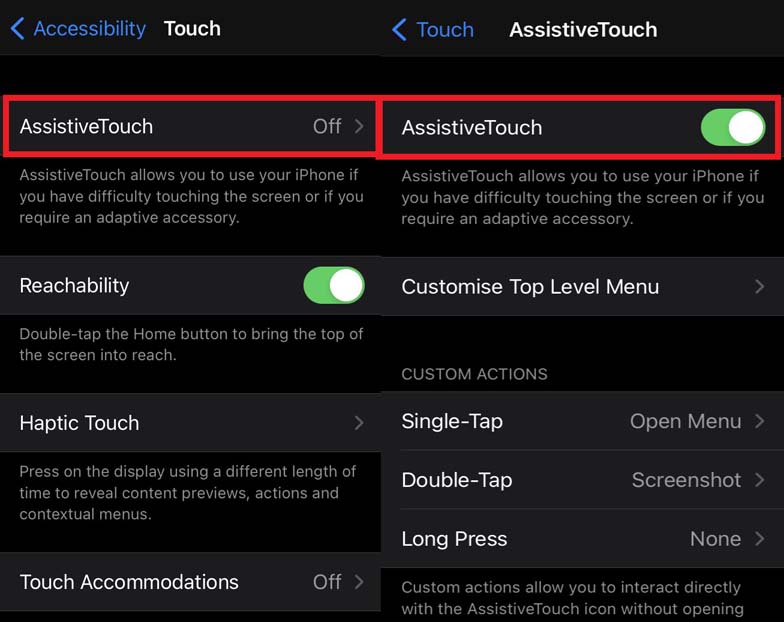
- Tap on the switch to enable it. Immediately you will see the virtual home button show up on the display
Using Virtual Home Button as Real Home Button
By default, the virtual home button is set to the menu. We need to tweak it a bit so we can use it as a home button.
- Under AssistiveTouch navigate to Custom Actions.
- Tap on Single Tap. It is by default set to the Open Menu.
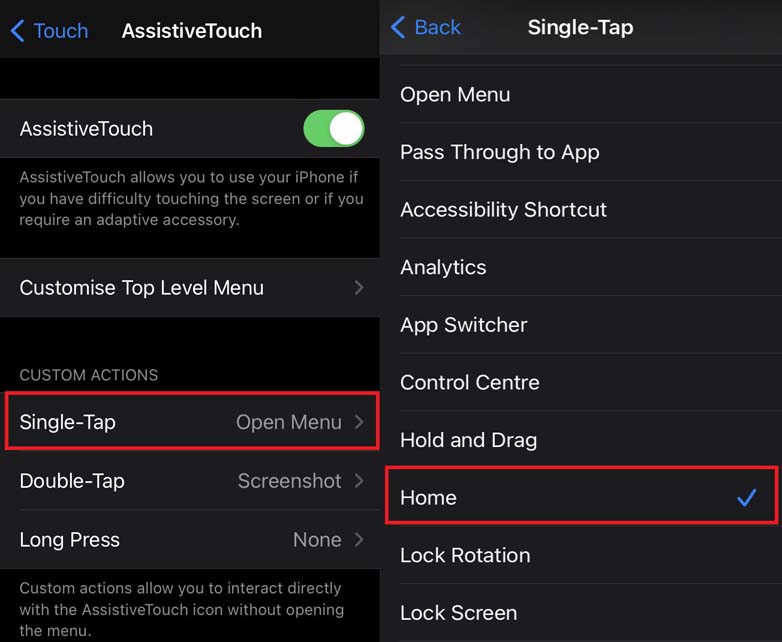
- Set it to Home from the list of items that expand from Single Tap.
Create Custom Gesture
To create a custom gesture,
- Open Settings app > go to Accesibility
- Tap on Touch under Physical and Motor
- Then select Create A New Gesture
- Swipe anything to create a new gesture [I did a Z type of gesture]
- Save it by giving any name
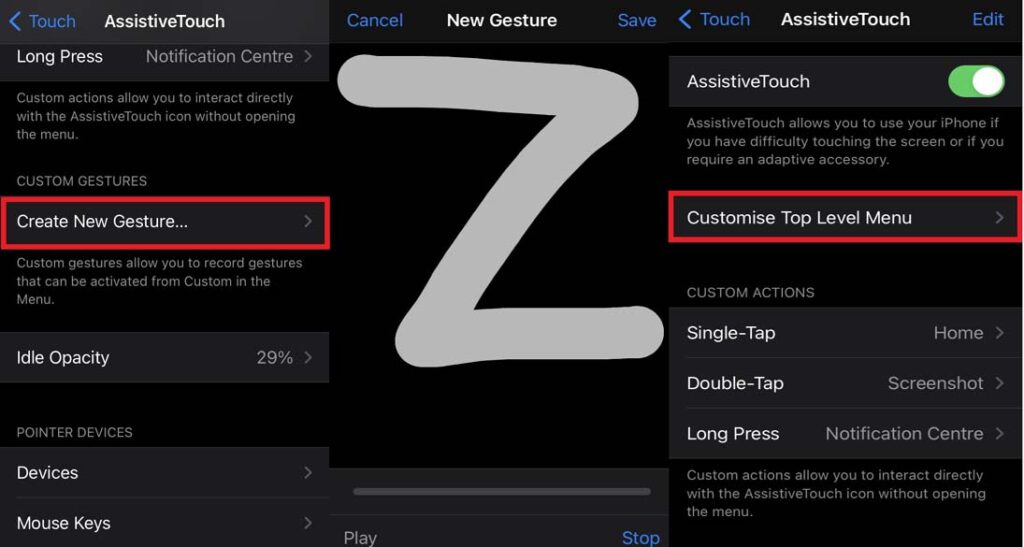
- Again under AssistiveTouch, tap Customize Top Level Menu
- Under Tap an Icon to Change tap on Custom
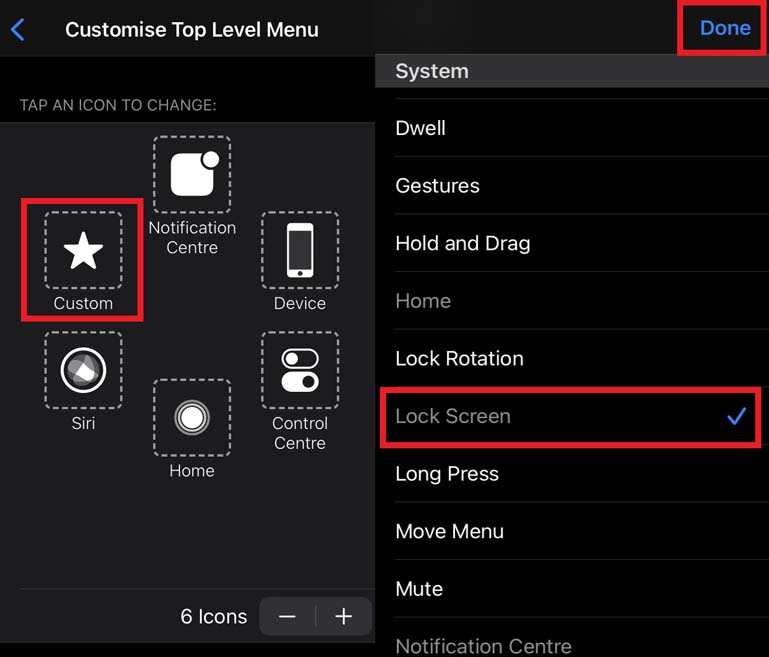
- From the list that opens up scroll down till you find the same gesture, you created a few steps ago under custom gestures. Tap on it to select. Then you can select an action for the custom button for example setting the lock screen.
Yes.! you can also add a custom virtual button under AssistiveTouch.
- Under AssistiveTouch tap on Customize Top Level Menu
- Tap on + and again Tap on + near the icon set
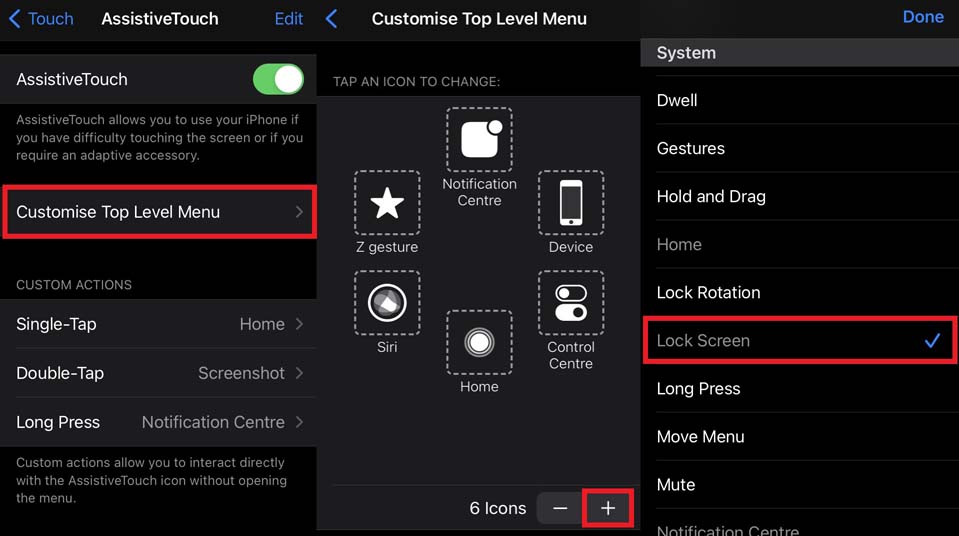
- Select an action for the custom button [for example I set it to lock screen]
- Then tap on Done
NOTE: You can also delete the custom button easily by simply tapping on the minus(-) sign at the bottom right corner under the Tap an icon to Change.
So, that’s all the primary setup you can create and tweak after you enable the Assistive Touch feature on your iPhone and iPad. The steps are entirely the same if you are setting it up on an iPad. Try this feature and enjoy it. I hope that this guide was useful to you.
