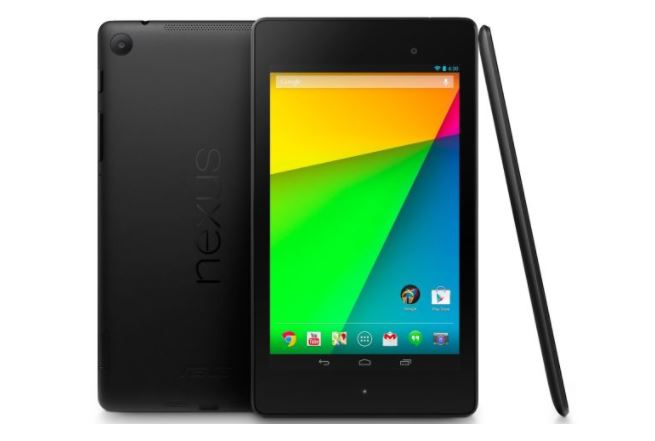
Google Nexus 7 2013 (flo) launched in July 2013. The phone came out of the box with Android 4.3 Jelly Bean and later upgraded to Android 6.0 Marshmallow. Here we will guide on how to download and install Resurrection Remix on Nexus 7 2013 which is currently based on Android 10 Q. The update brings all new Android Pie features and software version bumps to RR 8.0. Full Credits to Member Pranav-flo for sharing the Build of Resurrection Remix for Nexus 7 2013.
Resurrection Remix is one of the popular aftermarket custom ROM for any Android device out there. After the Android 9.0 Pie update, Resurrection is back with the new version based on Android 10 known as Resurrection Remix 8 or RR 8.0. The update is currently live for Nexus 7 2013 and few other devices. Now you can install the Resurrection Remix on Nexus 7 2013 by following our guide given below.
To install Resurrection Remix on Nexus 7 2013, your device should have Bootloader Unlocked and should be running on the latest TWRP Recovery. If you have all this, then you are good to try the new Resurrection Remix on your device. Follow our guide on how to upgrade, but before that. Let’s understand the features of Resurrection Remix ROM.

Page Contents
What is the Resurrection Remix?
Resurrection Remix is a custom ROM based on AOSP source code which means that its UI is no different from stock Android on the Pixel phones. The ROM brings many new features from popular custom ROM like Lineage OS, Slim, AOKP, Paranoid Android and many more. Along with all these features, Remix also brings an awesome combination of performance, customization, power and battery life compared to many custom ROM. Here is the quick recap of what’s on Android 10.
What’s on Android 10 (Q)?
Google has officially unveiled the latest version of Android OS called Android 10. The update is already going live for Pixel series devices. It brings plenty of new features to the device system like system UI, new gesture navigation, improved privacy and location control. The update also offers enhanced app permissions, foldable display support, security features, system-wide dark mode, etc.
The Android 10 also offers built-in call screening, multi-camera API, smart replies in the notification panel, 5G support, improved call quality, bubble feature, live caption, and more. While the latest version also improves battery life, Focus mode which is similar to the Do Not Disturb mode, etc. Apart from that Android 10 also features 65 new emojis. It also comes with direct audio streaming support to hearing aid devices.
Steps to Install Resurrection Remix on Nexus 7 2013:
Follow this guide and download the TWRP recovery, drivers and things to start with.
Pre-Requisite:
- Supported device: Nexus 7 2013
- Charge your phone: Make sure to charge before upgrading your device to at least 50% or more.
- USB Drivers: Download Google USB Drivers
- RR Flashable Zip file: Download Here
- Download Any Gapps File:
Instructions to Install
- First of all, You need to enable the developer option and activate the OEM unlock and USB debugging.
- Now you need to unlock the bootloader on your Nexus 7 2013.
- Once you have unlocked, you must install the latest TWRP Recovery on Nexus 7 2013.
- Now the guide will be easy, boot into TWRP Recovery
- You need to Decrypt and Re-Encrypt Data Partition on Nexus 7 2013.
- You can now take a complete backup of your ROM using TWRP Recovery.
- Now you need Wipe System Data on TWRP Recovery
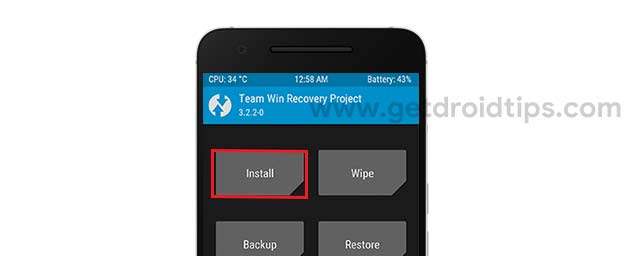
- Tap on the Install Button on your TWRP menu

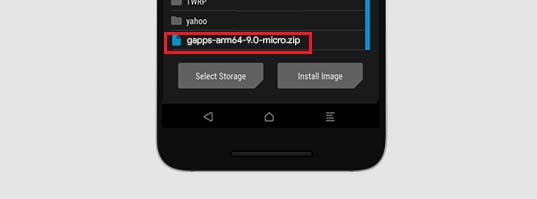
- Look for the installation zip file in the internal storage [ROM and Gapps]
- First, install the ROM by tapping on the Resurrection Remix zip file

- Now swipe to confirm the flash and that’s it! You have successfully flashed the Resurrection Remix on your Nexus 7 2013.

- Now flash the Gapps zip file by tapping the Install button again and select the Gapps zip file

- You can now reboot to enjoy Resurrection Remix ROM on Nexus 7 2013.
- If you want to root you can either try SuperSU root or you can try Magisk root.
That’s it! I hope you have installed the Resurrection Remix on Nexus 7 2013 successfully. Leave a comment or feedback down below. Thank you!.
