Microsoft has recently released or you can say announced the much-awaited Windows 11 after plenty of leaks and rumors around the web for a while. Now, it seems that even though so many Windows desktop/laptop users have powerful configurations, they’re getting the “This PC Can’t Run Windows 11” message. So, desperate users are searching Why Can’t my PC run Windows 11 and How to Fix it?
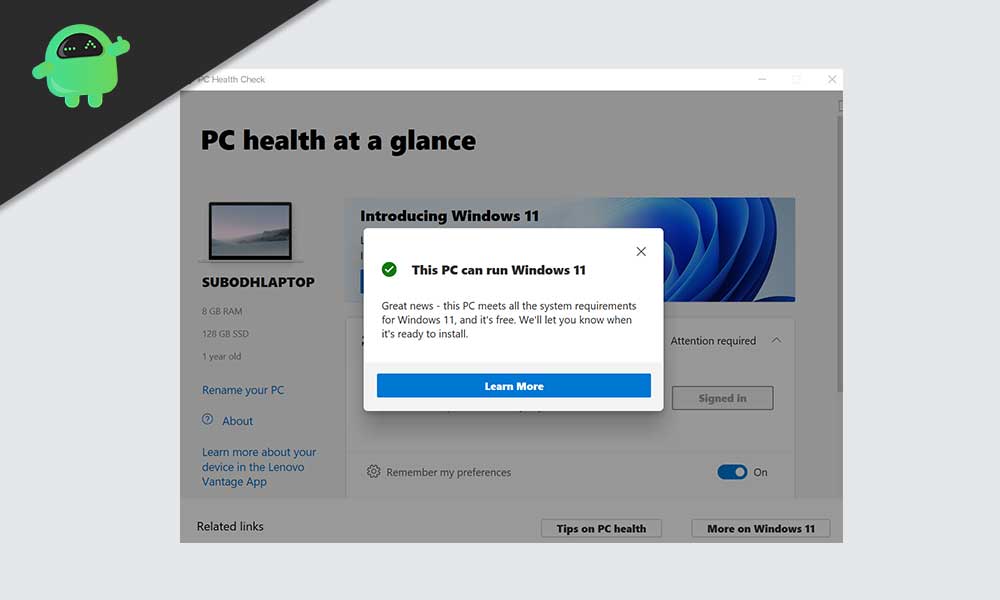
Well, Microsoft has officially provided a tool called ‘PC Health Check’ that basically scans your PC and the system requirements. It’ll tell you whether your PC is capable of running the latest Windows OS version or not. Sadly, plenty of existing Windows 10 users are getting the not-compatible message which literally ruins their hope of using the official build by any means. So, if you’re also one of them, check out the working solution.
Also Read

Page Contents
Why Can’t my PC run Windows 11?
To be very precise, you should check out whether your PC configuration is meeting all the requirements of Windows 11 completely or not. If you’re not sure about it, make sure to check the system requirement details below.
- Processor: 1 gigahertz (GHz) or faster with 2 or more cores on a compatible 64-bit processor or System on a Chip (SoC)
- RAM: 4 GB
- Storage: 64 GB or larger storage device
- System firmware: UEFI, Secure Boot capable
- TPM: Trusted Platform Module (TPM) version 2.0
- Graphics card: Compatible with DirectX 12 or later with WDDM 2.0 driver
- Display: High definition (720p) display that is greater than 9” diagonally, 8 bits per color channel
Please Note: You can also check out the list of Windows 11 supported Intel, AMD, and Qualcomm processors.
Also Read
Well, there is no specific formula that whether your computer is compatible with Windows 11 or not. Even if you have a modern PC or powerful specs, the PC Health Check tool may show the “This PC Can’t Run Windows 11” notice to you. But that doesn’t mean your PC actually doesn’t support it.
Yes! The chances are high that although your PC is compatible with Windows 11, the incorrect report by the checkup tool or disabled TPM or disabled Secure Boot feature is somehow causing the incompatibility issue.
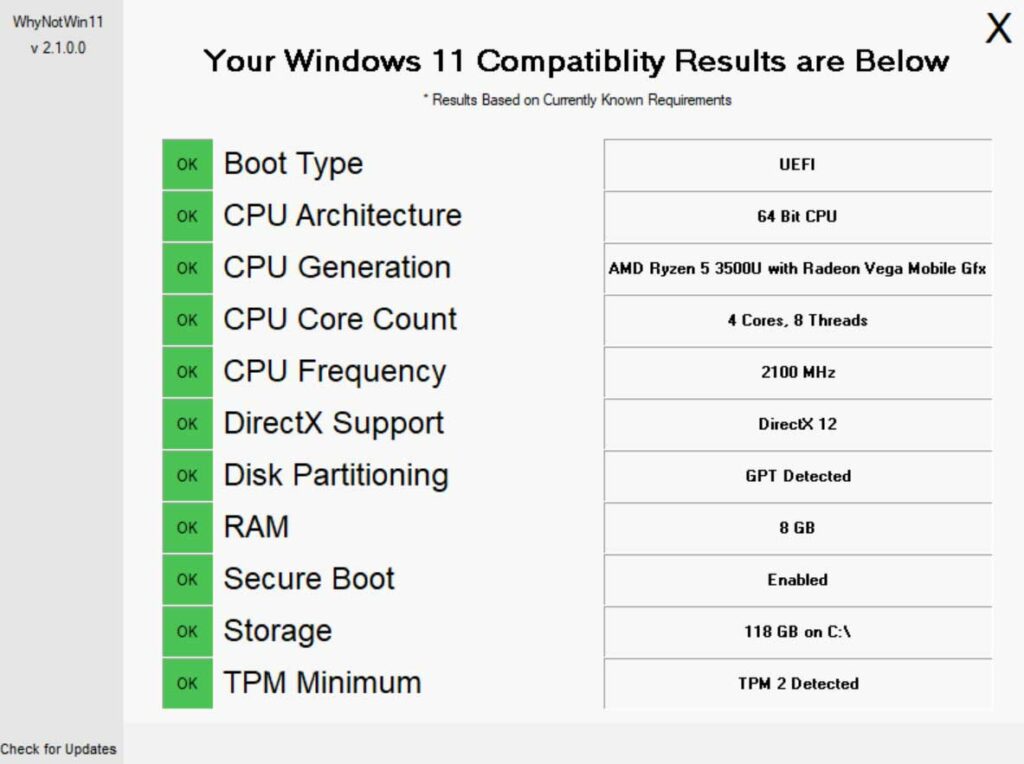
So, it’s better not to completely rely on the PC Health Check tool as Microsoft has also acknowledged that there are some issues with the incorrect analysis and the team is working on it. Meanwhile, you can run the WhyNotWin11 portable tool from Github to cross-check whether your PC is capable or not.

Read Also: Download Windows 11 ISO Leaked Build 21996.1
How to Fix it?
There are a couple of possible solutions mentioned below that should gonna help you out of this issue completely. So, without wasting any more time, let’s jump into it.
1. Enable TPM from BIOS
TPM (Trusted Platform Module) is a security chipset that’s designed to provide hardware-based security functions on the specific PC depending on the configuration. This is not a new thing and most of the PCs do have the latest TPM version.
Now, you may ask what is the latest TPM version? It’s 2.0 as of now and Windows 11 requires TPM 2.0 too. But the chances are high that maybe it’s disabled by default. Therefore, the PC Health Check tool may report the incorrect message.
If it’s disabled on your PC, then you’ll have to open the BIOS menu and enable TPM 2.0 manually. But you’ll have to check whether your PC has a compatible TPM version or not.
- Click on the Start menu > Search for Windows PowerShell.
- Now, right-click on it and select Run as administrator.
- If prompted by UAC, click on Yes to proceed.
- Once the PowerShell window opens, type the following command and hit Enter:
get-tpm
- In the first couple of rows, you’ll be able to see whether the TPM is present on your computer or not and if it’s enabled or not.
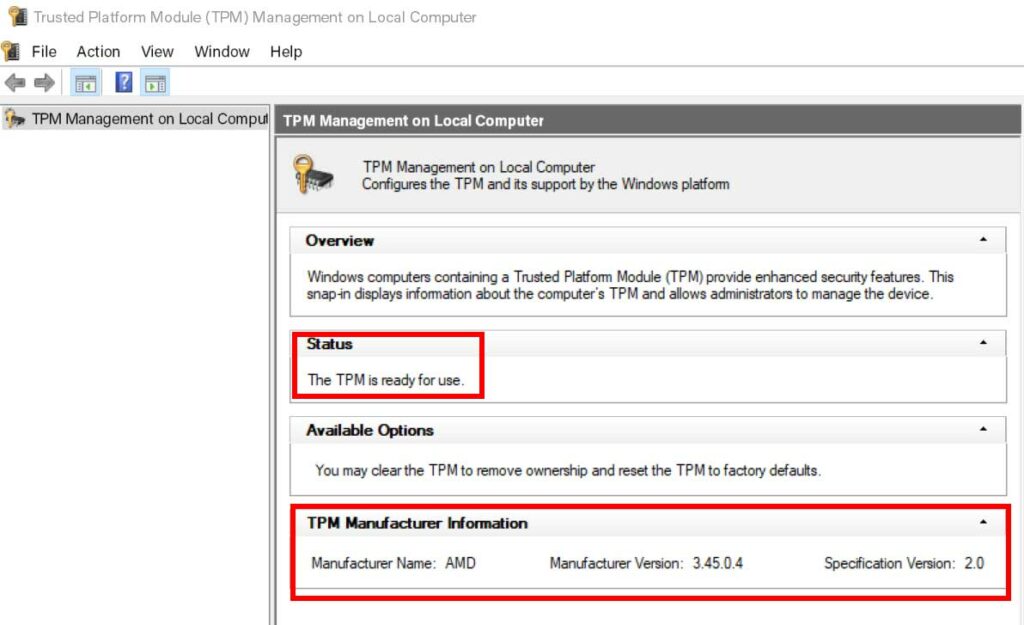
- If it’s enabled, then check out the version by pressing the Windows + R keys > Type tpm.msc and hit Enter > Here you’ll see TPM Status and TPM Specification Version.

If it’s not enabled on your computer, then follow the steps below:
- First of all, shut down your computer properly.
- Now, press the power button to turn it on and during startup, open the BIOS or UEFI menu by continuously pressing F1, F2, F10, F11, DEL multiple times depending on the model.
- Once the BIOS or UEFI menu opens, click on the Security option.
- Next, search for TPM and check if it’s enabled or not. If not enabled, do it right now.
- Just change the option and make sure to Save and Exit according to the key instruction.
- Finally, restart your PC.
Please Note: Some computer users may have to go to Advanced Settings > Security > Trusted Computing or Settings > Miscellaneous > Trusted Computing to enable TPM.
2. Enable Secure Boot
Secure Boot is a security standard for the PC that basically helps the hardware to boot securely using the signed software that has been approved by the manufacturer. It’s one kind of bootloader thing that you have heard from Android users which helps the computer and its system to protect from external malware or attacks.
So, coming to this generation, Microsoft has now made it mandatory for your PC to support Secure Boot in order to compatible with Windows 11. As the Secure Boot option can be found on every computer, you’ll need to turn it on from BIOS. But make sure to check whether the Secure Boot feature is enabled on your PC or not. To do so:
- Press Windows + R keys to open the Run dialog box.
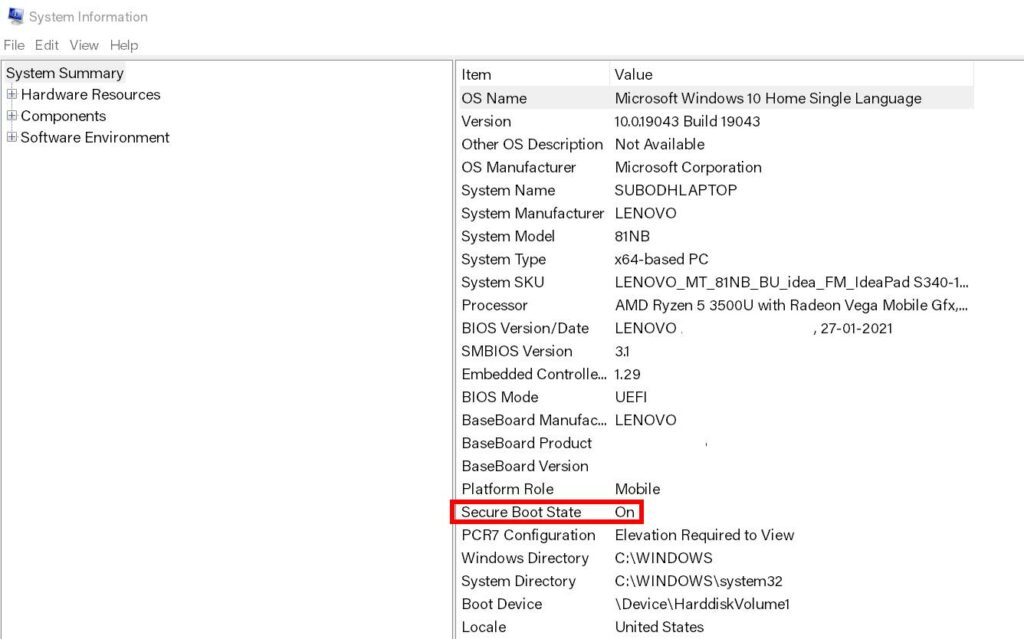
- Next, type msinfo32 and hit Enter to open System Information.

- Once the window opens, you can see ‘Secure Boot State’ as On/Off.
If it’s enabled then you’re good to go. But if it’s not, then follow the steps below.
- Just open the BIOS or UEFI menu on your computer during startup using the steps mentioned above.
- Head over to the Boot tab > Go to the Advanced menu.
- Search for the Secure Boot menu > Check whether it’s enabled or not.
- If not, make sure to turn it on.
- Once done, just Save and Exit by using the key as instructed on the screen.
- Enjoy!
That’s it, guys. We assume this guide was helpful to you. For further queries, you can comment below.
Also Read
