Many players have complained that the Nintendo Switch dock is not working and it won’t connect to the TV. Don’t jump to conclusions that the gaming console has faulty components because it could be a minor issue. The dock station is cleverly implemented, so it can push 60 fps on a 1080p television. The console engineers have developed the technology with the combination of multiple connectors such as HDMI and charging connectors. I have compiled a list of solutions that will fix Nintendo Switch dock issues.
Also Read
Is it Possible to Add Nintendo Switch Friends on PS4 or PS5
Fix: Minecraft lags on Nintendo Switch After An Update
Fix: STAR WARS The Force Unleashed Not Loading or Crashing on Nintendo Switch
Fix: Nintendo Switch Stuck on Logo Screen
When Will Roblox Come to Nintendo Switch | Release Date
Fix: Nintendo Switch/OLED Touch Screen Not Working
How to Fix Nintendo Switch Not Charging Problem
Fix: Nintendo Switch Games Keep Corrupting or Damaged
How To Download Faster On Nintendo Switch in 2022
How To Track a Lost Nintendo Switch
Page Contents
Why Nintendo Switch Dock is not connecting with the TV?

The portable gaming console is powerful enough to display the game on a larger screen, and it is possible with the help of the dock station. The technology allows the users to charge the Nintendo Switch and game on a larger screen.
There are a lot of pins, cables, and configuration that works in the background to make it work. One blockage will interrupt the entire service, and Nintendo Switch won’t connect with the TV.
1. We have to take the technology into the account and it has too many mediators to create a connection between console and TV. You got the dock, cables, settings, and compatibility, which increases the potential of blockages.
2. The HDMI cable is the main mediator that starts with the dock and goes directly into the TV. You need to check the HDMI cable condition and find out whether it is causing the problem or not.
3. Configuration!
4. Incompatible hardware or TV.
5. The manufacturer designed the dock to power the entire setup but the HDMI cable is not receiving enough power to transfer the information to the TV.
6. I recommend the users stick with the default settings when they are connecting the console to a new TV via a dock. You can perform a reset then try connecting the dock with the new TV.
We cannot erase the hardware damages or wear & tear into the equation. I have compiled a list of working solutions that will help you view the game on a TV without effort.
Fix: Nintendo Switch Dock Not Working – Won’t Connect to TV
I’m asking you to keep the television remote nearby, and Nintendo Switch is designed to work with older TVs, so it doesn’t matter if you have an Android TV or regular LED TV.
Configure TV Settings
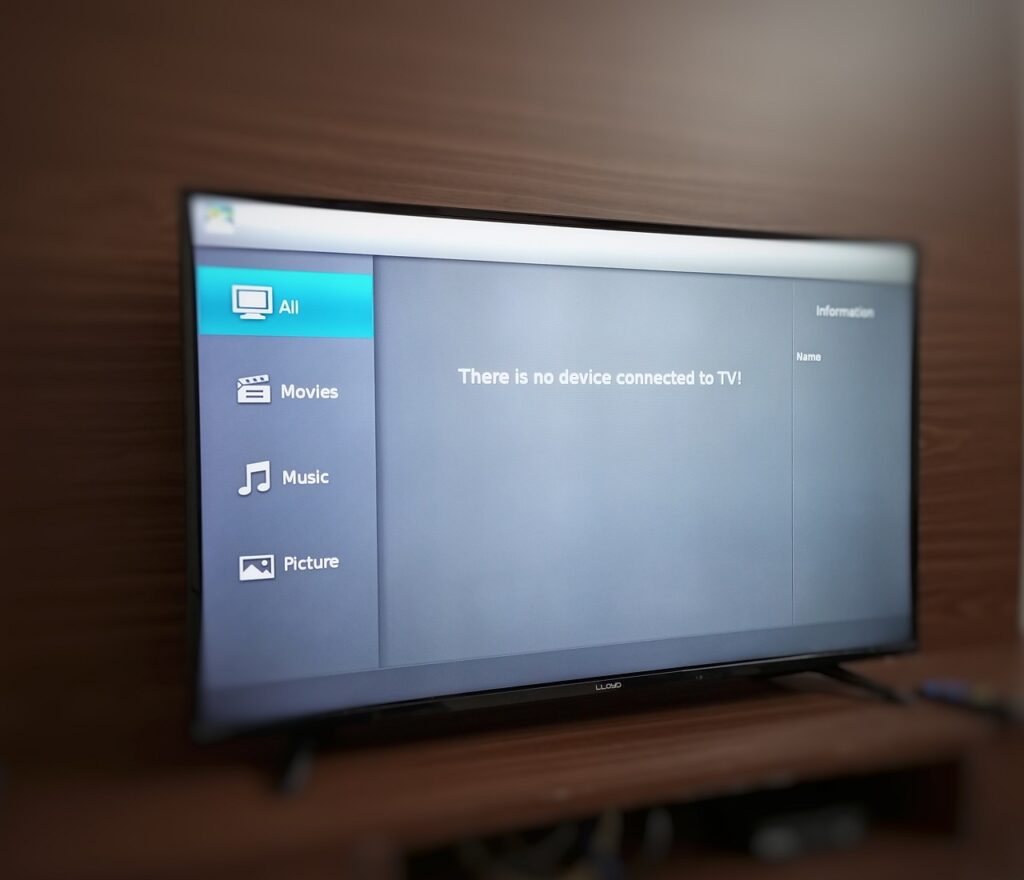
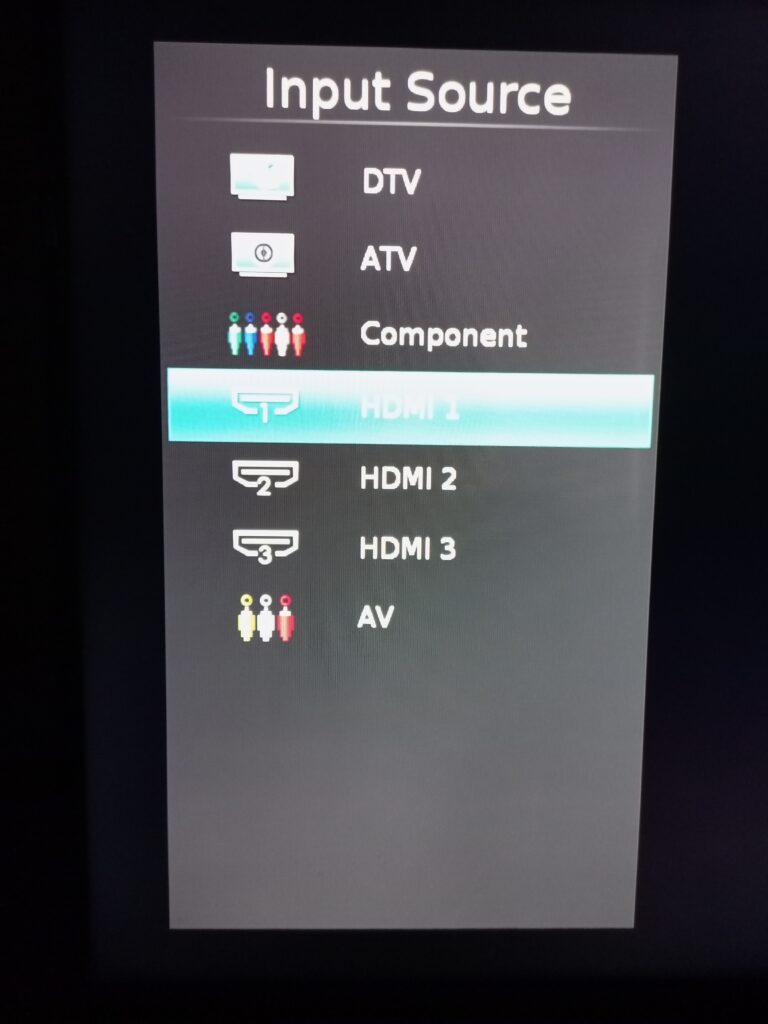
I won’t be using an Android TV or high-end TV for the tutorial, so you don’t have to worry about the modern technology and its interface. Much older television has multiple connectivity ports in the back panel, so the manufacturers added multiple options in the settings. You have to choose the right HDMI input source in the TV settings, and that’s when it will work.
1. Turn on the set and open “Settings” from the remote.
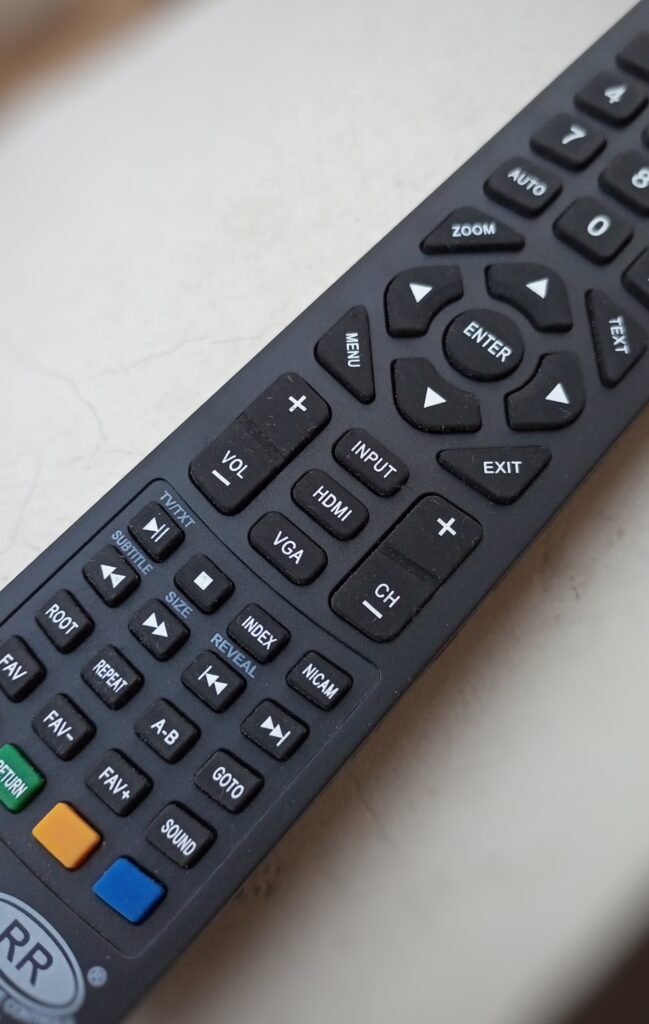
2. Find “Input” on the remote, and it could say anything on your device.

My remote has dedicated VGA and HDMI keys on the remote, which are useful to access the ports directly.
3. Choose the HDMI port from the selection.

4. Switch between HDMI 1, HDMI 2, and HDMI 3, but you should wait for ten seconds for the TV to read the signals from the console.
5. The game will load on your larger screen.
Many older TVs are slower, and they take ten seconds to display the image from Nintendo Switch or similar devices. Do not worry about the loading delays, and focus on choosing the correct input source.
Set Resolution Manually
The HDMI technology is wonderful and made cross-platform connections possible. I could never imagine connecting a portable device directly to the television back in the day. The High-Definition Multimedia Interface automates most of the manual work, and you don’t have to spend additional time configuring it.
However, I would say that for modern PlayStation, Windows laptop, MacBook, Linux machines, and others. Nintendo Switch is a different story because the dock is the mediator connecting the console and the larger screen. So you have to meddle in the process and set the TV resolution manually.
1. Go to “System Settings” from the dashboard.
2. Swipe down and choose “TV Output” from the options.
3. Select “TV resolution” from the options.
4. The software default setting detects the TV resolution “Automatically”, but you have to select the resolution manually.
A. Automatically
B. 480p
C. 720p
D. 1080p
You should start with 480p, then move to 720p, and then set 1080p manually. Much older hardware doesn’t have sophisticated software to allow the third-party devices to detect the resolution and transmit the signals. Now, you should be able to choose the TV resolution manually, and Nintendo Switch transmits correct output signals.
Faulty Dock
We have set the TV settings and selected the correct resolution to end the debate. We have to focus on the dock since it is the mediator between the console and the larger screen. There is a high potential that the dock might be faulty, and we should strike out the possibility from the list.
1. Remove the console from the dock.
2. Press the power button to turn the console screen black.
3. Make sure the dock is turned on and connected to the power socket.
4. Reset the console in the dock.
5. The charging indicator should appear in the Nintendo Switch.
The dock is working if the battery indicator displays the icon with green color filled in it. The dock is a charging station and a mediator to expand the device’s horizons.
Power Cable
Electronic products suffer from wear and tear, which is a common factor. Buying a new replacement from the official store is an expensive deal, and most consumers purchase third-party parts from the online store.
There is no doubt that the third-party power brick is functional, but the question lies in the power output. The power brick should have produced enough output to complete all tasks. Unfortunately, the non-branded power bricks don’t have enough juice to supply power to all components equally, and that’s
why the genuine parts are expensive compared to the generic versions.
I’m not asking you to purchase a new one immediately, but you should clear the doubt by visiting a nearby repair store and asking them to provide a power brick. You can confirm the power cable or power adapter capacity.
Reconnect Cables
You should take time to remove the back protective panel and remove the cables from the Switch. Many users don’t clean the console from time to time, and it is one of the reasons why the manufacturer added a protective panel in the dock.
Remove the rear panel to access the cables and clean them with a dry cloth. Yes, you should clean the HDMI, power cable, and USB cable. Let me simplify the cleaning process and restore the connections.
1. Turn off the console, dock, and Windows machine.
2 . Remove the dock back panel.
2. Disconnect the cables from the Switch dock.
3. Use a dry microfiber cloth and clean it gently.
4. Remove the cable from the TV or Windows PC and clean it.
5. Reconnect the cables.
6. Turn on the dock, console, and TV/Windows PC.
Double-check the connections and make sure they are resting in the socket properly. Dust is a leading cause of hardware failures, and it affects smartphones, computers, portable devices, and others.
Faulty HDMI Cable
The manufacturer ships Nintendo Switch with HDMI cable, and it is made out of high-quality material and is made in Indonesia. There is no doubt that the HDMI cable will last longer, but it is prone to wear & tear.
Millions purchase new HDMI cables from online shopping sites because they do end up getting damaged with time. Unfortunately, it’s not easy to maintain the condition of the cable, and the cable may be damaged.
Make sure your TV or Windows PC supports HDMI 1.3/1.4 or later version or later. Older motherboards and television released before 2009 don’t support HDMI 1.4 versions. Of course, it’s a minor probability that your TV or Windows machine doesn’t support the latest generation HDMI version.
Soft Reset Nintendo Switch
The manufacturer has added an option to fix the software-related issues in the Switch. Soft reset doesn’t wipe the data in the Switch and it helps the software function. Let me show you how can soft reset the software and I have simplified the process.
1. Press and hold the Switch power button.
2. Do not let go of the power button until the device shuts down.
The Switch takes fifteen seconds to sleep in slumber.
3. Wait for a minute.
4. Press and hold the Switch power button until the Switch turns on.
You have successfully soft reset the console, and you can try to connect the device to a TV. Nintendo Switch will display the content on the TV screen, and you shouldn’t have complications anymore.
Conclusion
There is a high probability of hardware failure, and if the Nintendo Switch is under warranty, then you should book an appointment. Allow the authorized service center to take a look at the console & dock and conclude the reason behind the failure. The authorized engineers will help you in identifying the problem, and you can decide to repair it or buy a new one instead. Let us know how you solved the problem when the Nintendo Switch dock is not working and not connecting with the TV.
Also Read
How to Fix Nintendo eShop Not Available in Your Country/Region
Fix: Nintendo Switch Not Seeing 5Ghz WiFi
Nintendo Switch Keeps Asking For Password, How to Fix?
Pokemon Scarlet and Violet Connection Issues, Is There A Fix?
Fix: Nintendo Switch Sound But No Picture
5 Best Nintendo Switch Emulators for PC (100% Working)
How To Check If Your Nintendo Switch Is Moddable
