Although one thing that annoys everyone is the watermark in the right side corner of the screen, it is okay to have a watermark on an unactivated installation, but it can be quite frustrating to have one on an activated system. So in this article, we are going to explain how you can remove the evaluation copy watermark from the Windows 11 preview builds easily and Quickly.
By now, you would have already known that Windows 11 is available for users to test as a “Developer Preview” or “Insider Preview” build. What this means is that the product is not yet final to get released to the masses. Instead, only people who enroll in the Insider program will receive the update to Windows 11. That too, assumes you are running compatible hardware.
All Windows 11 builds come with a trial period, and after that trial period ends, users are supposed to enter the registration or product key code in order to activate the full features of the operating system. If not done so, an evaluation watermark will keep appearing on the right-hand side of your screen all the time, which is very annoying. There are multiple ways by which you can get rid of this watermark from your Windows 11 PC.
Also Read
How to Fix Laptop Hotkeys Not Working on Windows 11
Fix: Touchpad Not Working After Windows 11 Update
Fix: Windows 11 Clipboard History Not Working
Fix: Miracast Not Working on Windows 11 and 10
How To Fix External Hard Drive I/O Device Error in Windows 11/10
How to Fix if 4K Videos Not Playing on Windows 11
How to Fix If Brightness Slider Missing on Windows 11 and 10
TranslucentTB Windows 11 Not Working, How to Fix?
Fix: Mouse Scroll Wheel Jumps Up and Down on Windows 10, 11
How to Enable New CoPilot AI in Windows 11 23493
Page Contents
How to remove the Evaluation Copy watermark from Windows 11?
Windows tends to show watermark in their product as a reminder to people who are using it. For instance, if you have not activated your Windows installation, it will show you a watermark in the right side corner saying that “Windows is not activated.” This might be annoying, but it is a good way to remind you to activate your installation. Especially in Corporate environments, it could be a lifesaver to quickly identify unactivated installations.
In a similar manner, Windows shows a watermark on the Preview or Insider builds. Just in case you don’t know whether you are running a stable or preview build. So that you can quickly uninstall the preview build and switch to a stable one in case you encounter any issues with your work.
Introducing Universal Watermark Disabler
The Universal Watermark Disabler or UWD is a freeware program for Windows that allows to quickly remove Watermarks from Windows installation. Since many people use it, you can consider it safe, especially when they are running Developer previews, so that they can get rid of those annoying watermarks on their screen.
Also Read
Step 1: Download Universal Watermark Disabler
You can easily download the Universal Watermark Disabler from the official site. The tool is available on the Win Aero website. So here is how you can download the tool for free:
- Go to the official download site for the UWD tool by clicking here.
- Scroll down on the page, and click on the appropriate download button.
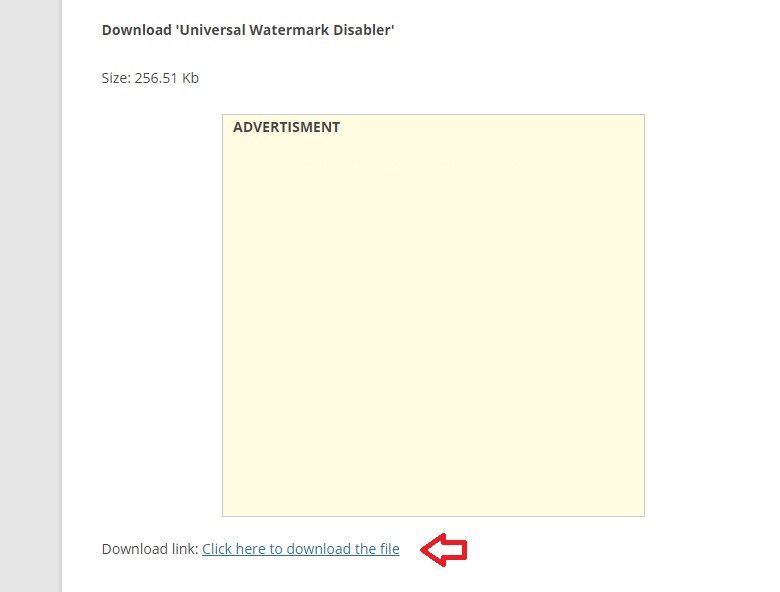
- Close any Advert prompts to begin downloading the file.
Just make sure that the file name should be “UWD.zip.” Once the download is complete, you can move on to the next step.
Step 2: Extract and install the UWD.zip file
Once you download the file, the next step is to extract the file and install it.
- Go to the Downloads folder to find your downloaded file.
- Now, right-click on the UWD.zip file and click on Extract All.
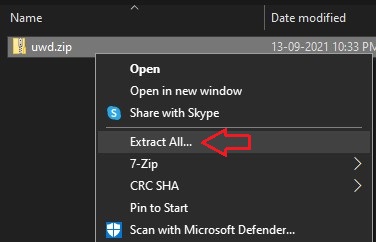
- This should extract the content of the zip folder into the specified folder.
- Once the extraction is complete, double-click on the uwd.exe file that we just extracted.
Also Read
Step 3: Run the file
Once you double-click the file, you will be presented with a small pop-up. In the pop-up, click on the install button and wait for the installation to complete.
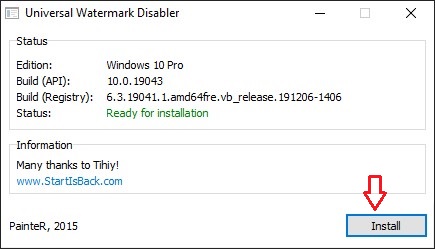
Note: Your screen will go full-blank with a flashy white color. This means the tool has been installed. You do not have to panic or worry while this step happens.
Also Read
Step 4: Logout and Log back in
The final step in removing the watermark is to log out and log back into Windows. Once you log out and log back in, you will find that the watermark is no longer visible at the right corner of your screen. Enjoy using your installation without any annoying watermarks.
Restore the Watermark
If you want to get those watermarks for some reason, don’t worry. You can do it easily.
- Go back to the downloads folder and double-click on the uwd.exe file.
- Now from the pop up click on Uninstall button.
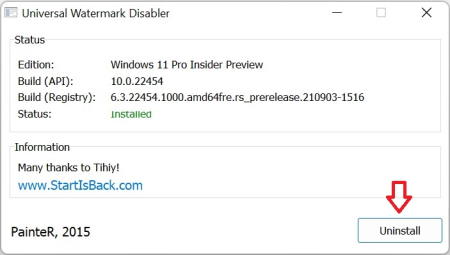
- Similarly, wait for the Uninstallation to complete.
- The screen will go blank and full white once again.
Once the uninstallation is complete, log out and log back in as you did previously. Once you log back in, you should be able to see the watermark visible on the right side corner of the screen.
Conclusion
As you can see, removing the “Evaluation copy” watermark from your system is very easy using the Universal Watermark Disabler tool. Similarly, restoring the watermark is also very easy. It is good that the tool is freeware and easily available for all people to give it a try. However, I would have preferred if Windows included a setting to disable the watermark straight from the setting menu or at least use some commands. But for now, this tool method seems much easier.
