Compared to the older versions, Windows 11 is here offering an improved user experience. With all the features and enhancements, this new Operating System is here to rule for future years. Windows 11 allows its users to optimize the use of hardware devices, such as printers or scanners. However, it was not long back when some Windows 11 users reportedly claimed that their printer was not working after the update.
Also Read
Fix Windows 11 Random Shutdown Issue
Fix: Windows 11 Clipboard History Not Working
Fix: Miracast Not Working on Windows 11 and 10
Download and Install Epson L3150 Driver in Windows 11 and 10
How To Fix External Hard Drive I/O Device Error in Windows 11/10
How to Fix if 4K Videos Not Playing on Windows 11
Fix: Windows 11 Taskbar Not Hiding in Full Screen
How to fix Ricoh Printer Red Light Error?
TranslucentTB Windows 11 Not Working, How to Fix?
Fix: Mouse Scroll Wheel Jumps Up and Down on Windows 10, 11

Page Contents
After Windows 11 Update, Printer Spooler Errors: How to Fix?
As per the suffered users, since they installed the update, their printer is showing errors every time they try to print something. In some other cases, either their Windows 11 is not recognizing the printer. Or there are also complaints that the printer is not working at all. So, today in this article, we will resolve all the stated printer issues with some easy and quick fixes. For more information, keep reading.
Also Read
FIX 1: Check for Windows updates
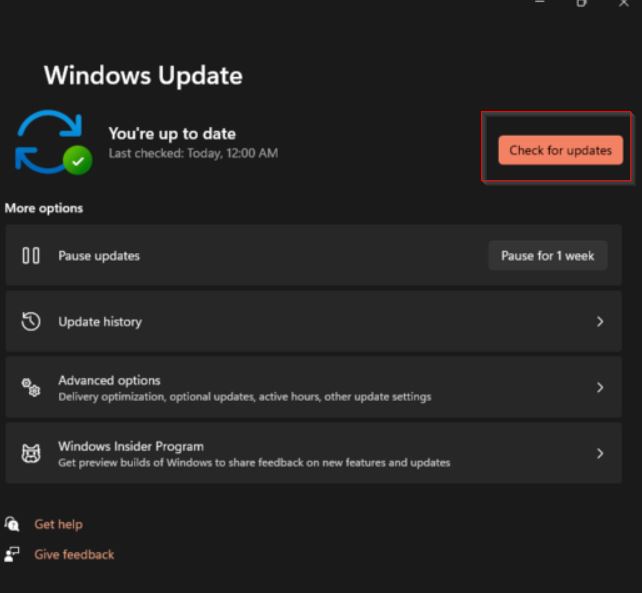
If your Windows 11 printer is not working after an update, a new Windows update might help you. Check whether one such is available and if yes, install it right away. For doing so, follow the steps given below:
- Firstly, press Windows + I and launch the Settings App. Now navigate to Windows Update and then click on the Check for Updates tab.

- If there is any new update available, your System will automatically download it. The process, though, will take longer than usual.
Also Read
FIX 2: Run the Printer troubleshooter
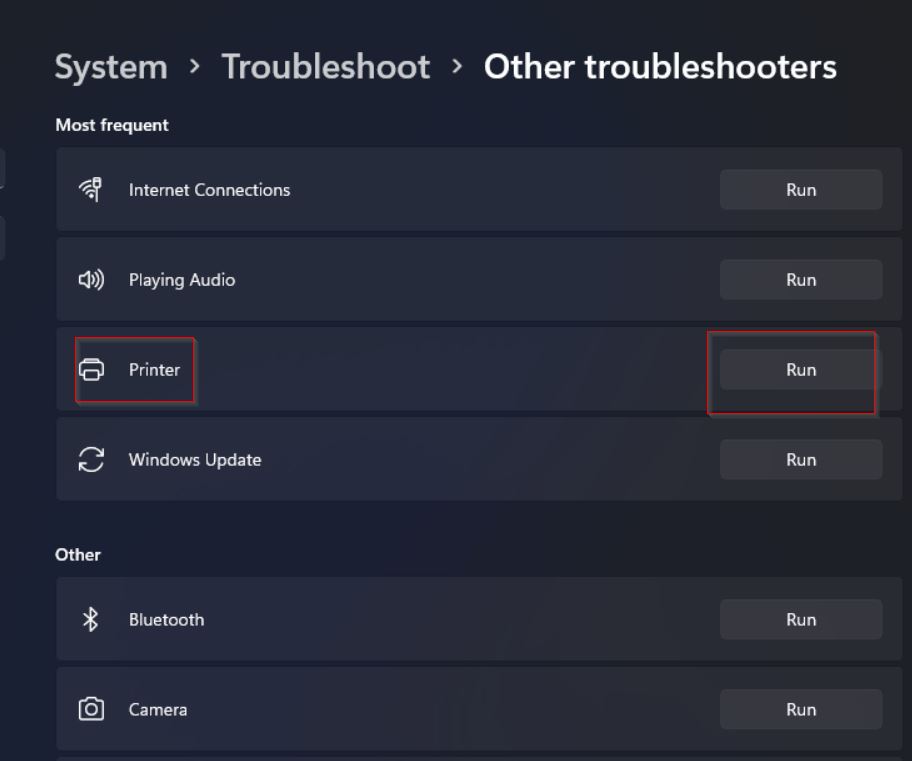
Just like Windows 10, the newest Microsoft Operating System comes with a built-in troubleshooting utility. This utility helps to resolve basic errors and glitches. Here while your printer is not working after an update, run the Printer troubleshooter and check whether it helps or not. For doing so, follow the steps given below:
- Firstly, press Windows + I and launch the Settings App.
- Now navigate to System (from the left-pane menu) and then click on Troubleshoot (from the right-pane menu).
- Further click on Other troubleshooters, and then from the list of options, look for Printer.

- Click on the Run tab associated with the option Printer, and it will run the troubleshooters.
Updating the Printer (Related) drivers helped users while they were facing issues with their printer on Windows 11. You can also try the same method by following the fixes given below:
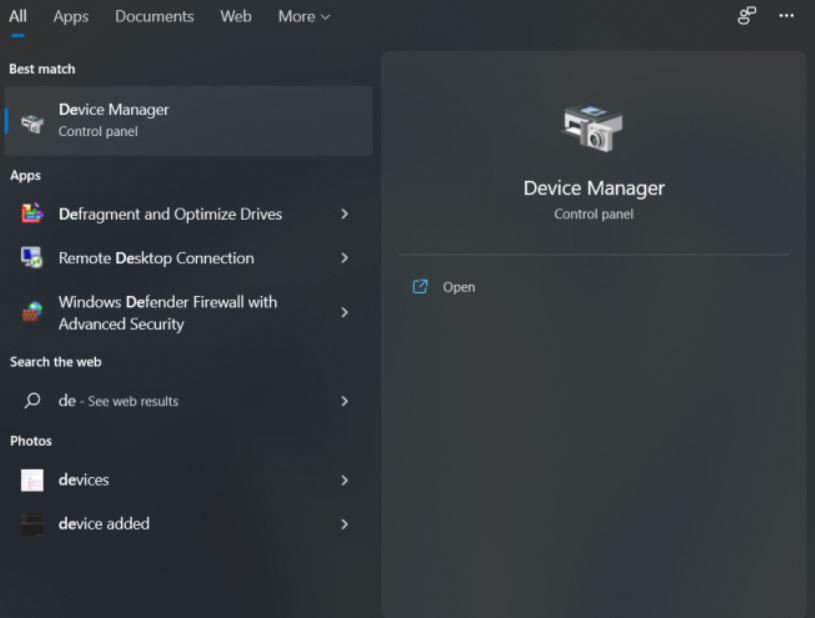
- Firstly, go to the Desktop search bar, type Device Manager, and launch the relevant search result.

- Now inside the Device Manager window, expand the Print queues section, locate the needed driver, right-click on it and then select the option Update Driver.
- On the next prompt, click on Search automatically for drivers and let it process on its own.
If updating the drivers did not help you, then you can also try to uninstall and reinstall the drivers and check whether it helps or not. For doing so, follow the steps given below:
- Firstly, go to the Desktop search bar, type Device Manager, and launch the relevant search result.
- Now inside the Device Manager window, expand the Print queues section, then select and right-click on the needed driver, and then select the option Uninstall Device.
- On the next confirmation window, click on the Uninstall tab.
- For reinstalling the driver, open the web browser and locate your printer manufacturer’s download centre.
- Now navigate to the driver download page and then type the exact model of your device.
- Once you find the relevant driver, download it by following the on-screen instructions.
Also Read
FIX 5: Disable the firewall
At last, if none of those mentioned above fixes works for you, then disable the firewall. It may happen that your firewall is set too secure to prevent the printer from communicating smoothly. Thus to mark out this possibility, disabling the firewall is one effective solution. For doing so, follow the steps given below:
- Firstly, go to the Desktop search bar, type Windows Defender Firewall, and launch the relevant search options.
- Now inside the Windows Defender Firewall screen, click on Turn Windows Defender Firewall on or off (on the left-pane menu).
- Further, select the option Turn off Windows Defender Firewall for both the Private network setting and Public network setting.
- Lastly, press OK, and you are done.
These were the top 5 fixes for resolving the “Windows 11 printer not working after update” issue. Currently, Windows 11 is still in development. Therefore, some drivers are not compatible with the OS. So, you have to wait a little longer for new improvements.
At the end of this article, we hope that all the information mentioned here will prove helpful and relevant to you. If you have any queries or feedback, please leave a comment in the below comment box.
