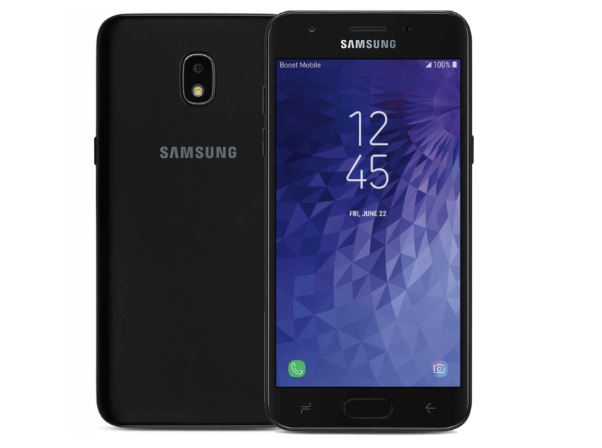
Good News for all Samsung Galaxy J3 Achieve (SM-J337P/j3topeltespr) users. Now you can install Custom Recovery TWRP Recovery On Galaxy J3 Achieve. Today we will guide on How to Root and Install TWRP Recovery On Galaxy J3 Achieve. TWRP Recovery is a Custom Recovery which is also known as TeamWin Recovery built with a touchscreen-enabled interface which allows users to install third-party firmware and backup the current system, which are often unsupported by stock recovery images.
If you want to unleash the full power of Android Modding, then flashing TWRP Recovery is the first priority to get all modding ability on your Galaxy J3 Achieve. If you have a TWRP on Galaxy J3 Achieve, you can always try Custom ROM, Kernel, Xposed, Rooting, Mods, etc in few simple steps.
In this guide, you can download and install the TWRP Recovery On Galaxy J3 Achieve. This is not an official TWRP Recovery for Galaxy J3 Achieve. Download now and enjoy Custom Recovery on Galaxy J3 Achieve. The TWRP Recovery comes with 3.1.0 version which has a Material Design, Touch Screen Support, and Encryption mode.
Rooting Procedure is followed only after installing the TWRP Recovery on your Phone. If want to try only Rooting procedure, we recommend to follow How to Root any Android Phone without PC.

Page Contents
How To Root And Install TWRP Recovery On Galaxy J3 Achieve
This is a guide to Install latest TWRP for Galaxy J3 Achieve. Download the Install TWRP Recovery on Galaxy J3 Achieve today and Read the steps below. This is not an official TWRP Recovery for Galaxy J3 Achieve from TWRP Team. If you install any Custom Recovery on Galaxy J3 Achieve, you can install Custom ROM, Custom Mods, Custom Kernels or any zip file such as Xposed. Read the guide carefully on How to Root and Install TWRP Recovery on Galaxy J3 Achieve.
Before doing the methods, I just want to warn you that, By doing this you will loose the warranty and sometime if you don’t read the steps and do something wrong can brick your device. That won’t happen though you follow our step by step guide carefully.
To install TWRP Recovery or any Custom Recovery on Galaxy J3 Achieve, you must have a Unlocked Bootloader. If your phone doesn’t have a Unlocked Bootloader, first of all you should go and unlock the bootloader of your phone. Only after doing so you can safely apply everything that’s detailed in this tutorial.
Also Read:
- TeamWin rolled new updated TWRP v3.1.0 with ADB Backup Support
- TWRP 3.2.0 Recovery Released for all Android devices. How to download and Install the same
Advantage of TWRP Recovery
- You can flash Custom ROM with TWRP Recovery
- You can flash modding zip files to customize your phone
- Easy to use Xposed Modules’
- Easy to Root and Unroot using TWRP Recovery flashable zip SuperSU
- You can always take FULL NANDROID Backup in case of any modding or flashing.
- Easy access to restore the Nandroid Backup.
- You can flash the image file using TWRP Recovery.
- Can remove all bloatware using TWRP Recovery.
- To underclock and overclock.
- You can clean Wipe, Cache, and Data.
CHECK POPULAR POST
- Official and Unofficial Lineage OS 14.1 Device List and Download Link
- List Of Devices Getting Lineage OS 15.0 (Android 8.0 Oreo)
- Android Oreo is Here: List Of Official Supported Device
- List of MIUI 9 Supported Devices – Official and Unofficial
- List of All AOSP Android 8.0 Oreo Supported Device
- Resurrection Remix Oreo Release Date: List of Supported device
PREREQUISITE
- To flash a Custom Recovery, You need a Laptop or PC
- You need to Unlocked Bootloader on Galaxy J3 Achieve
- Download latest Samsung USB Drivers
- Charge your phone to at least 70%
- Take a full Backup your device just in case if you need it later
- Download SuperSU.zip for root and Move it to internal memory on your phone
- First Download and Install the Samsung Kies Software : CLICK HERE
- Install the Samsung USB Drivers : CLICK HERE
- Download and Extract the ODIN ZIP file on Desktop : CLICK HERE
Download Files
How to Flash TWRP on Samsung Device
Hopefully, you have understood on How to Root and Install TWRP Recovery for Galaxy J3 Achieve, If yes then please give the star rating. If not leave a message, We will help you.
Credit goes to: gaybreh

After flashing the recovery using the tar I still have the stock recovery on my phone. The hashes matched from the regular img file and the image file in the tar. Is it the stock recovery image?
After flashing the recovery, first, you need to boot into recovery. That is after flashing, when the device reboots hold Power Key, Volume+ and Home