Bots are the components based on artificial intelligence that can execute various tasks on their own. If you use Discord, then you must be familiar with the concept of bots. While human setups a Discord server, bots help in delivering notification, banning offenders, moderating the chats, etc. But how does one control these bots.? Well, for that you need to create the Discord Bot Token. In this guide, I have explained how you can generate them and use them.
Bots use these tokens to issue commands to the API of the application. To create a bot token in Discord you have to use the developer portal of the app. The process is quite simple. You have to create a bot, give it an identification, and then assign it to your server. I have explained all the steps in this. Let’s get into the details.
Also Read
Also Read: How to Fix If You Can’t Hear Anyone on Discord
Create a Discord Bot Token
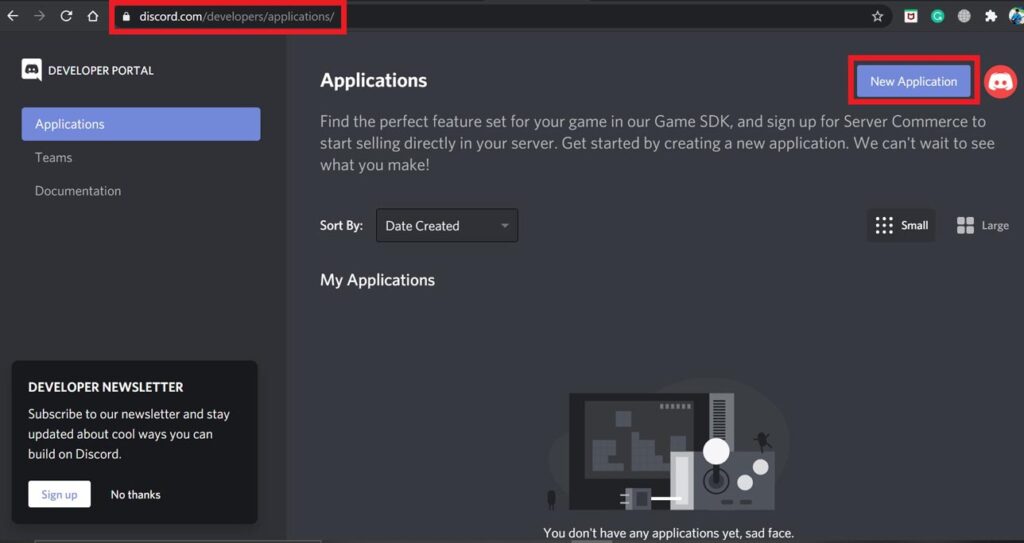
- Start by going to the Discord Developer Portal [https://discordapp.com/developers/applications]
- Login to your account
- Then click New Application as you will create a new bot token
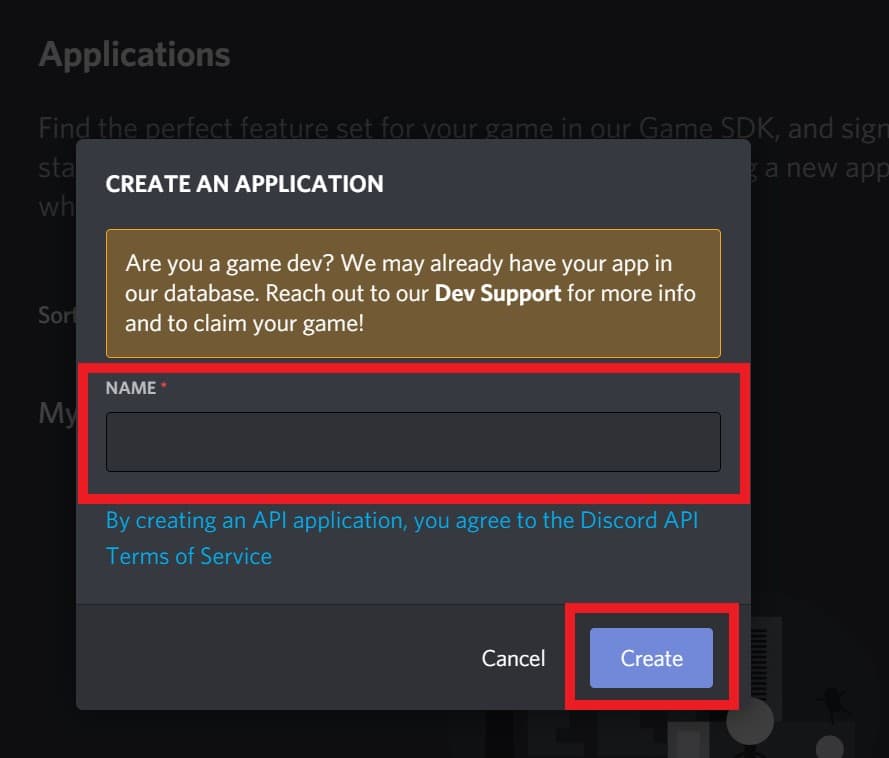
- Next, you have to give a name to the bot and click Create
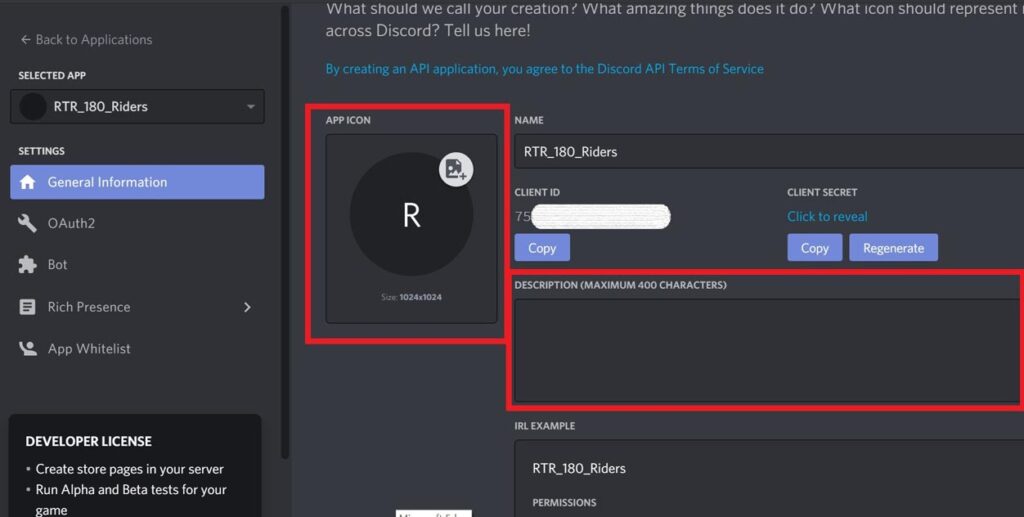
- In this step, you have to add an icon/avatar for your bot
- You also have to describe your bot within a minimum of 400 characters.
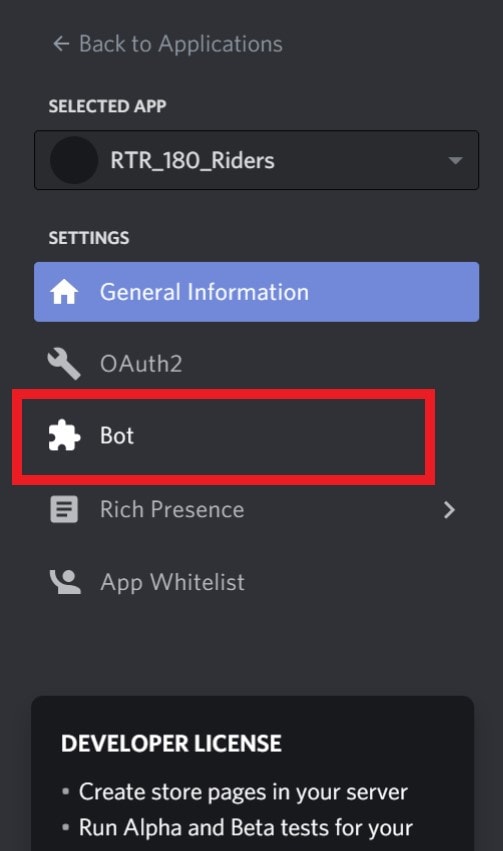
- Once done, go to the left-hand side panel of the dashboard. Click on Bot
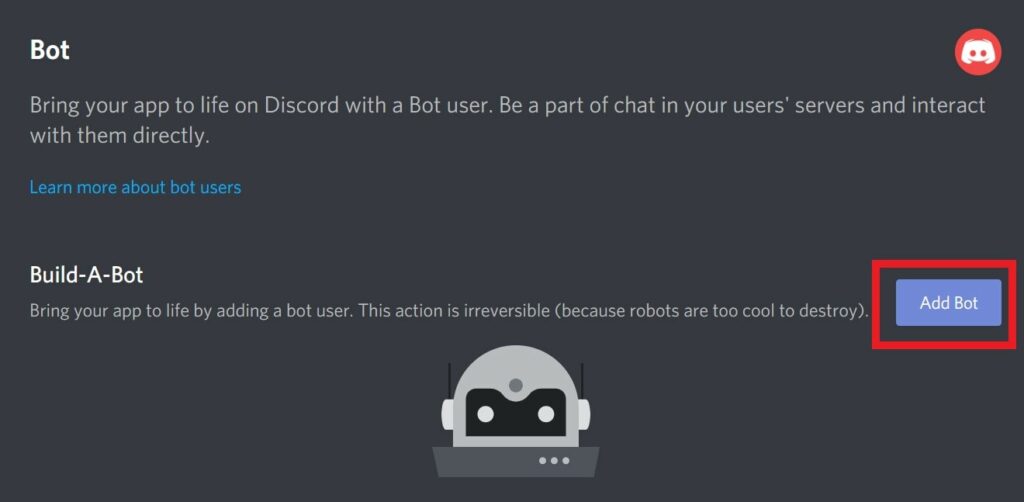
- Then in the next screen click Add Bot.
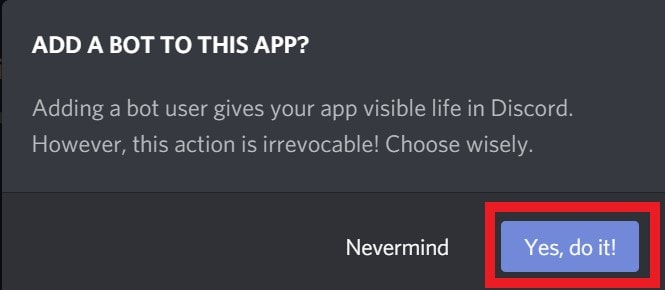
- Confirm the action on the pop-up dialog box by clicking Yes, Do it.
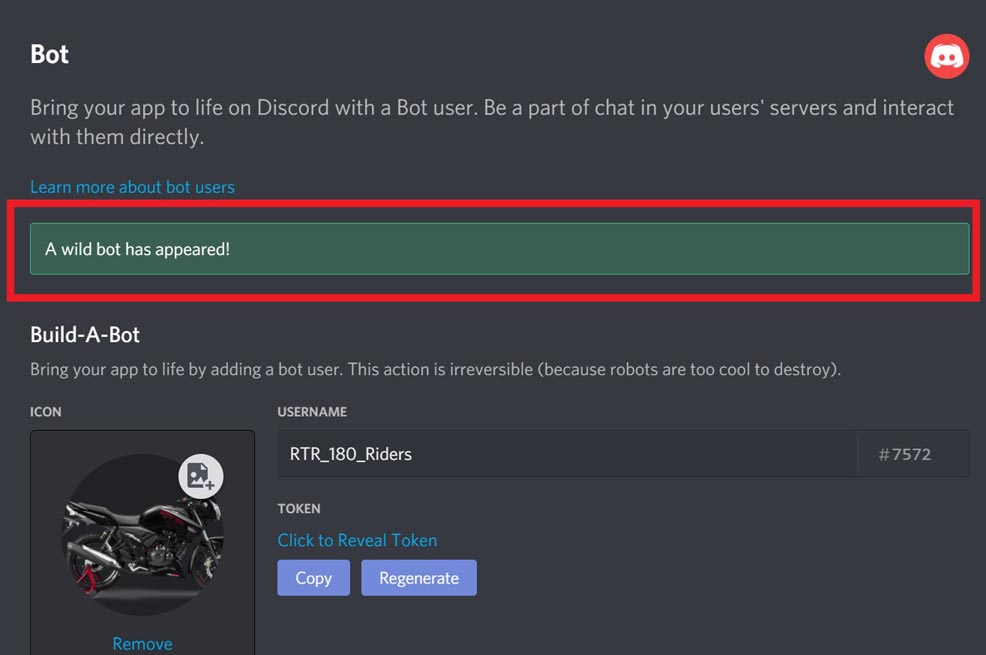
- Now, you will see a message appears that says “A Wild Bot Has Appeared”
Guide | How to Change the Game Status on Discord
Authorize Permission and Add Bot to the Server
Now, that we finished creating a bot, it’s time to add it to our server.
Warning
- On the left-hand panel, click on 0Auth2
- You will see on the right-hand the URL generator tab shows up
- Click the checkbox beside Bot.
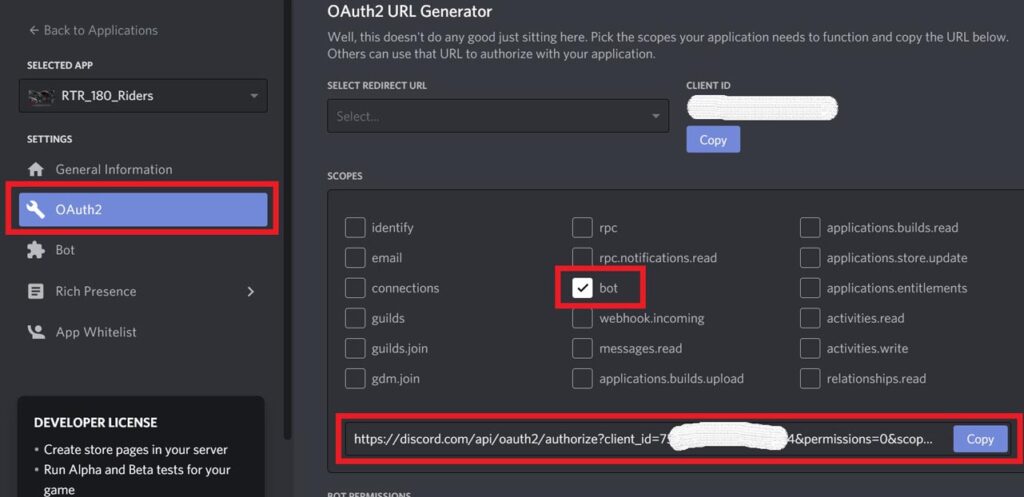
- You will see a URL will generate in the space below.
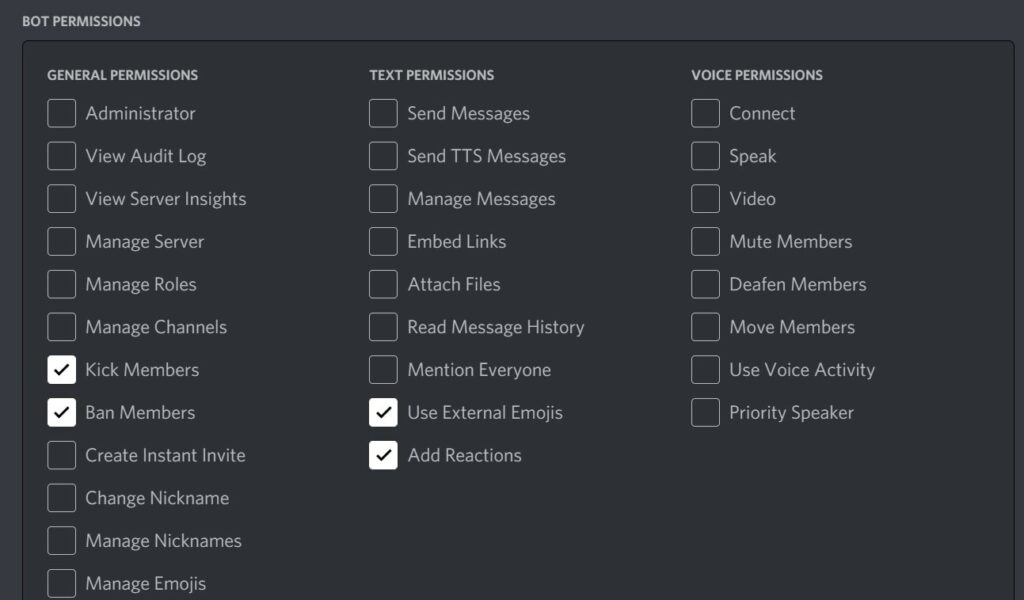
- Now, move to the Bot Permission tab.
- This will empower the bot to execute several or selected tasks. As per your need click on any checkbox to assign that particular permission to the bot.
- Now click Copy on the URL that was generated a few steps before
- Then paste that URL in your browser address bar and hit Enter
- Now you have to add the bot to your existing server.
- Select the server(you must have created it before when you joined discord)
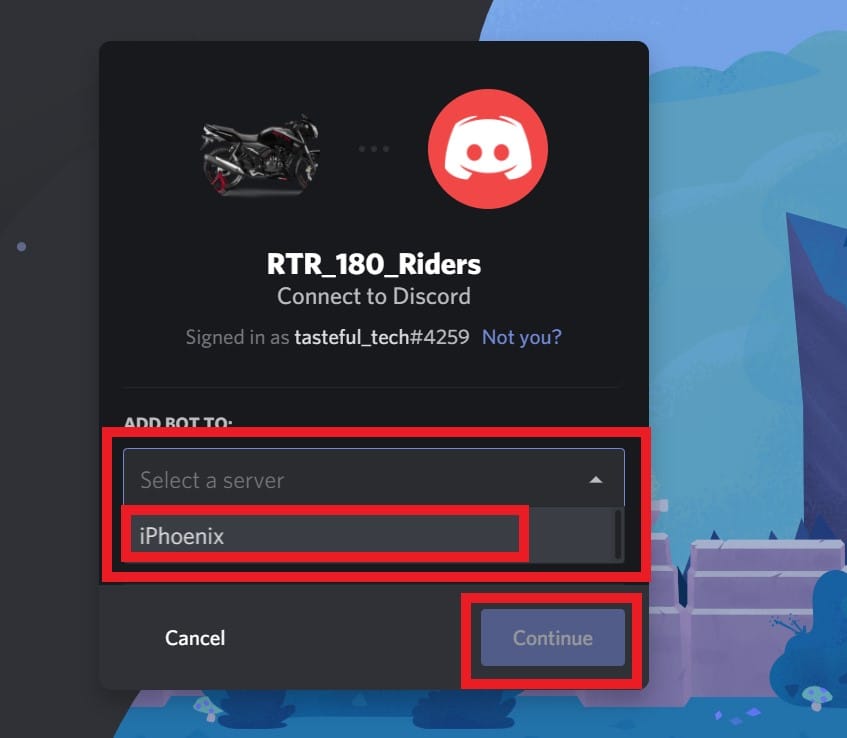
- Then click Continue
- Next, you have to make sure to check once again all the permissions that you have given for the bot.
- Then click Authorize > confirm you are not a robot by clicking the checkbox for the Captcha.
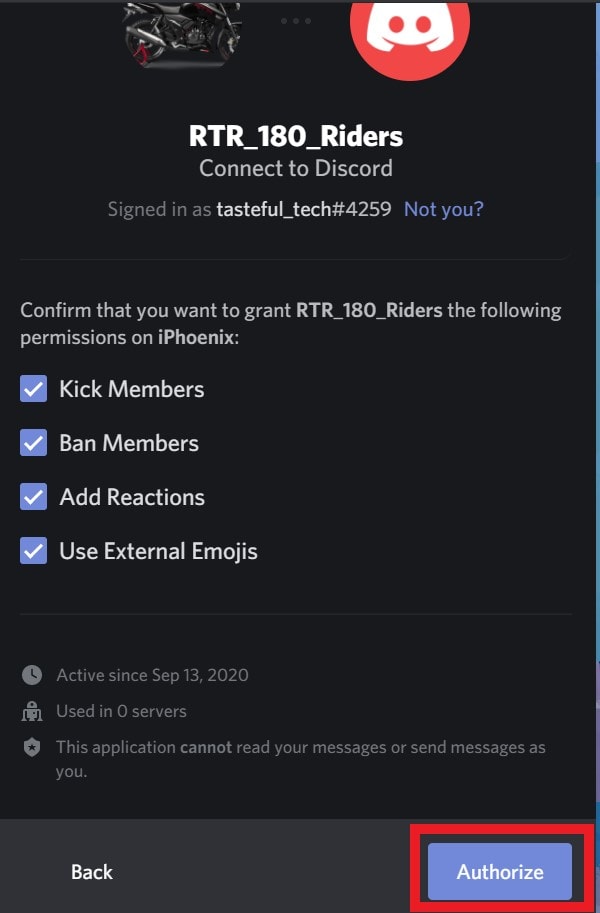
- You will see a message that the bot has now been authorized.
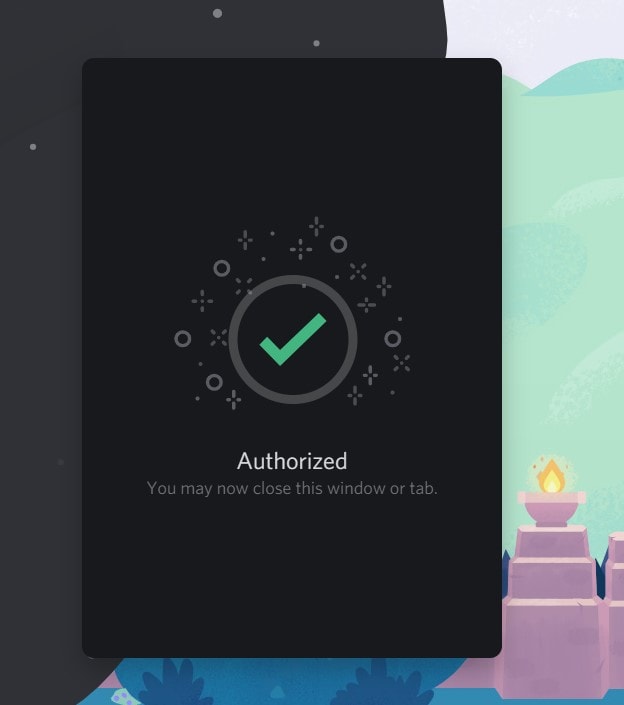
That’s it. Now, Your Discord bot token is ready and it has been assigned to your server. I hope that everyone with a server can now create a bot and assign them various tasks. Try it out and have fun.
Also Read
How to Share Your Screen on Discord Desktop and Mobile
How to Fix a Discord API Error?
How To Fix Discord Stuck in Fullscreen
Fix: Discord Not Working with CSGO
Best Discord Plugins For BetterDiscord 2022
Best Discord Name Idea (2022) |Good, Funny, Weird Nicknames for Discord
How to Fix If the Xbox Discord Transfer Didn’t Work Problem
Fix: Discord Yellow Border When Streaming or Screen Sharing
How To Install Discord on Steam Deck
Free Discord Nitro codes (Daily Updated 100% Working)
How To Connect Discord To A Twitch Stream
