In this tutorial, we will show you how to integrate Twitch with Discord. When it comes to the live-stream platform for gamers, Twitch might be the first name that comes to your mind. Along the same lines, if we talk about a VoIP and instant messaging service that supports voice, video, and text conversations in private or on servers, Discord is the go-to choice. All in all, these two services remain on top of the priority list for near about every gamer, whether he is a subscriber or a host.
Also Read
Fix: Twitch Not Working or Crashing on Xbox One, Xbox Series S|X
How to Fix a Discord API Error?
How To Fix Discord Stuck in Fullscreen
How To Check Twitch Chat Logs | 2022 Guide
Fix: Discord Not Working with CSGO
Fix: Twitch Login Error “Something went wrong”
Best Discord Plugins For BetterDiscord 2022
Best Discord Name Idea (2022) |Good, Funny, Weird Nicknames for Discord
How to Fix If the Xbox Discord Transfer Didn’t Work Problem
Fix: Twitch Link Removed from Steam Profile
But what if you could use both of them under a single roof. Yes, that is very much possible. Discord provides the option to integrate your Twitch account into its service. This way you could manage your subscribers, assign them a role and the viewers could directly get hold of all their subscribers right from Discord itself. Here are all the instructions steps pertaining to the aforementioned features. Follow along.
How to Integrate Twitch with Discord
Both the subscribers as well as viewers are an integral part of this live-streaming giant. However, integration is a little bit different for these roles. As a result, we have segregated the instructions into two separate sets. First off, we will list out the steps for the subscribers which would then be followed by the instructions for the viewing members, to integrate their Twitch account with Discord.
Also Read
Fix: Discord Stuck On Loading Screen
How to Fix Twitch Stream Lagging Issue
Fix: Discord Yellow Border When Streaming or Screen Sharing
How to Fix If Your Twitch Emotes not Showing
How To Install Discord on Steam Deck
How to Fix Hogwarts Legacy Twitch Drops Not Working
Free Discord Nitro codes (Daily Updated 100% Working)
Two Factor Authentication Twitch Not Working, How to Fix?
How To Connect Discord To A Twitch Stream
Fix: Discord Custom Emojis Not Working or Disappearing
How to Fix Discord AMOLED Mode Not Working
For Subscribers
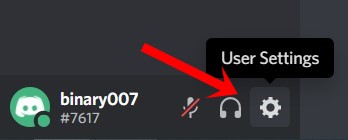
- Launch Discord and sign in with your credentials. Click on the User Settings option situated at the bottom left.
- Then head over to the Connection tab from the left menu bar. Select Twitch from the list and then sign with your ID and password.
- Once that is done, you will have to set up a server and then sync it with your Twitch account.
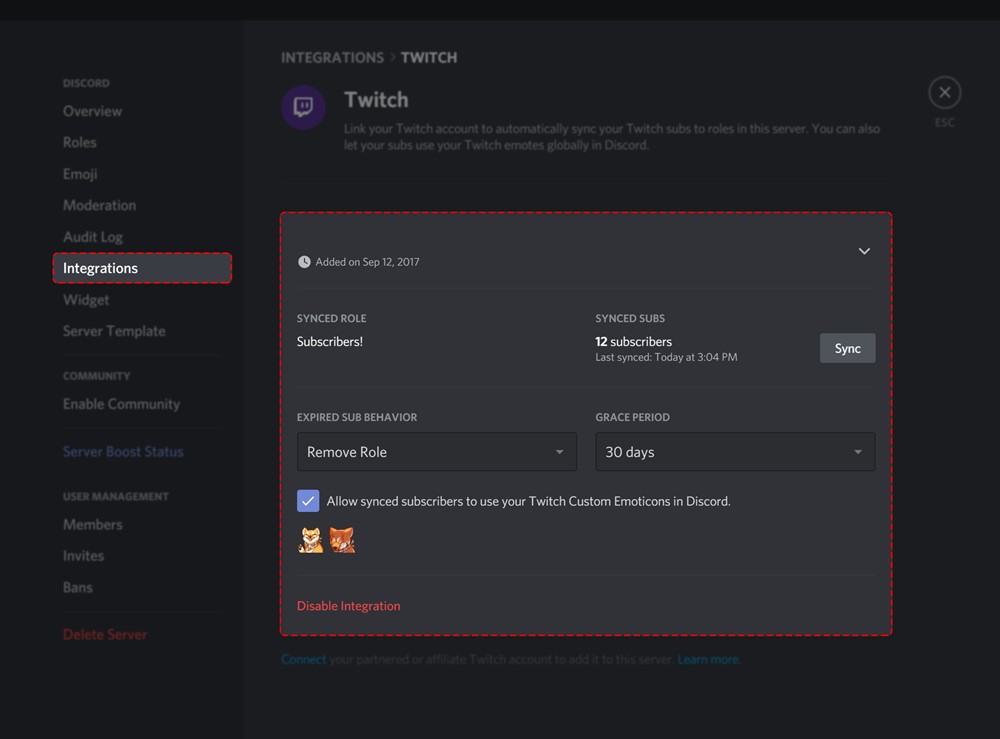
- For that, go to Server Settings > Integrations and select Twitch. As soon as that is done, a new permission role will automatically be created for the Subscribers.
- You could carry out further modifications such as re-naming these roles or adjusting their permissions. All this could be done right from the Server Settings > Roles section.
That’s it. These were the steps to integrate Twitch with Discord for subscribers. Let’s now turn our attention towards the viewers.
Also Read
For Viewers
- Open Discord and sign with your User ID and Password.
- Click on the Settings gear icon right next to your name at the bottom.
- Now go to the Connections menu from the left-hand side.
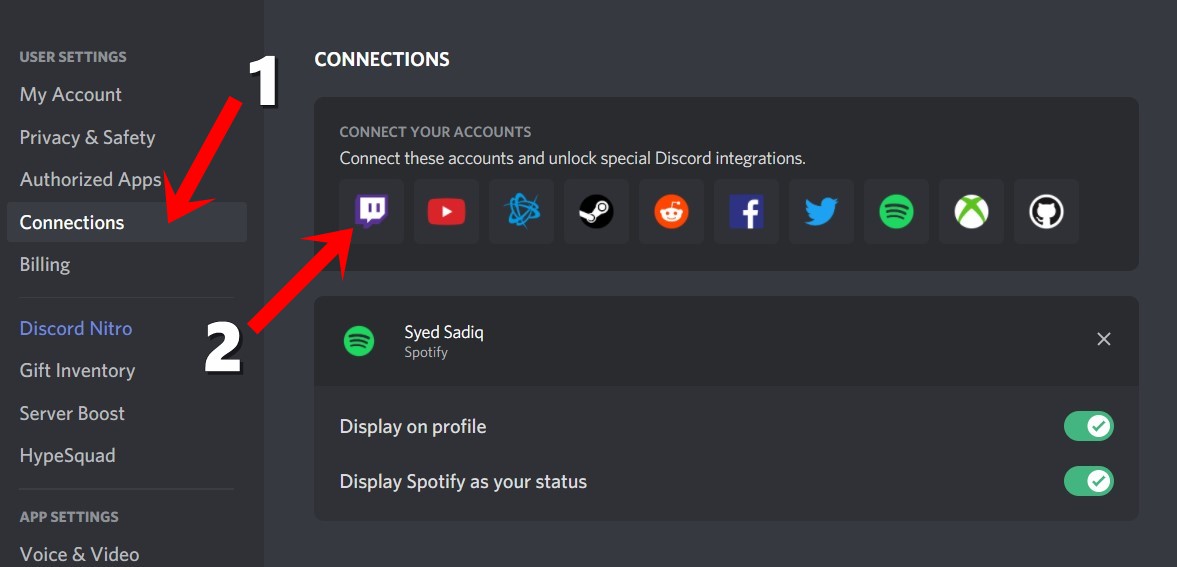
- Select Twitch from the list of available apps. This will bring up the Sign In window, enter your credentials to proceed ahead.
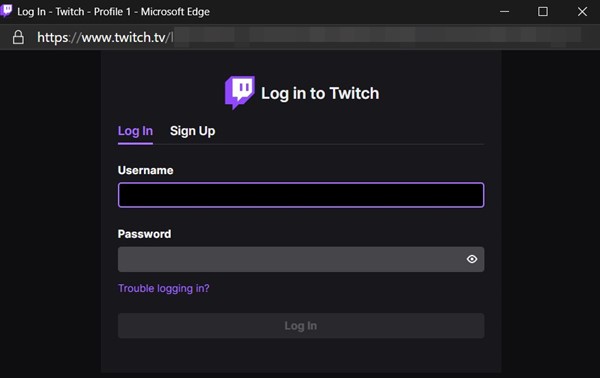
- Once that is done, Discord will be synced with your Twitch Account. Likewise, you could also get hold of all the streamers you are currently subscribed to from the Connections tab itself.
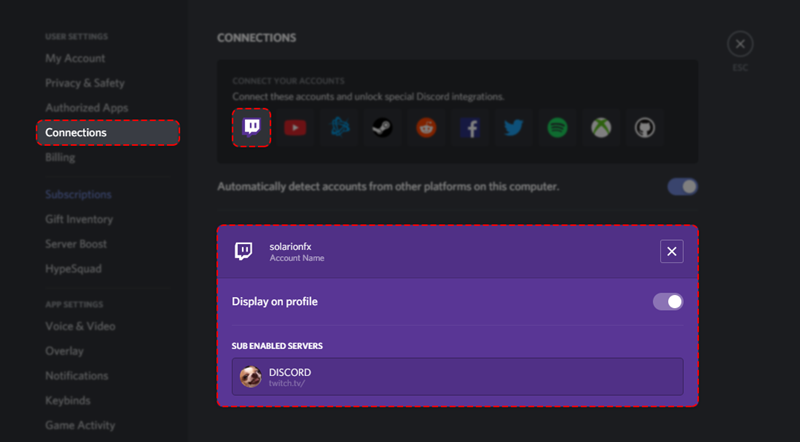
- All you have to do is hit the Join Server button and you will be assigned the sub role. That’s it.
These were the steps to integrate Twitch with Discord. We have listed out the instructions for both the subscribers as well as viewers. If you still have any queries, let us know in the comments section below. On that note, here are some iPhone Tips and Tricks, PC tips and tricks, and Android Tips and Trick that you should check out as well.
